November 30, 2006
I'm turning into a Loaf of Bread, or 6 of them.
Are you tired of me talking about bread yet? Tough, here’s another post. This one extends slightly beyond bread to the wonderfully festive “Parent-Teacher Interview Night.” What could be more festive than that? Smiley, happy faces all around. Maybe not. It’s hard for parents to hear that their darling angels are brats. To at least make this night more bearable, (there’s no reason everyone should suffer) some schools provide dinner for their teachers. In this case, I’ve been asked to prepare dinner for the teachers of two local schools. The principals of these schools left it up to me to decide what they were having and since this would be a substantially larger group than I usually cook for, I decided they were all getting the same thing: Roasted Butternut Squash Soup, Broccoli Salad, Baked Ham, Homemade Bread and for dessert Roxanne’s Millionaire Shortbread Bars, Baklava Muffins, (both Nigella recipes) and Lemon Bars. My kitchen is a mess.
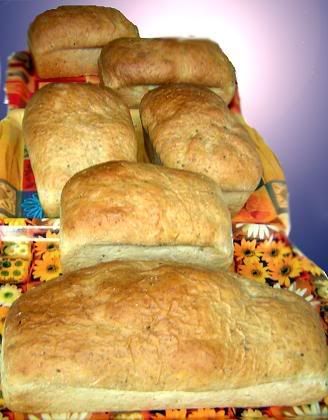
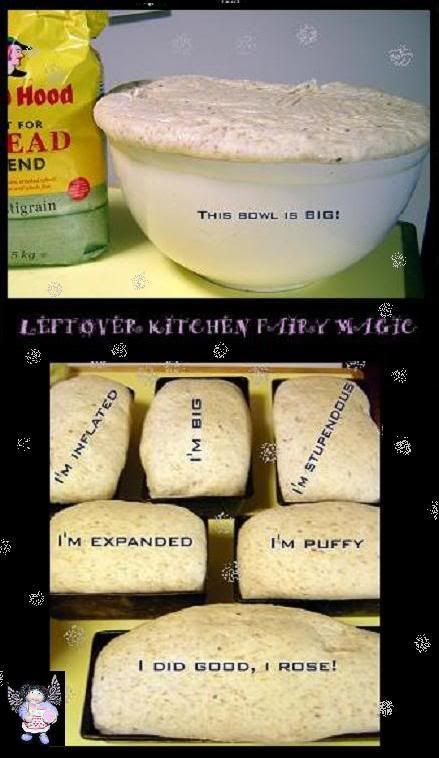
I’m just going to focus on the bread for now. A while back I made Mom’s bread and was so happy that I actually succeeded in making bread… with a little help from the Kitchen Fairy. I posted the recipe that went along with it, but what I didn’t post was the fact that I scaled it down to 1/6th of its actual size. According to Mom, she used to make a batch of this bread once a week. Of course this was before my time, I never received such treatment. A loaf here or there maybe, but the weeks of 6 loaves were only for my brother and sister. Well it’s back! I had to do it myself, but I made 6 loaves last night. And developed some more respect for Mom. Do you have any idea what it takes to knead 20 cups of flour? This wasn’t just bread, it had a life of its own. I think I heard a heartbeat. I made some changes to the recipe this time too. I was asking Mom about the recipe and she basically said that you could put anything at all into this bread. She claims to have but all sorts of leftovers into the bread, apparently tomato soup gives it a nice pinky colour… I wasn’t that adventurous. I’m still shocked every time my bread turns out so I tried not to deviate too far from the recipe.
Mom’s Bread with Bri’s Adaptations
In a pan heat: 2 c buttermilk, 4 c water, 6 tbsp butter, 6 tsp salt, 1 c sugar, cool to lukewarm.
In a bowl put 2 c lukewarm water. Stir in 3 tsp sugar. Sprinkle on 3 tbsp (or 3 envelopes) yeast. Let stand 10min.
Into a very large bowl, pour 1st mixture and mix in 6 c multigrain bread flour. Mix in 2nd mixture. Mix in 2 more c multigrain bread flour and 2 c all purpose flour. Gradually add approx. 10 c white flour at first stirring in with a wooden spoon and then kneading by hand. Knead at least 15min (I kneaded about 22min, and was actually sweating at the end of it… too much information) or until dough is soft and elastic and hands come clean.
Set to rise in a greased bowl covered in a warm place until doubled in bulk. Punch down and knead for a few minutes. Divide into 6 balls for loaf pans. Let stand 10min.
Grease 6 loaf pans.
Place the balls of dough into the pans.
Cover and set to rise in a warm place until doubled in bulk.
Bake at 375°F for 10min and then at 350°F for 25min, (my oven sucks and I did this in 2 batches).
Remove from pans, butter tops, let cool.
If I can repeatedly make this bread successfully, so can you. Seriously. Go make bread, it’s festive.
Speaking of festive, Anna over at Morsels and Musings is hosting a Festive Food Fair and this is my contribution of festive food. Parent-teacher interview night is certainly a festivity and every festivity needs bread. Put one and one together and you get two, (some of those bratty kids may think otherwise, but it is indeed two).
I promise, no more bread… for at least a week.
Technorati Tags:
Bread + Blogging Event + Recipe + Festive Food Fair
November 29, 2006
What Santa Really Wants

Forget milk and cookies, if you really want Santa to be good to you, leave him one of these- a Coffee-Chocolate drink spiked with a generous shot of Baileys. The more generous you are with the Baileys, the more generous Santa will be with you. If you really want to suck up, you'll leave him a Baileys infused truffle or two as well. The particular recipe for this drink came from the 1956 Constance Spry Cookery Book, which is a good read if only for its hilarious suggestions of when you would eat certain foods. Drinks were filled under “Shooting Party”. No, not an alcoholic shooters party, (that’s what I first thought of, maybe that’s just me) but an actual “Bang-bang! Animals die now!” kind of party. I love the 50’s… Since this recipe is so old, it serves as the perfect entry for this month’s Retro Recipe Challenge which has alcohol as its theme. Ok, so maybe the original recipe didn’t have Bailey’s in it, but the Coffee-Chocolate, (they could have come up with a better name) is an excellent wintery drink that is only improved with a good dose of alcohol.
Unfortunately for me, my parents were responsible and never let me have alcohol as a kid, (or coffee for that matter) but I suspect the former would have made for a more festive and friendly Christmas atmosphere between my sister and I. Every year when the Christmas decorations were being spread throughout the house, from out of the boxes would emerge two Santas. Each of us would get one of them to put in our room for the holiday season. The Santas, however, were not created equal. One was cool, the other was not. Guess which one I always got stuck with. I’ll give you a hint- it wasn’t the cool one. Every year I would try to steal the better Santa but my sister always won that battle. Have a look for yourself and see why I was disappointed with the Santa that decorated my room.

My sister hogged the nice Santa, you know, the one that looks normal. As opposed to my Santa, that would be the one with the wonky legs, his belt around his nipples and no hands! What kind of Santa was that??? He doesn’t have hands! He’s like an out of work B-list celebrity Santa impersonator. He probably doesn’t even know the reindeers’ names. Jerk. My pleas to have the real Santa, if only for a couple days, went unheard. No matter what kind of scene I made, my sister always got the better Santa. She was older, she did what she wanted. Clearly, I didn’t stand a chance.

It’s hard to make a cabbage patch doll look sinister. I did my best.
You’ll be happy to know, that the Santa sharing issue isn’t a problem anymore. I’m bigger now, I don’t live with my sister, and I always get the good Santa. He likes me better, I give him Baileys.
Coffee-Chocolate (The Constance Spry Cookery Book, 1956)
Mix 1 pint strong black coffee with 1 pint milk, sweeten and pour from a height into a jug. Keep hot. Melt 2 bars of unsweetened chocolate with 2 tablespoons cold water. Boil 4 cups of milk with 3 tablespoons of sugar, and chocolate and vanilla, and pour from a height into the jug containing the coffee. Beat till frothy, serve with unsweetened whipped cream on top.
**When I made it, I scaled the recipe down to make only one big mug for me. I used Mexican chocolate in place of the unsweetened, and of course, a large dose of Baileys.
Technorati Tags:
Drink + Blogging Event + RRC5 + Chocolate + Recipe + Coffee
November 26, 2006
Stir and Stir and Stir and... Risotto!
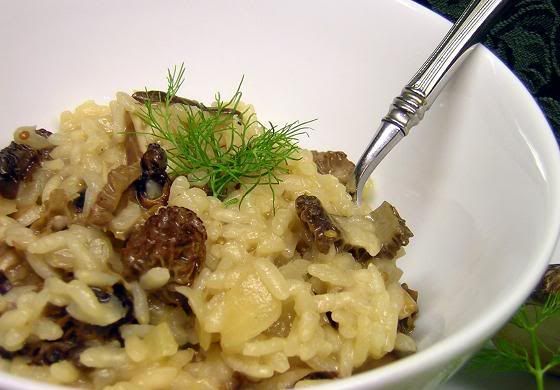
Donna Hay has gone Italian. The theme for Hay Hay It’s Donna Day #8 is risotto and is being hosted by il Cavoletto di Bruxelles. Risotto is relatively new for me, it always seemed like something that was hard to do. I knew it was good, but I thought it was out of my league. Let me set the record straight right now: Risotto is NOT hard to make. True, it takes time, but it’s not difficult. If you can stir, you can make risotto. It’s all about the stirring. Anyways, this is my second blogging event where I’ve made a risotto. The first one was for the “Take Two” round of the Monthly Mingle, hosted by Meeta of What’s For Lunch Honey. I made a butternut squash risotto with zucchini and sage and thoroughly enjoyed it. I previously hadn’t done much cooking with sage, but I really liked it. This post has nothing to do with sage.
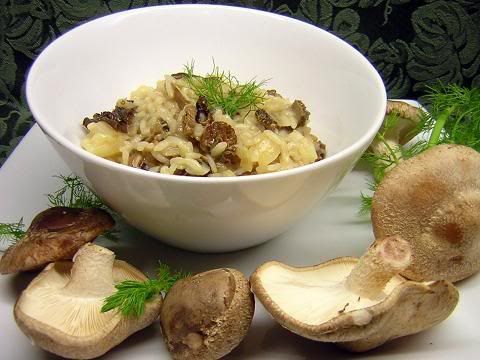
This time around my risotto consists of wild mushrooms and fennel. The reason for that choice was quite simply that I had recently received a very large box of shiitakes from my mushroom growing friend, (to which I added dried morels from my cupboard) and I had a fennel bulb that needed to be used asap. I looked at a few risotto recipes, mainly just because I like looking at cookbooks, but then decided to wing it. For the most part, risottos all have the same base which can then be built upon to create endless variations. I made this recipe up as I went along, and as you’ll see; my instructions for making it are therefore all approximate. If you make a risotto once by the books then you’re all set to do your own thing afterwards. I had originally wanted to do a bunch of risottos and post them all, but then the deadline for HHDD snuck up on me and so this is all you’re getting, (but it's a good one). Expect a dessert risotto from me sometime in the near future.
Wild Mushroom and Fennel Risotto- Courtesy of Me!
A few splashes of olive oil
A chunk of butter
An onion, chopped
1 fennel bulb, chopped
Some fennel seeds and roasted garlic powder
A generous handful of fresh shiitakes, sliced
A smaller handful of dried morels, soaked for ~20min, reserve liquid and slice morels
1 cup white wine, (take a few sips off the top, then pour yourself a real glass)
1 ½ cups Arborio rice
About 4 cups of stock, combination of reserved morel liquid, chicken stock and water
Lots of freshly grated parmesan
• Heat olive oil and butter in a large pan.
• Add onion, fennel, mushrooms, fennel seeds and garlic and stir occasionally until soft.
• Add rice and mix in well.
• When rice is fully coated, add wine and stir until wine is almost completely absorbed.
• Begin adding stock, about ½ cup at a time, allowing each previous ½ cup to absorb before adding the next one. At this point you will almost have to stir continuously.
• When your rice looks slightly creamy but is still a little aldente to the taste, add the parmesan and mix it in.
• Then eat it!
Technorati Tags:
Risotto + Dinner + Recipe + Donna Hay + Blogging Event
November 23, 2006
Cute vs. Big: Round 1
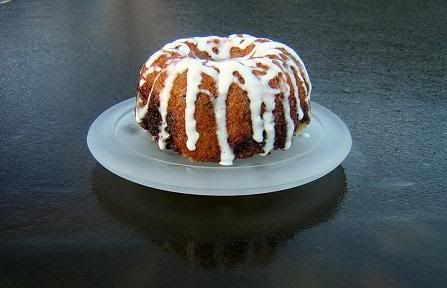
Oooh, look at the little bundt cake. Isn’t it cute? Doesn’t it inspire you to talk in a baby voice… it’s a cutesy wutesy bundtsy wundtsy. NO! No it doesn’t. I hate little things, (little things being cute by definition). But they’re just so easy to love. You can pick them up, swing them around, give them piggy back rides, cuddle them and smother them. These are all things you can’t do with something that’s big. Big things are clumsy and awkward and don’t make people want to say “awwww.” And I want people to love my baked goods so I try to make little things, (this time using my new mini bundt molds), but no matter how hard I try, cute is not something that I can achieve. Maybe I’m harbouring a hate against cute things that extends beyond baking… You see, I’m almost 6’2, (188cm) so I think it’s obvious that I’m never the little one. And I’m going to come right out and say it- I’m jealous of the little girls. They have all the advantages. They can get away with anything they want just because they’re little. And it’s always the little girls that get picked up and swung around and piggy backed. Big girls can’t get away with anything, they can’t hide in little spaces, they can’t wear nice shoes and they have to carry themselves everywhere. Oh, and that’s another thing, just because I said it, doesn’t mean you can; I highly suggest you don’t use the word ‘big’ to describe a tall girl. I don’t care how you meant it, it sounds like you’re calling me fat. Nobody likes that... I seem to be getting sidetracked, (what else is new?) and you’re probably wondering what all of this has to do with today’s baking. Well, the above picture is how my mini bundt cakes were supposed to turn out, little and cute. Instead, they looked like this:
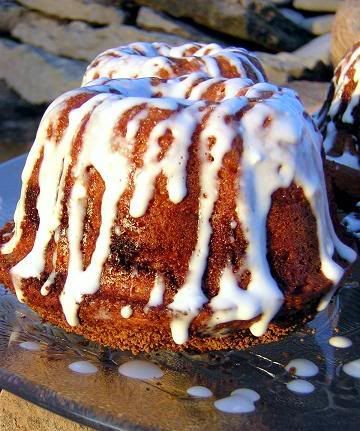
Big and awkward. The first picture is a fraud. I chopped off the bottom of the cake and ate it. The above photo is how my supposed “mini” bundt cakes really turned out. Not so mini after all. The thing is, even as I was pouring the batter into the molds I knew how they would turn out. I was well aware of the fact that I was overfilling them but that didn’t stop me. A smarter person would have filled the bundt pans ¾ full and then poured the extra batter into mini muffin cups, therefore multiplying the cute factor. Not me though. Perhaps I was secretly sabotaging the mini bundts, knowing perfectly well that they would overflow and wouldn’t be cute anymore if I filled the pan all the way to the top. Take that cute! Score one for big!
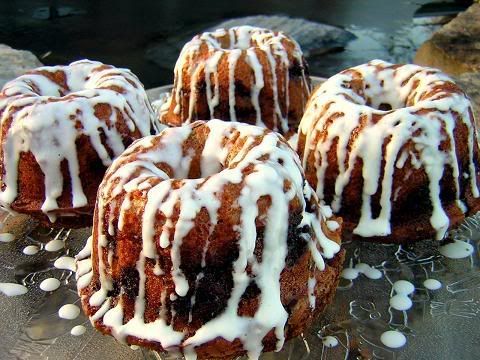
You’re probably thinking “Shut up Brilynn, just tell us about the cake, we don’t care about your big complex.” Fair enough. The cakes are Mini Cinnamon Swirl Chocolate Chip Bundts. I adapted the recipe from All Recipes.com, the original one had an equally long title and was called a Cinnamon Swirl Bundt Coffee Cake. I’ve never had the original, but I can only assume mine is better. Mine has chocolate chips in it.
Bri’s Not So Mini Cinnamon Swirl Chocolate Chip Bundt Cakes
INGREDIENTS
1 ¼ cup sour cream
3/4 cup butter
¾ cup white sugar
¾ cup brown
2 1/2 cups all-purpose flour
1 cup chocolate chips
1 teaspoon baking soda
1 teaspoon baking powder
1 teaspoon vanilla extract
3 eggs
2 tablespoon ground cinnamon
1/2 cup brown sugar
DIRECTIONS
Preheat oven to 400 degrees F (205 degrees C). Grease bundt pans.
Cream sugar and butter together until well blended. Add sour cream and eggs one at a time and beat well. Add flour, baking soda, and baking powder and mix well. Stir in vanilla and the chocolate chips.
Mix the remaining brown sugar with the cinnamon.
Pour some of the batter into the prepared pans. Sprinkle generously with the cinnamon sugar mixture. Cover with cake batter, then more sugar and cinnamon mixture and then top with cake batter.
Bake at 400 degrees F (205 degrees C) for 8 minutes. Lower heat to 350 degrees F (175 degrees C) and bake for an additional 20 minutes.
The verdict? They big and they’re spectacular! (Topped with cream cheese icing).
They may not be cute, but in a fight, we all know big wins every time.

Technorati Tags:
Food + Baking + Cinnamon + Chocolate + Bundt
November 22, 2006
Big Boule Bread: I'm Taking Over the Bread World
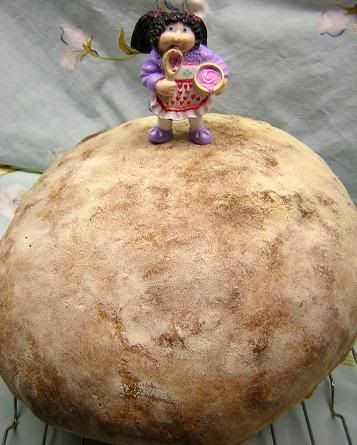
I’m on the biggest bread kick ever lately, spurred on by the fact that my bread is turning out really shockingly well. Previously, my bread has sucked. It’s been short and dense with a soft crust and just generally disappointing. I was ready to give up bread making, hang up my apron and resign myself to the fact that it just wasn't for me. But Joe Pastry promised me that bread making really wasn’t that hard, he gave me some suggestions, I had visit from the Bread Fairy and low and behold I recreated Mom’s bread, and it was good. Then along came the ubiquitous No Knead Bread and it was a huge success. Even with my enormous bread ineptitude, I discovered that it was possible for me to produce a wonderful loaf of bread. The only downside was the length of time it took to produce this bread, almost a full 24 hours. When I want bread I just can’t wait that long. Apparently I’m not the only one. As I was browsing the blogs I saw that Adam, the Amateur Gourmet had received some fancy schmancy cheese and wanted to enjoy it with some nice homemade bread that didn’t require a days worth of waiting. Enter Nigel Slater’s recipe for "A Really Good and Very Easy White Loaf." Best of all it was ready in a fraction of the time required for No Knead Bread. Adam made an enormous loaf of "A Really Good and Very Easy White Loaf" and enjoyed his cheese with it. He then encouraged readers to make this bread and send him pictures of the results which he would post, giving those intrepid bakers instant fame and popularity. I can’t say that didn’t play into my decision to make this bread. Alas, as usual, I was behind on the trend and he’s already posted the round up of people who have made this bread. I’m sure they’re all very famous now and people are showering them with cash. A day late and a dollar short. But I persevered. I tried to forget about the fame in order to focus on the bread.
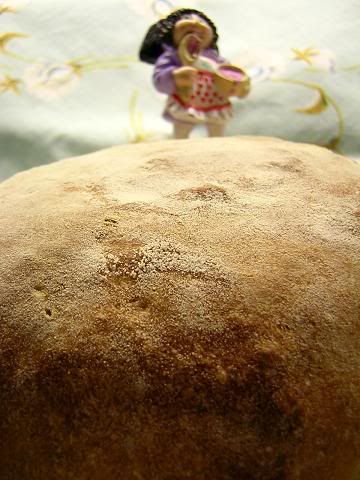
I was rewarded with another absolutely wonderful loaf of bread which I’ve renamed “Big Boule Bread” cause it sounds cool and that’s what it looks like. Watch out people, I’m on my way to dominating the bread world, one loaf at a time.
Technorati Tags:
Food + Bread + Recipe
It’s Like Your Italian Grandmother’s Pizza… But Better.

Yeah that’s right, I said it, but better! I love my homemade pizza. Ok, maybe I don't have an Italian Grandmother to confirm that mine is better than hers but I love my pizza more than any take out. It varies depending on what ingredients I have around, but it’s always real good. It’s better than real good, it’s amazing. I’m bragging, I don’t care, I love my pizza. It’s such a common item that everyone eats but there’s a huge variety in the quality that you can get. Why do people continue to eat bad pizza? If we boycotted it, maybe it would go away. I’m not a fan of cardboard masquerading as pizza. I don’t like plastic pretending to be cheese. Some people think they’re improving things by using a raw buckwheat biscuit like crust. They’re not. I want a yeasted, baked dough for my pizza, thank you very much. It’s so easy to make wonderful pizza and yet people still mess it up.
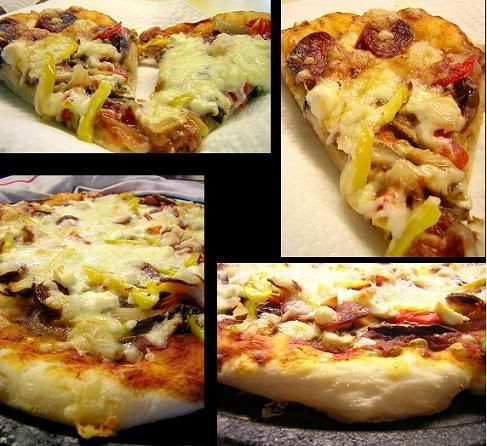
Don’t let anyone try to fool you either, pizza dough isn’t hard to make from scratch. As far as bread goes, it’s as easy as you get. You don’t have to worry about trying to make it rise as high as bread dough and if it’s ugly it doesn’t matter because it gets covered up anyways. Plus, if you make a bunch at once you can store balls of dough in the freezer and you’re all set to go for next time. And how hard is it to cut up some fresh toppings? Chop, chop, done. The lovely pizza you see before you, (yes, pizza is lovely) includes the following tasty toppings: olive tapanade, spicy tomato sauce, caramelized onions, shiitake mushrooms, yellow peppers, sweet and spicy marinated red peppers, chorizo sausage, feta and mozzarella cheese. A-m-a-z-i-n-g.
Technorati Tags:
Food + Pizza + Gourmet
Now That's A Spicy Curry!
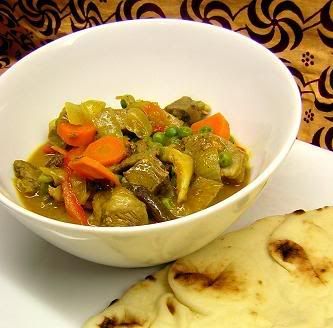
Scott of Real Epicurean made a delicious looking Coriander Naan Bread. I thought that would inspire me to do the same but apparently it just reinforced my desire to make curry and to shamefully eat it with store bought naan bread. In my defense, ever since that No Knead Bread came along, I’ve been pumping out a loaf a day. I don’t know where it all goes, I think I’m eating it in my sleep. But one day, I’ll make the naan to go with my curry. Put it on the list.
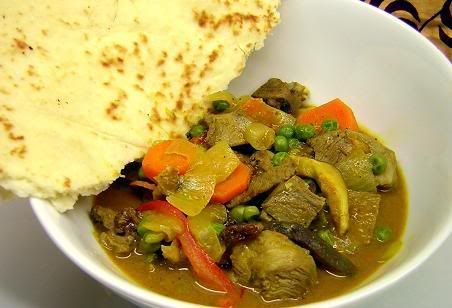
But back to the curry, it was a lamb curry and was my own creation. I basically just threw in whatever I wanted to, including some fresh shiitakes that I got from my mushroom growing friend, onion, peppers, carrots, peas, a forgotten habanero pepper. Mmmm spicy. The lamb was on sale so I had picked up two chops which I then deboned and cubed. I made stock out of the bones and used some of it in the curry sauce along with a lot of curry powder, cumin and curry paste, (I also added some coriander in remembrance of Scott's naan). There was some orange juice in there too… I was just tossing things in, but strangely enough it all worked out really well. Or maybe it was just so spicy that I couldn’t have tasted whether or not it was actually edible. I’m going to believe that it was good, even if I had to mop up the sauce with store bought naan.
Technorati Tags:
Food + Cooking + Curry + Lamb
November 20, 2006
Miracles All Around
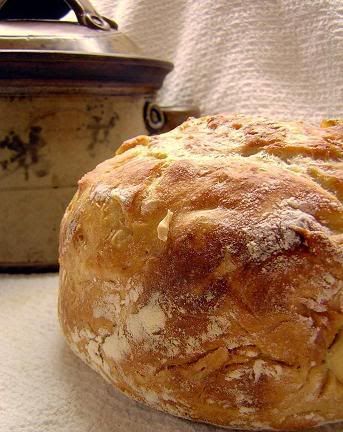
No Knead Bread is taking over the blogs and why should everyone else have all the fun? If bread making could really be this easy, I wanted in on it. Ever since a New York Times article lauded this recipe for No Knead Bread as the new greatest thing, promising a perfect, crisp crust and no kneading, everyone has been trying it. Slashfood provided a list of just a few of the many, many bloggers who have made this bread. I first read about it on Joe Pastry and when he suggested that even I could make this bread turn out well, I moved the recipe to the top of my “to make” pile. And the fact that Joe Pastry finally included some pictures with this post, (which I’m so happy about because I love his blog and would like to see what all of the wonderful things he makes look like) made me even more sure that I needed, (no pun intended) to make this bread.
Much to my surprise, my bread actually turned out like everyone else’s, which is to say very good! The crust was exactly as predicted, crispy and bakery like, and it was really easy to make. The recipe required quite a lot of waiting time, but hardly any actual work. Basically it sits for about 20 hours. It couldn’t be easier. And there’s really no kneading involved, although you couldn’t knead it even if you tried, this dough is extremely sticky. The interesting part is that it’s baked in a preheated crock pot with the lid on. Here’s where I went slightly wrong. I can’t make any recipe without something going wrong, and here’s my warning for this one: Make sure your crock pot doesn’t taper at the top, therefore trapping your bread inside. Yeah… I had to crush one side of the bread in order to extract it from the pot. I suppose most people have a wonderful Le Creuset pot that would work perfectly for this occasion, sadly, I do not. The only other minor complaint I have about this bread is that it could use more flavour, (and I even added a little sugar because I can’t leave well enough alone) but the crust distracts you so that you don’t really notice that lack of flavour immediately. But it’s plain white bread, so how much flavour can you really get? I’m going to experiment with adding some different salts or spices or types of flour to see what happens. The first loaf I made, (I’ve already got a second loaf on the go as the first one was gobbled up in less than 24 hours) prior to putting it in the oven was almost more of a liquid than a dough so I reduced the liquid slightly in the second one and it’s looking much more dough like. The recipe can be found on the Slashfood site, Joe Pastry, or just about every other blog currently in existence. I’m always the last one to know when things are happening.
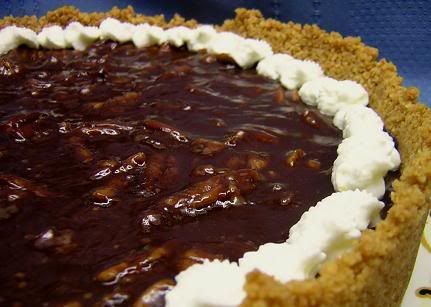
For my second miracle, I present to you another very easy and very good recipe, this time for a Chocolate, Caramel and Pecan Pie. At the beginning of October I attempted to make a Chocolate, Caramel and Walnut Tart (I actually used pecans)from the new issue of Bon Appetit. The end result was super tasty, but the route I took to get there included a whisk welding itself to a pan, mass amounts of hard caramel, grape juice boiling over on the stove and a very loud and annoying smoke alarm. It wasn’t exactly an experience I was rushing to repeat. Everyone loved it though. That meant I’ve had repeated hints to make it again. So last night when I inquired as to whether anyone had any preferences for what dessert I should make, the response I got was something like this: “Chocolate… or caramel… with pecans… chocolate, caramel and pecans.” Although I was well aware of what they wanted me to make, I was stubbornly refusing to give in. Instead I started perusing the Bon Appetit cookbook, trying to find another recipe that included chocolate, caramel and pecans, but that wouldn’t drive me to the brink of insanity. Success was found in the form of a Pecan, Caramel and Fudge Pie recipe that promised a no bake crust and a filling that only required 10 minutes in the oven. This recipe has a very similar taste to the other one but is ridiculously easy. It has a crumb crust rather than a dough crust, but I actually think I like that better in this case. The recipe called for crushed chocolate cookies but I used a combination of vanilla crumbs and graham crumbs, that’s what I had. Now, I’m generally pretty slow in the kitchen, I dawdle around, don’t get all my ingredients out at once, eat half the ingredients and have to get more, (you know how it is…) but I made and baked this pie in about 20 minutes, including baking time. Freaking amazing. And if you make this, everyone who tries it will love you. I’m sure they told you they loved you before they tasted your pie, but now they’ll actually mean it.
And here's one more great thing, that I should have taken a picture of, but didn’t, so I guess it’s not as great as it could have been for you, but I assure you, it was great for me. You’ll just have to believe in the miracles to trust that this was one impressive breakfast. Before I begin, I have to once again thank Linda of Kayak Soup for the wonderful package she sent me. I used her cranberry-apricot chutney and cranberry sauce to make Cranberry and Brie French toast. It was like decadence on top of decadence. The brie gets nice and gooey and when you add maple syrup on top of that, well basically I’m reduced to a drooling idiot, unable to take photographs.
Technorati Tags:
Food + Bread + Baking + Chocolate + Recipe + Pie
November 18, 2006
Truffles- The More Accessible Kind
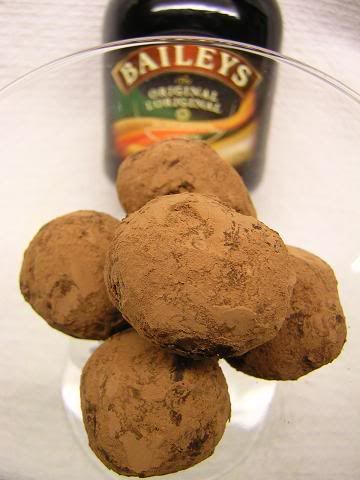
Mmmmm sugar high, mmmmm truffles… For an entire week there was a package sitting on my counter, just waiting to be opened but I wasn’t there to open it. I knew my Canadian Blogging By Post parcel had arrived and I couldn’t wait to get back home to find out who it was from and what was inside. Jasmine of Confessions of a Cardamom Addict hosted this second edition of CBBP and when I finally got to open my package I found out that it was from Linda of Kayak Soup, all the way from Vancouver! I’ve been reading Kayak Soup for quite some time now and Linda’s always cooking up something great so it was no surprise to find some wonderful homemade goodies in my package. I got some homemade blueberry and pink peppercorn jam, cranberry sauce, apricot-cranberry chutney and red currant jelly. I also received 2 bars of 86% cocoa chocolate and an accompanying recipe for liqueur truffles!
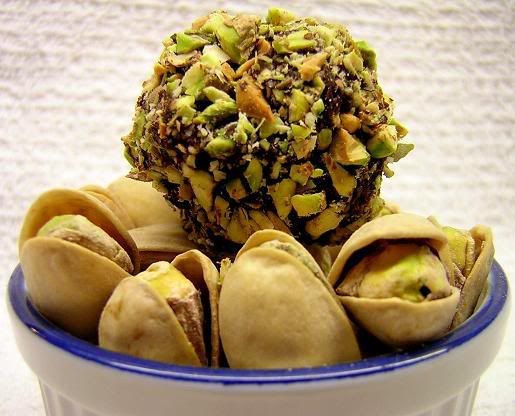
I’m so happy with everything I’ve received, (I’ve already tried the jam and am looking forward to the rest) but the truffle recipe was an especially good choice. This month The Passionate Cook is hosting the 25th round of Sugar High Friday and the theme is none other than truffles. I’ve been wondering what kind I should make and Kayak Soup solved the problem. Linda’s recipe called for cassis, (she had made her own) but said that any kind of liqueur could be substituted so I opted for Baileys. I also decided to make two different kinds of truffles using her recipe as a base. I added the Baileys to half of the mixture and maple syrup and vanilla to the other. I rolled the Baileys truffles in cocoa and the maple-vanilla truffles in chopped pistachios to finish them off. Truffles are ridiculously easy to make, the hard part is trying not to eat all of the chocolate in the process. I think Űter summed it up best when he said: “Don’t make me run, I’m full of chocolate.”

I know this SHF will yield much more interesting variation of truffles than the ones I made, but I think mine are pretty tasty anyways and I’ve consequently already had way more than my share. Thanks again to Linda for the wonderful recipe and package!
Liqueur Truffles by Kayak Soup
8 ounces bittersweet chocolate, finely chopped (I used part 86% cocoa chocolate and part semi sweet chocolate)
1/3 cup unsalted butter
¼ cup heavy cream
¼ cup Blackberry cassis*
In a double boiler, melt the chocolate over simmering water. Remove from heat, mix in the butter until smooth, then whisk in the cream and wine. Cover and chill until it firms up. Then form round balls (1 to 1 ½ inches) of the chocolate mixture. Roll them in the cocoa to coat or dip in tempered chocolate. Store, covered in the fridge until just before serving.
*Because I used so much of the dark chocolate I added some confectioners’ sugar to sweeten it up a little. I substituted 1/8th cup Baileys in one half of the chocolate and 1/8th cup combination vanilla and maple syrup in the other half.
Technorati Tags:
Truffles + Dessert + Baileys + SHF25 + Chocolate + Blogging Event
November 16, 2006
Testing.... Is This Thing On?
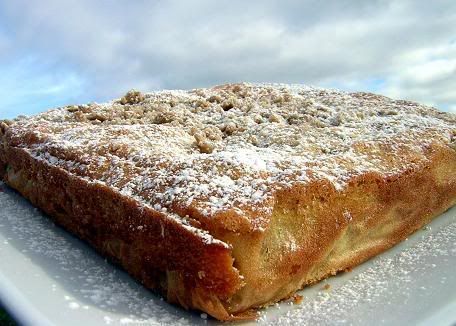
I signed up to test recipes for Cooks Illustrated. From what I gather they randomly send you recipes and if you feel like testing it, go ahead, if not, no big deal. I forget what the first recipe they sent me was for. Maybe some sort of steak dish. In any case, I didn’t get around to trying it in time to give them input, (you have about 2 weeks from when they send it to you to test it). The second recipe they sent me was for crumb cake and I decided to give it a shot. Since I was testing a recipe I thought I would try to be really good and follow the recipe exactly. And I actually did! Who would have thought it was possible?
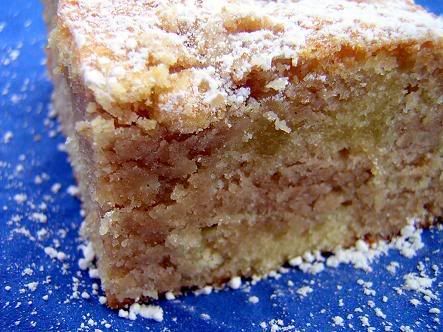
As for the cake itself, everyone who has tried it has enjoyed it, but I wasn’t overly impressed. Maybe for what it is, it’s very good, but not anything special. It’s a fairly plain crumb cake, not too sweet, nice with a cup of tea or coffee. It doesn’t knock your socks off but it would probably please finicky eaters who don’t like trying anything new or unusual, (ie- anything fun). It didn’t turn out quite like I expected though, but maybe I didn’t know what a crumb cake was. I think I was picturing a lighter, higher coffee cake and what I got was much smaller and more dense crumb cake. I also expected the top to be more crumbly, like a streusel topping. But the recipe made so much topping that it basically sank into the cake and didn’t sit lightly on top. The end result was by no means bad, it just wasn’t what I was expecting... I just went back and read the intro to this cake provided by Cooks Illustrated, I may have followed the recipe exactly, but clearly I didn't read any of the extra info. This is what they had to say about the cake:
"This is not a coffee cake, but rather a tender, buttery cake topped with loads of chunky crumbs that are more cohesive and less crunchy than a traditional streusel."
Well, I guess that explains things then, doesn't it? In any case, this cake also needs some dressing up if you’re going to take it out. The recipe called for dusting the top with icing sugar and without it I think you’d be embarrassed to take this cake anywhere with you. Maybe it would be more appropriately named Eat-It-In-the-Dark Crumb Cake. This cake’s like a country bumpkin, I’m sure she’s very nice on the inside, but she ain’t pretty to look at.
I’m struggling with giving this recipe a rating. Like I’ve said; the cake is good, but plain. I think that was its goal though, and in that respect it succeeded. I like my sweets to have more pizzazz though. Yes, pizzazz. I doubt I’d make it again without adding some things to it. Maybe a jam layer in the middle… Some strawberries, raspberries or blueberries, fruit of some sort. Or maybe I’d top it with a caramel sauce. Or fruit and a caramel sauce. Basically I’d be this cake’s fairy godmother and transform her into something beautiful for the ball so that everyone would want a piece of her.
Technorati Tags:
Baking + Cake + Cooks Illustrated + Recipe
November 13, 2006
Biscotti Blues
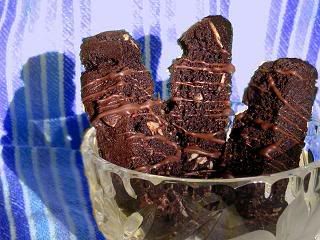
I’ve been getting hints from Dad lately that he wanted me to make biscotti. Usually he doesn’t come right out and say “I want you to make biscotti” which would be the easy thing to do. Instead he’ll hint about it in a not very subtle manner. He’ll say stuff like “I saw a recipe for biscotti on Foodnetwork today.” or “You know what’s good? Biscotti.” or “I haven’t had biscotti in a long time.” It’s not too hard to see what he’s getting at. In general I’m happy to make whatever Dad wants because odds are I’ll like it too. Today I finally got around to making the biscotti that Dad has been talking about. When a magazine was left on top of my computer, open to a biscotti recipe, I knew it was time. This particular recipe was from a Longo’s magazine and was called “My Mother’s Chocolate Almond Biscotti”.
I didn’t really see any reason to change the recipe at all, except that I only had a ¼ cup of almonds when the recipe called for ½ cup. While looking for more almonds I found some candied ginger and dried cherries and decided those were better than almonds anyways. I did half the recipe as it was written, and the other half I changed slightly. Or at least that was my plan. The recipe called for 2 tsp of baking powder and ½ teaspoon of baking soda. I stupidly reversed those amounts, clearly not on purpose, I just can’t read, sometimes I think I’m dyslexic. I didn’t like the effect of the switch on the outcome of the biscotti. No one else seemed to notice, but I thought they had a bit of a baking soda taste to them. Ew. The chocolate drizzled on top helped to cover that up though. I also decided I liked my ginger cherry version better than the original chocolate almond. But I didn’t love either of them. The reason for this may be that I’ve come to the conclusion I don’t overly enjoy biscotti in general. It pains me to say that. The problem isn’t so much the taste, (at least not when I follow the recipe) but the texture. I know biscotti is supposed to be crunchy and that’s why people like it, but I don’t think I like how hard it is. I find biscotti is more likeable when it’s been dipped in hot chocolate or cappuccino, and has lost its crunch. I guess that’s not really biscotti though. Complete aside- my spellchecker has been trying to fix some of my sentences because it was saying biscotti should have been in the singular form. I didn’t know that it was in the plural form, and quite frankly, I didn’t believe my spellchecker. So I looked it up on dictionary.com and apparently biscotti is the plural of biscotto. Biscotto??? Who knew?
Chocolate Almond Biscotti (adapted from Longo’s recipe for “My Mother’s Chocolate Almond Biscotti, with proper amounts of baking powder and soda)
½ cup butter, softened
½ cup sugar
2 eggs
1 T vanilla
½ cup unsweetened cocoa
1 ½ cups all purpose flour
2 t baking powder
½ t baking soda
Pinch of salt
Handful of chocolate chips
¼ cup slivered almonds, toasted
Chopped candied ginger and dried cherries, combined to equal about ¼ cup
Bittersweet chocolate, melted
Beat butter and sugar until fluffy. Beat in eggs one at a time and vanilla. Beat in cocoa, 1 cup of the flour, baking powder, baking soda and salt. Stir in remaining flour. Bring dough together with hands. Divide the dough in two. In one half of the dough mix in chocolate chips and almonds, in the other half mix in ginger and cherries.
With floured hands, shape into 2 logs about 12 inches long and 2 inches wide. Place on parchment paper (or silpat) on a baking sheet. Flatten into a rectangle shape.
Bake at 350°F for ~20min or until firm. Let cool on racks for 15min and then slice diagonally into ½ inch slices. Place on baking sheet cut side down and return to oven at 300°F for an additional 20min or until crisp. I then just turned off the oven and left them inside for about an hour.
Let cool completely and then drizzle melted chocolate on top.
Technorati Tags:
Food + Biscotti + Baking + Chocolate + Almonds + Recipe
Labels:
Baking,
Chocolate,
Cookies,
Sweets of All Kinds
November 10, 2006
Comfort In A Bowl
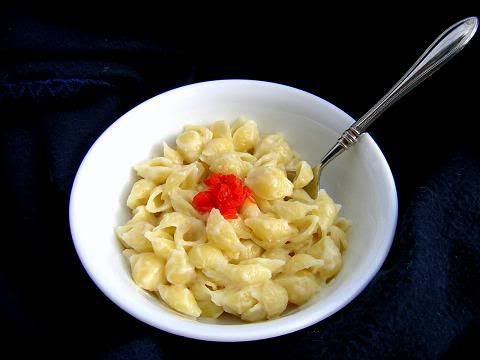
Ivonne of Creampuffs in Venice and Orchidea of Viaggi e Sapori are hosting a one off event called Dishes of Comfort. They’ve asked that we post about a special dish from our youth that brings back wonderful memories when we have it now. The first thing that came to mind was macaroni and cheese, but I thought I should be able to think of something better than that. Mac and cheese is so simple. The more I thought about it though, the more I kept coming back to macaroni and cheese.
I remember when I was in kindergarten and only had half days of school. I would come home at lunchtime and have Kraft Dinner while watching Mr. Dress Up. Whenever Mom gave me a choice in what my lunch would be, the answer was always KD. A few years later while at my best friends’ house, we made Kraft Dinner for the first time all on our own and were so proud of ourselves. I remember how many times we read and re-read the directions on the box and how we went running to her Mom every 30 seconds to clarify something. Was the water boiling when we saw little bubbles? How do you measure butter? How much salt do we add? How much should you stir the pot? When were the noodles done? I think it took us almost an hour to make macaroni and cheese, but we were so happy with the results.
Even with our amazing success, it took a while before I became confident enough in my ‘chef’ skills to make it on my own. In the meantime Dad would make it for me and he would often add extra cheese, spices and whatever else he felt like putting in. He’d let me help out too, I was always the official noodle tester, letting him know when the pasta was done. Gradually I became more comfortable making it myself. I no longer had to measure the salt or milk or butter. I also started adapting the recipe to suit my liking. And I liked cheese. I would grate as much extra cheese into the pot as I could. I think sometimes there was more cheese than pasta.
Later, I graduated from modifying Kraft Dinner to making my own macaroni and cheese. I liked to make it with shell noodles because the cheese would get trapped inside the shells, exploding in gooey goodness in your mouth. It got to the point where I had reached what I thought was macaroni and cheese perfection. Then, in my first year of university, in residence and without the luxury of a stove or fridge, I reverted back to Kraft Dinner. But KD had changed! Now there was Easy Mac. Everything was contained in the package. I only had to add water and heat in the microwave. I was in heaven. Late night snacks or mid day munchies were satiated in less than 5 minutes. Although it wasn’t my macaroni and cheese, it was an excellent substitute for the time being.
I was only in residence for one year and after that I was back to making my own version of KD with shell noodles. I branched out though too, sometimes I would add veggies, like broccoli or peppers, (hot ones are especially good). Chorizo sausage was often seen in my bowl and if there was leftover steak in it went. I also really began to experiment with different kinds of cheese. By experimenting I mean more than simply exchanging mozzarella or extra old cheddar for regular cheddar. Right around the corner from my apartment was the best cheese store in the world, Global Cheese, (76 Kensington Ave, Toronto) and it introduced me to cheeses I never could have imagined. If you love cheese, this is the place you want to be. They’ve got everything. The whole store is cheese and the people who work there are great. They let you sample whatever you want and always have suggestions. My macaroni and cheese was reborn with smoked gouda one day, maasdam another, the possibilities were endless!
This was also around the time however, that I was starting to experiment more with cooking in general. As much as I loved my mac and cheese I made it less and less as I began to explore the range of cuisines that Toronto had to offer. Sushi, red bean buns, Korean bbq, bubble tea, fresh made pasta, street meat, schwarma, jerk chicken, (from Jerk Spot, oh the memories), patties, doubles, pho, the list continues to grow and I continue to seek out new foods wherever I go. No matter what else I’ve tried though, if I’m having a bad day or a good day or I just want something easy, nothing beats a big bowl of my own macaroni in cheese. It’s my ultimate dish of comfort.
Technorati Tags:
Cooking + Macaroni + Dishes of Comfort + Blogging Event + Cheese
November 09, 2006
It Could Have Been Made By Your Grandma
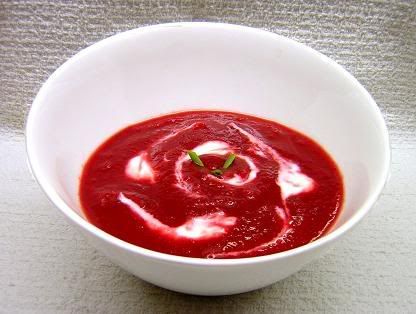
Borscht. Doesn’t it just sound like something a Grandma would make? I thought so and that’s why I decided to make it for this month’s Retro Recipe Challenge. This is the 4th installment of Retro Recipe Challenge and the specific instructions were to make a favourite fall dish. And what says fall more than a colourful thick soup? It’s perfect to take the chill out of the air and warm you up on the inside when the temperature’s dropping outside. I found this recipe hand written in one of Mom’s old cookbooks. I have no idea where it’s from or who wrote it, but I assume that means it’s old. It’s also vague. For example, I interpreted “herbs” to mean bay leaf, thyme and a little bit of cumin seeds. That’s just what I felt like putting in. I also like puréed soups, so I instead of thinly slicing the veggies I diced them and then blended the whole thing before serving. I love the colour of the borscht and how it looks with the sour cream swirled in.
Borscht
4 good sized beets
1 carrot
1 onion
1 potato
1 cooking apple
Butter
Stock
Lemon juice
Herbs
Peel and thinly slice beets, carrot, onion, apple and potato. Add them to melted butter in a large pan. Cook until they begin to soften a bit. Add stock to cover, lemon juice and herbs. Bring to a boil and reduce to a simmer. Simmer until veggies are soft. Laddle into bowls and serve with sour cream.
Technorati Tags:
Food + Blogging Event + RRC4 + Borscht + Recipe
November 08, 2006
An Ode To the Kitchen Fairy
It was blog writing time and all through the house,
Not a creature was stirring, not even a mouse.
My cat was curled up, asleep in her chair,
As I tried desperately to think of something to share.
The dishes were done so I started this thread,
While visions of failed dinner danced in my head.
Sitting in the lazyboy with the computer on my lap,
No matter how I wrote it, tonight’s cooking was crap.
When out in the kitchen there arose such a clatter,
I sprang from my chair to see what was the matter.
Away to the kitchen I flew like a flash,
And slid into the counter with a bang and a crash.
The bruise on my thigh was just starting to show,
As I let out a Homer Simpson like D’oh!
When, what to my wondering eyes should appear,
But a Kitchen Fairy, there was nothing to fear.
With silver wings, so lively and quick,
I knew in a moment this wasn’t a trick.
To get me inspired is why she came,
And summoned some help by calling out names!
"Now Wilbur! Now, Ames! Now, Simon and Monty!
On, Jacob! On, Jordan! Let’s pour some chianti!
Bring out the wine and top up the glass,
We’ll work and we’ll work and we’ll help this young lass!"
Dinner may have been salty and dessert a bit dry,
What matters the most is you gave it a try.
Sometimes things go wrong, it might happen to you,
But all is not lost if you learn something new.
With a twinkle in her eye she said ‘Now you know,
When pouring the soy sauce, be sure to go slow.
And as for puff pastry, your oven runs hot
So times in a recipe may be for naught.’
Of course she was right, it was no big deal,
I know for a fact I can cook a good meal.
Pointing to the cookbooks I said ‘Let’s go!’
Feeling a bit daring I was going to make dough.
Her eyes-how they twinkled! Her dimples how merry!
Her cheeks were like roses, her nose like a cherry!
Her droll little mouth was curled up like my cat,
Because dough leads to bread and she’s an expert at that.
A jar of yeast was held out in her hand,
She knew this would happen, she had it all planned.
Then to the pantry to pick up some flour
This bread would turn out, I had Fairy power!
But what recipe should I use? Over that I debated,
Then selected my Mom’s as it was star-rated.
Milk, sugar, water, yeast and some lard,
Two types of flour, this wasn’t so hard!
I mixed and I added, I mixed and I kneaded,
Allowed it to proof and this I repeated.
I heated the oven and greased up some pans,
This is the bread that would win me some fans.
The sweet scent of bread was all I could smell,
But I was so anxious and my Fairy could tell.
With a wink of her eye and a twist of her head,
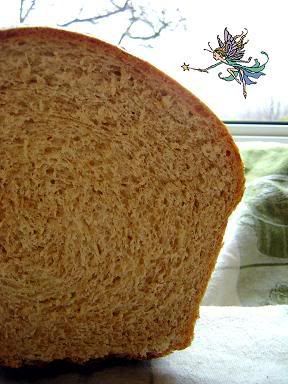
I knew that at last I’d succeeded with bread.
She spoke not a word, but pulled out her wand,
With the sureness and certainty of a seasoned gourmand.
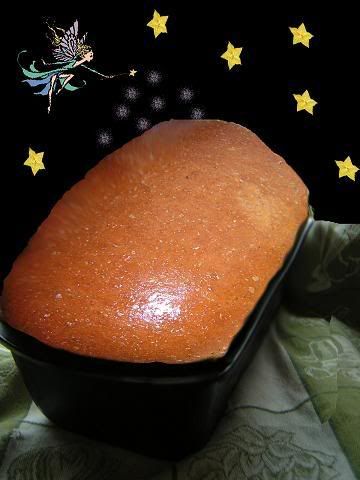
And out of the oven came my amazing creation,
It was golden and perfect, and oh! the elation!
Then away from the kitchen my Fairy did go,
Out of the warmth and into the snow.
But I heard her exclaim, as she flew out of sight,
"Happy Bread Baking to all, and to all a good-night!"
Mom’s Bread
In a pan heat: 1.5 c milk, 1.5 tbsp lard, 1.5 tsp salt, ¼ c sugar, cool to lukewarm.
In a bowl put ½ c lukewarm water. Stir in ¾ tsp sugar. Sprinkle on ¾ tbsp yeast. Let stand 10min.
Into a very large bowl, pour 1st mixture and beat in 1.5 c whole wheat flour. Beat in 2nd mixture. Beat in 1 more c whole wheat flour. Gradually add 2 3/8 c white flour (or a combination of white and rye flour) at first stirring in with a wooden spoon and then kneading by hand. Knead at least 15min or until dough is soft and elastic and hands come clean.
Set to rise in a greased bowl covered in a warm place until doubled in bulk (1 - ½ hours). Punch down. Let stand 10min.
Grease a loaf pans.
Roll dough into a rectangle, then with fingers roll up jelly roll fashion. Flatten edges. Tuck in seams. Place in pan.
Cover and set to rise in a warm place about 1 hour or until doubled in bulk.
Bake at 375°F for 10min and then at 350°F for 25min.
Remove from pan, butter top, let cool.
Technorati Tags:
Food + Baking + Bread + Recipe
November 06, 2006
Happy Birthday to Everyone!
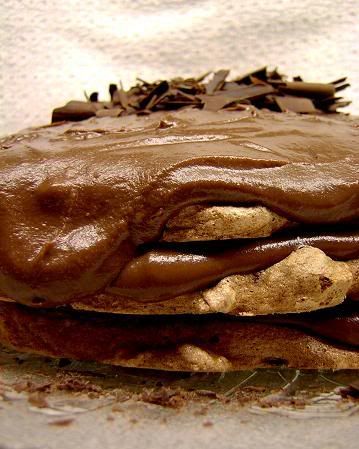
There will be more about that gooey chocolate stack you see above later, but you’ll have to eat your dinner first, (and appetizer and salad and don’t forget to drink your wine too). Bruno of Zinfully Delicious tagged me to participate in a meme called the ‘Foodbloggers Welcome Dinner’ which was started by Angelika of The Flying Apple.
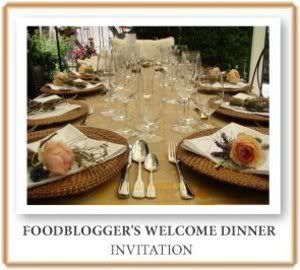
The idea is to create a menu that you would serve to fellow foodbloggers if they were to come over for dinner. I think a Foodbloggers dinner is reason enough to celebrate and since my birthday is also reason for celebration, I’m combining the two causes. Sunday, (the 5th) was my birthday and I’d like to share with everyone the menu that I prepared, (with some help, afterall it was my birthday, I couldn’t do everything).
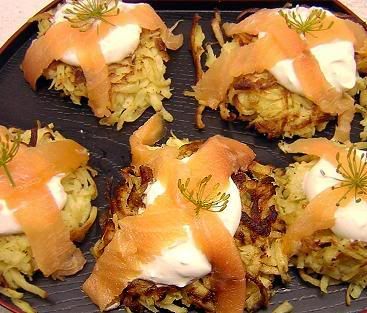
If you had of been at my birthday dinner I would have started by serving you some grated parsnip and apple pancakes topped with crème fraiche, smoked salmon and a little dill. These are actually good served warm or cold, so in the rare event that there are leftovers they can be gobbled up for breakfast however you like them.
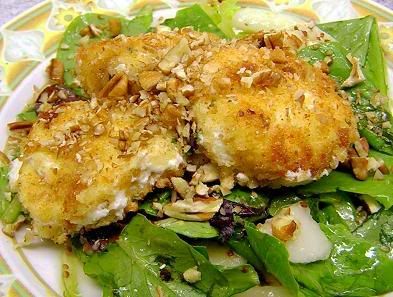
Next I would present you with a warm goat cheese salad with pears and pecans. The original recipe is from a 1997 issue of Bon Appetit, the source of all things good. The goat cheese would be perfectly crisped on the outside and soft and warm on the inside. The pears and pecans complimented it very nicely as well. But I warn you not to fill up on salad, because the pièce de resistance is yet to come.

Drum roll please as I bring out an amazing paella. It’s filled with only the best of ingredients and includes shrimp, mussels, scallops, lobster, fish, peas, peppers, onions, artichokes, Arborio rice, saffron, wine and chicken broth. Help yourself, there’s plenty to go around, no one will leave here hungry. In case you were wondering, you won’t go thirsty either; I’ve long since uncorked some excellent bottles of Riesling from Ontario’s own Stonechurch winery. I can tell some of you have definitely been indulging… Just try to stay sober enough for cake because this is one you don’t want to miss.
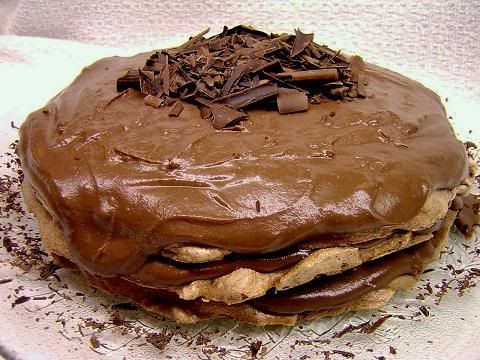
Traditionally I’ve had a black forest cake on my birthday. I don’t know why, that’s just what Mom always made me. This year, much to Mom’s dismay I wanted to make my own cake and I take full responsibility for the outcome. Ok, so maybe Nigella provided the recipe for this Gooey Chocolate Stack in her book How To Be A Domestic Goddesss, but she wasn’t in my kitchen making it, I was, and I did a damn good job too. I don’t think you can quite call this a cake though; it’s more like a giant macaron. Yes, you heard me right, a giant chocolate macaron! How’s that for decadence? The delicacy you see before you consists of three layers of chocolate meringue covered with a chocolate crème patissière and topped with chocolate shavings, (Nigella suggests pistachios but I was deep in chocolate and there was no turning back). Ms. Lawson calls it chocolate heaven and I hope you’ll all agree that ‘heavenly’ is an accurate way to describe the entire meal. Thanks for coming!
Now I’d like to invite you to move the party along to the dinner tables of:
Artizan Flair of artizenkitschen
Nicole of Pinch My Salt
Nic of bakingsheet
JenJen of I Love Milk and Cookies
Stephanie of Dispensing Happiness
Peabody of Culinary Concoctions by Peabody
Technorati Tags:
Food + Blogging Event + Dessert + Dinner + Appetizer + Chocolate
Labels:
Baking,
Blogging Events,
Chocolate,
Fish/Seafood,
Sweets of All Kinds,
Veggies
November 05, 2006
Pumpkin Meets Snowman

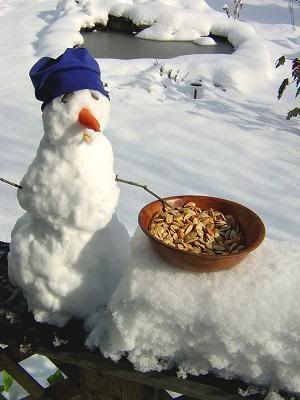
Why is pumpkin carving reserved for Halloween? What if I want to carver a winter pumpkin? Well, I do what I want! And there you have Frosty the Pumpkin… er, Pumpkin-Snowman, he’s hyphenated. I didn’t get around to carving a pumpkin for Halloween for a couple reasons, the foremost one is probably that I was just too lazy and secondary to that was the fact that there hasn’t been a trick or treater at my house for the past 11 years. After Halloween had passed however, there was still an uncarved pumpkin sitting on my front steps and it seemed sort of wrong for him not to have fulfilled his destiny of being carved and lit up. That was a shame indeed. But he still wasn’t getting carved. Then, while scanning the blogs I noticed quite a few people who had roasted pumpkin seeds. Mmmmm, roasted pumpkin seeds. My pumpkin was going to achieve his destiny after all. Had my earlier attempts of seed roasting gone better he might not have though. At Thanksgiving I had scooped pumpkin seeds out of a little cooking pumpkin so that I could turn the pumpkin into pie. I tried to roast those seed but they ended up being severely over roasted to the point of blackness and inedibility. Now was my chance to redeem myself. But since Halloween was over I didn’t want to carve your typical jack-o-lantern.

Inspiration came in the form of almost a foot of snow deposited on my doorstep overnight. It was too cold to make a snowman outside, so I created one inside. Eventually the sun came out and it was nice enough for my snowman and I to venture outside to find him a friend. I didn’t have to go far at all to find a lovely little snowman with a carrot nose. He was so nice that I had no reservations about leaving Frosty the Pumpkin-Snowman to hang out with him. Oh the adventures those two got into! They built forts, they had snowball fights, they became the best of friends.

While they were busy playing in the snow, I was busy inside roasting those pumpkin seeds. First I boiled them in salted water for ten minutes. Then I drained them, and mixed them in a bowl with an egg white, salt, sugar, cumin and cayenne for a treat that would be sweet with heat. Then it was into the oven at 375F for around 20 minutes, stirring as necessary. The end result was a crunchy and satisfying treat. Apparently I wasn’t the only one who thought so.
Technorati Tags:
Food + Pumpkin + Snowman + Seeds
November 03, 2006
Monty: Not Just A Pretty Face
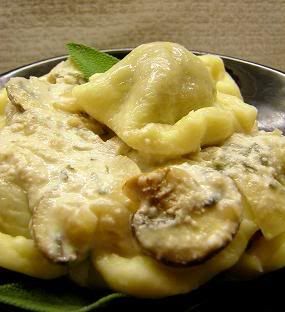
Just so there’s no doubt about it, Monty, my pasta machine is NOT neglected. He was of immeasurable help last night when I made veal ravioli. Veal is something that I rarely eat but for no particular reason. So when I had a piece of veal in the fridge that needed to be used I wasn’t sure what to do with it. While I was writing up my post for Weekend Cookbook Challenge #10 about neglected gadgets I thought about how it had been a while since I’d made pasta. It hadn’t been so long that Monty felt neglected, but long enough that I should make pasta sometime soon. Homemade pasta is so much better than dry, store bought stuff. Maybe it’s the act of making it yourself, kneading it like bread dough or maybe it’s just better. Yeah, that’s probably it. In any case, I decided I could use the veal and make homemade pasta at the same time by combining the two to make veal ravioli.
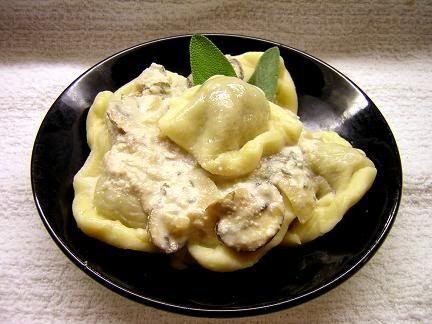
I didn’t use a recipe for this, I winged it all on my own. The inside of the ravioli was a combination of sautéed veal, onion, garlic which was then combined in the food processor with white wine, bread crumbs, and parmesan cheese. There was probably some spices in there too, a little bit of nutmeg, some roasted garlic powder, pepper, salt. I made up a sage and mushroom cream sauce to go on top. For the sauce I started out by sautéing shallots, cremini mushrooms and garlic. Then I added white wine and chicken stock and let that reduce. After a while I removed the pan from the heat and added cream, ricotta cheese and chopped fresh sage, mixed it in, returned it to the heat for a couple minutes and then poured it over the ravioli. Final result? Mmm mmm good. Ravioli is a bit time consuming to make, but well worth the effort.
Technorati Tags:
Food + Pasta + Dinner + Veal
November 02, 2006
Oh the Weather Outside is Frightful, But the Fire Is So Delightful

Weekend Cookbook Challenge #10 is being hosted by Mary at The Sour Dough and she chose the theme of using a neglected gadget/appliance in your kitchen. Surprisingly I had a hard time coming up with a gadget that was neglected. Sadly, the reason for that is that I really don’t have that many gadgets. I’d like to believe none of them would be neglected even if I had more. My mallet was neglected for quite a while and probably would have been a good choice if this were the theme a few months ago, but lately I’ve been using it for lots of things, namely pounding out steak. I don’t use my pasta machine very often, but I don’t think Monty’s neglected. I make sure to take him out and talk to him, let him get some fresh air. Sometimes Monty and Wilbur hang out, they’re buddies. But back to neglected gadgets… I determined my icing gun to be the most neglected gadget I have, but I swear it’s not my fault. Ames has been hidden away in a box in the back of the cupboard and I just completely forgot about him. I know he’s been used before, but it’s been years and years. And I hate to say it, but he’s beginning to show his age. What age exactly I’m not sure, but suffice to say Ames is no spring chicken. I asked Dad where Ames came from and he said we’ve had him for at least 25 years and he was acquired when some old lady died and she’d been his for a long time before that. I now realize that Ames is past the point of being a neglected gadget and would be more proper categorized as an antique, but I didn’t realize that when I started out.

I was making up a tray of Christmas baking, (I’ll explain later) and so I thought I’d be all artsy and use Ames to decorate gingerbread men. It’s been a long time since Ames worked out and he was in no shape to be decorating 3 dozen gingerbread men. Part of the problem, in medical terms, is that his rubber gasket has deteriorated and his plunger no longer pushes the icing forward except in fits and starts. When trying to decorate you’ll get no icing so you push the plunger harder and still no icing so you push harder still and then AAAAAAAHHHH waaaay too much icing. This led to a couple gingerbread men, a tree and a snowman being entirely white (and lumpy) as opposed to neatly decorated with perfect icing, (yeah, like that would have happened regardless). Ames was struggling so I decided to let him retire and got out a pastry bag to finish the job. Ames will receive a medal for his valued lifelong service to the cookie decorating industry.
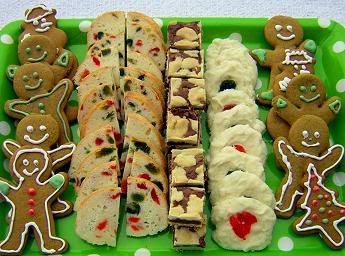
So I thought switching to a pastry bag would help me, ha! My decorating skills are severely lacking and I don’t know if Ames could have helped me even if he was in his prime. The finished gingerbread men look like the work of a 4 year old. Luckily I also made whipped shortbread, Christmas cream cheese cake and chocolate walnut bars. All of these were more presentable as they didn’t require any extra decorating. That’s not to say the gingerbread men weren’t tasty, they were indeed, they were just prettier on the inside than on the outside, or so I hear. I actually like raw gingerbread dough better than when it’s been baked. I think there would have been quite a few more cookies produced if I hadn’t of eaten so much dough, (yeah, yeah, salmonella, I know, whatever). The whipped shortbread really melt in your mouth, unfortunately this makes them hard to pick up because they fall apart, but they’re super tasty. The Christmas cream cheese cake is a recipe that comes from one of my Grandma’s friends and I think it’s my favourite out of the bunch. I liked it better before I made it though. Not because it wasn’t good, but because I learned everything that went into making it, it’s not the healthiest choice. What am I talking about? Who cares about healthy choices when you’re talking about Christmas baking?
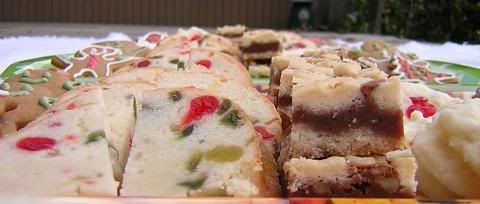
Anyways, I realize that Christmas is a long ways away but I was making up some Christmas goodies as a sample of my baking so that people from Mom’s work who are too busy to bake during the holidays can get me to do it for them. Besides, Christmas isn’t that far away. Sing it with me “Oh the weather outside is frightful, but the fire is so delightful…” Or at least that’s what this little gingerbread man was saying, (the snow is real, welcome to Canada)…

**Here's the recipe for the Cream Cheese Christmas cake, it's the best kind of Christmas cake there is.
Nora Atkin’s Christmas Cream Cheese Cake
1 8 oz package of cream cheese
½ lb butter
1 ½ c white sugar
½ tsp vanilla
4 large eggs
2 ¼ c all purpose flour
½ tsp baking powder
¼ lb red glazed cherries
¼ lb green glazed cherries
¼ lb yellow glazed pineapple (I didn't use the pineapple in this one, I like just cherries)
Chop fruit and toss in ¼ c flour. Cream butter and cheese – beat until smooth. Add sugar and vanilla and beat. Add eggs one at a time. Beat. Sift flour and baking powder together. Add gradually to cream mixture with electric mixture. Bake in tube pan for 300°F for 70min.
This cake freezes very well.
Technorati Tags:
Christmas + Blogging Event + Baking + Gingerbread + Cookies
November 01, 2006
Pie Makes the World Go Round
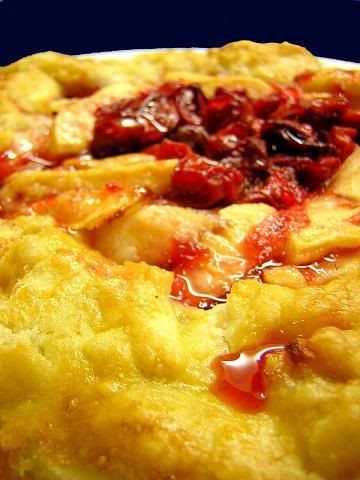
Here’s some fun news, someone offered to give me money to bake pies for them! I’d do it for free just cause it’s fun for me, but getting paid to do something I like is even better. This individual had tasted a piece of pie I made for someone else, decided they liked it and wanted more. Sweet. They didn’t even care what flavour I made, they just wanted pie. Since they were paying me I wanted to ensure that they’d like what I put in so I asked what their favourite fruit was. Turns out it’s cherries. They’re not exactly in season right now but I do have a fairly large supply of cherries in the freezer that I picked at my Grandparents orchard this summer. That being said, I also didn’t want to make exclusively cherry pies and I thought something seasonal might also be nice. Something from my backyard might be nice too, nice and convenient. Since I don’t think a squash and cherry pie would go over so well, apples were the obvious choice. I made two apple pies, an apple-cherry pie and a straight cherry pie. I still had dough and fruit left over when I was finished, but not enough for an entire pie.
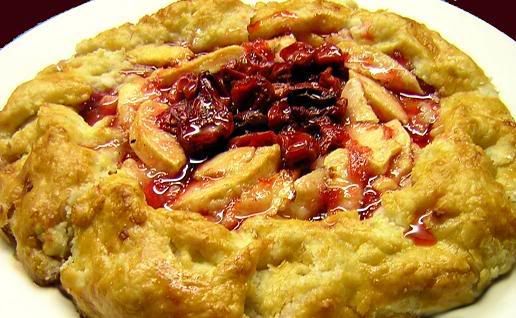
Mom had been through the kitchen earlier asking which pie was for us and seemed somewhat disappointed when I told her none of them. When I realized I had leftovers I figured I’d throw them together into something I like to call apple-cherry rustica. I rolled out my extra pie dough, made a ring of apples in the middle and filled the ring with cherries. Then I folded the extra dough over the top. Dessert was made in no time.

I’ve been doing lots with apples lately because I have so many of them. One of the nicest and simplest things to do with an apple is to slice it up and to drizzle the slices with caramel. It made for a great afternoon snack while reading The Nasty Bits by Anthony Bourdain, which, after eons of waiting, (I believe I started at number 300 on the waiting list) I finally got from the library.
Technorati Tags:
Food + Apple + Baking + Cherry + Pie
Subscribe to:
Comments (Atom)

