March 30, 2007

Tarts Are Sweet

Image Hosted by ImageShack.us


I told you that cacao nibs would be making an appearance again soon and here they are! I was looking for a topping for my Chocolate Banana Rum Tart and the cacao nibs jumped right out at me. This could have been because my cupboards are overflowing, but I’d like to believe that it was fate. Whatever it was, it was good.


I’ve been meaning to make a tart of some sort for a while now to break in my new tart pans. I suppose they remain ‘new’ until I’ve used them, regardless of how long I’ve actually had them. Before Christmas it seemed like I was making tons of tart recipes and every time I did, I would curse the fact that I didn’t have a tart pan. Instead, I was using springform pans and pushing the crust half way up the sides. This resulted in some interesting and unattractive tarts. I decided that I absolutely had to have tart pans because surely I would use them all the time. I got three of them for Christmas and this was the first time I’ve used one. How did that happen? Why has it taken so long? Maybe I was saving them for a recipe that was really deserving of their lovely tart shape. This one was worthy.


Image Hosted by ImageShack.us


I bet you’d like to know how to make this tart, wouldn’t you? I decided on the combination and then looked to my favourite source of inspiration for how to make each element. If you want to make my Chocolate Banana Rum Tart this is what you’re going to have to do: first you make Dorie’s chocolate shortbread crust, then you fill it with Dorie’s chocolate pastry cream, (with a hit of rum) and then you top that with rum soaked bananas and cacao nibs. And if you happen to have any leftover rum soaked bananas, (because you purposefully made extra) they’re fantastic in a fruity blended drink.


Technorati Tags:

+ + + > +

March 28, 2007

Excuse Me Waiter, There’s Somebunny in My Easter Basket…

Photo Sharing and Video Hosting at Photobucket


Johanna, The Passionate Cook is hosting this month’s Waiter, There’s Something In My… and has chosen Easter Basket as the theme. I felt like making some pretty coloured Easter eggs to fill my basket with but instead of chocolates I was going to undertake the ever daunting task of caramel making. I was armed with a wonderful recipe from Helene of Tartelette for Salted Butter and Chocolate Caramels and was ready to take on my nemesis. I wish I could rave to you about my success, but as you can see in the above pictures, my basket is not full of caramels. However, this is the closest I have ever come to succeeding at making caramel, sadly, I still failed. I was intending for my caramel to be a firm, not an ice cream topping. But I didn’t cook the caramel long enough for it to set firmly and be cut and wrapped individually, so it was gooey. On any other occasion, I would have been thrilled with a rich, thick oozy caramel that melted in my mouth, but not when I was trying for firm caramels to be eaten as candy. Despite the fact that this caramel was not exactly what I was looking for, I still ate way too much of it with a spoon. While doing so, I realized that unless I wanted a very gooey Easter basket, I would have to find something else to fill it with. I had a bunch of brown and fragrant bananas sitting on the counter so I decided on Banana-Date Muffins, topped with caramel. This improved on an otherwise naked muffin, but still left me with a lot of extra caramel. Don’t worry though, it’s going into another project which will be revealed soon…


Photo Sharing and Video Hosting at Photobucket


As for the coloured eggs, I started by blowing out their innards. In theory, this is quite easy; you just take a needle and poke little holes in both ends and then blow. It’s not hard per se, but it’s also not something you want to do a lot of. After five eggs I was weak in the knees and started seeing stars. It was at that point that I decided five was more than enough. I mixed up some food colouring, water and vinegar and set about dyeing my eggs. The process did not go as smoothly as I expected. Hollow eggs float. This meant for a lot of poking my fingers into dye. I think my fingers ended up more colourful than the eggs. The bunny liked them though. Hoppy, hoppy, hoppy.


Photo Sharing and Video Hosting at Photobucket


Banana-Date Muffins (Adapted from Cooks.com)


1 c. all bran cereal
1/4 c. milk
3 mashed ripe bananas
1 c. all purpose flour
1/4 c. whole wheat flour
1/4 c. sugar
1 tsp. baking soda
1/2 tsp. salt
2/3 c. chopped pitted dates
2 eggs
4 tbsp. melted butter
1 tsp. vanilla


Heat oven to 400 degrees. Grease 12 cup muffin tin or line tin with cupcake liner. In a small bowl combine bran with milk and bananas. Set aside and let stand for 5 minutes.

In another bowl stir together flour, sugar, baking soda, salt and dates. Beat eggs, butter and vanilla into bran mixture and add to dry ingredients. Stir just until flour is moistened. (Butter will be bumpy.) Spoon into muffin cups. Bake 20 minutes or until golden.


Technorati Tags:

+ + +

March 27, 2007

Touring the Great Lakes

Image Hosted by ImageShack.us


Pancakes, bread AND cookies! What do they have in common? These three recipes all come courtesy of the Ships of the Great Lakes Cookbook. I was lucky enough to receive this book to review from Sara of I Like to Cook who runs her own blog in addition to hosting The Weekend Cookbook Challenge and The Cookbook Spotlight. This month, Mary of Breadchick is helping Sara out with hosting duties for The Cookbook Spotlight and so I, along with a group of 10 other bloggers are reviewing the Ships of the Great Lakes Cookbook for your reading pleasure. As I’ve mentioned before, I LOVE getting mail and was thrilled to receive my copy. This book was especially interesting in that it’s not strictly a cookbook. It gives you a glimpse into both the history and culinary history of the tall ships, freighters and passenger ships that sailed the Great Lakes. The book is divided not by course or flavour, but by boats, with each one presenting a history of the ship and an authentic menu that was served aboard the boat. This makes for some very interesting stories and menus but unfortunately also leads to one of the book’s downfalls. Because the book contains authentic menus, this means that they were written for a full crew as opposed to a regular serving of 4-6 people. For example, one recipe calls for 18lbs of chicken and 7 ½ cups of Caribbean Jerk Sauce. Darn! I just used up my last 18lbs of chicken… uh, maybe over the course of the last 6 months! The recipes varied in this respect and not all of them were for such large quantities but I would say that the majority of the recipes resulted in more servings than I would ever need. This meant having to seriously scale down most of the recipes I wanted to try. Now, I’m a smart cookie and am able to do the math, but I’m also a lazy cookie and would rather that someone else do it for me. On the other hand, if you need a recipe for a bake sale or family reunion, this is a great cookbook to use! Another issue I had with the book had to do with the very nature of its subject. Because the cooking was all being done onboard the ships, the recipes called for a lot of canned goods, some of them almost exclusively so. Obviously this is necessary when living onboard a ship where fresh ingredients aren’t always obtainable or able to be stored, but that’s not the case in my kitchen so I would have opted to use more fresh ingredients and less ready made sauces. What does appeal to me about the Ships of the Great Lakes Cookbook is all of the stories that accompany the recipes. It gives a great idea of what it would have been like aboard some of these boats and the effort that goes into feeding a huge crew of people. The recipes vary broadly as well, and I’ve learned that some sailors definitely ate better than others! Reading through the book I found a number of very good recipes and there are many that I have bookmarked to try such as Beef Crepes with Curried Apricot Beef Filling or the Broccoli Cream Quiche. But for the most part I will have to either scale them down significantly or invite the whole neighbourhood over for dinner. I just might go broke in the process… The three recipes that I did try were the S.S. Courtney Burton Buttermilk Hot Cakes, (to which I added bananas) the Homemade Bread, (which was jammed packed with dried fruit and spices) and the Sailor’s Favorite Cookies. I enjoyed each of them and didn’t have any trouble replicating only a fraction of the recipe.


Image Hosted by ImageShack.us


Like I said before, the best part of the book is all of the wonderful stories it contains such as the following one I’m about to retell about the Flower Lady. Her real name is Arlene Earl and she owns a third generation flower business which she runs on Harsen’s Island. Arlene had an uncle, Norman LaCroix who absolutely loved the ships of the great lakes and spent 47 years working on the lakes as a Chief Engineer. After his retirement, Norman developed Alzheimer Disease and so Arlene invited her uncle to come and live with her and her husband on the island to that he could watch the freighters that he loved so much. He spent most of his days outside, waving to the ships as they went by. Arlene saw this and sent a note to the shipping companies, telling them about where Norman was now and from that time on, whenever the ships went by they would greet Norman with whistle blasts. Norman came to believe that each ship that passed was his own and it gave him immense pleasure. Arlene decided to repay the sailors onboard those ships the best way she knew how, by sending flowers. She didn’t even think they would be noticed but they were and she began receiving letters of thanks addressed to “The Flower Lady.” For the next 10 years until his death, Norman watched the boats everyday, Arlene continued to send flowers at least 4 times a year and the sailors continued to send notes of thanks. Some of the crew would even stop by for a visit and Arlene was not only good with flowers, but she could also cook and made sure there was always something ready for the sailors who arrived at her door. These cookies, Sailor’s Favorite Cookies, are an example of that.


Image Hosted by ImageShack.us


Sailor’s Favorite Cookies


2 cups sugar

2 cups brown sugar, firmly packed

¼ cup butter

1 cup Crisco

4 eggs

2 tsp vanilla

3 cups all purpose flour

2 tsp salt

2 tsp baking soda

3 cups oatmeal

2 cups soft raisins

1 cup chocolate chips

1 cup chopped nuts

2 cups coconut


Cream together sugars, butter, Crisco, eggs and vanilla. In a separate bowl, mix flour with salt and baking soda. Mix dry ingredients into creamed mixture. Stir in remaining ingredients by hand. Chill dough. Using a small scoop, place dough on ungreased cookie sheets. Bake at 350F for 8-10 minutes.


Technorati Tags:

+ + +

March 26, 2007

Well It Certainly Is Red

Image Hosted by ImageShack.us


It’s time for another round of the adventures of the Daring Bakers! The group that previous brought you Chocolate Intensity Cake, Croissants and Biscotti is at it again. This month the ever growing group of bakers voted to make Red Velvet Cake. I voted for a crepe cake, but majority rules… one day I’ll make that crepe cake… one day…


Image Hosted by ImageShack.us


Back to the present though, I’d never made a red velvet cake before and had never had any inclination to do so. It’s not something you see much in Canada, it’s more of a Southern USA thing. I don’t know why but it’s never appealed to me. Probably because it’s not stuffed full of chocolate or caramel or ice cream. That being said, I’m always up for a challenge so I certainly couldn’t refuse to make the cake. I figured if I was going to make a red velvet cake, it had better be a fairly authentic one. Peabody assures me that this recipe is in true southern form, complete with pecans in the cream cheese icing. Cream cheese icing? Maybe this cake wasn’t so bad after all! Cream cheese icing could make the mud cakes of my youth taste good.


Image Hosted by ImageShack.us


My plans of making a traditional cake only lasted about 5 minutes though. The red velvet cake is supposed to be covered in white icing to hide the fact that the inside is red and thus create more of a contrast and a surprise when the cake is cut into. Bah! I wanted something that was more visually appealing than a plain white iced white cake. Sure there was a surprise on the inside, but given the choice between what looks like a plain white cake and a cake with pizzazz, the pizzazz wins every time. Apparently in my mind pizzazz looks like a red cake with white icing between the layers and on top, smothered with red cake crumbs. Then I realized that this wasn’t my idea at all. I had made a cake in a similar style for New Years, and Dorie was the source of this cake. Well, at least the cake was going to look pretty…


Image Hosted by ImageShack.us


That is, if you think a very red cake is pretty. It calls for an astounding amount of red food colouring. I happened to use food colouring gel, but it’s really all the same. So how did the cake actually taste? It didn’t. I thought the actual cake was really bland and didn’t have much flavour. The texture was nice and moist, but there wasn’t much taste. The icing, however, is outstanding! I ate more icing than I did cake. I could eat that icing on anything. I wish the whole cake was made of icing. Mmmm icing… No one else complained about the cake and it was eaten quite quickly, but I’m looking for something more in my cake experience. As good as the icing was, it didn’t salvage this cake for me. I suppose some people are taken with the novelty of a red cake, but I would rather be taken with intense chocolate flavour or a web of spun sugar. The red velvet cake was by no means bad, it just didn’t thrill me either. To see what 14 other bakers thought of this cake, click on the links on the right hand side of the page under the Daring Bakers banner.


Image Hosted by ImageShack.us


Red Velvet Cake (from Mrs Wilkes Boarding House in Savannah, Georgia)

2 eggs
1 1/2 cups sugar
1 1/2 cups vegetable oil
1 tsp white vinegar
2 1/2 cups cake flour
1 tsp baking soda
2 to 3 TBSP cocoa powder
1 cup buttermilk
1 tsp vanilla
5/8 ounce bottle red food coloring


Preheat the oven to 350F. Cream the eggs, sugar, oil and vinegar. Sift the cake flour, baking soda, and cocoa together. Add the flour mixture to the creamed ingredients while beating. Slowly add the buttermilk. While still beating, add the vanilla and the food coloring. Pour into three 8-inch layer pans and bake for about 25 minutes. Press lightly;if the layers are spongy, then the cake is done. Frost the cooled layers, assemble and frost the top and sides. Serves 12 to 14.


Red Velvet Cake Frosting

1(8 ounce) package cream cheese, softened
1/2 cup butter
1 (1 pound) box confectioners sugar
1 cup chopped pecans
1 tsp vanilla extract


Combine the cream cheese and butter and melt over very low heat. Add the sugar, pecans and vanilla and mix well. If the frosting becomes too thick, add a little milk. Frost one 8-inch or 9-inch layer cake. (I made three layers, but only layered two and crumbled the third to put on top.)


Free Image Hosting at www.ImageShack.us


Technorati Tags:

+ +

March 24, 2007

You Can Pick Me Up Anytime!


This cake will pick you up too! Why? Because it’s tiramisu, (which literally means ‘pick me up’) in cake form. Oooh, fancy! When Emily of Chocolate in Context, announced the theme for this round of Sugar High Friday was raw chocolate I had no idea what I would be making because I’d never used it before. This is a good thing though because it forced me to try something new. But it was also a problem because where I live there’s not a whole lot of places to find raw chocolate. Or chocolate. Or stores. Or people. There are cows though. Moooo. After much searching and a hint from a friendly cow, I found some cacao nibs. The next step was finding a recipe so naturally the first place I looked was Dorie’s book. Nuts! Nothing called for cacao nibs, but they were listed in the glossary where it said they could be used to replace chocolate chips. Interesting. Lots of Dorie recipes called for chocolate chips. I had lots to choose from but just to be fair, I scanned some of my other books and the internet to look for an alternative recipe, but my heart wasn’t in it. Dorie or die! And so I looked through Baking: From My Home to Yours for the umpteenth time and I came to rest at a recipe that could kill two birds with one stone. A while back I made alfajores as I was challenged by Marce of Pip in the City to do so and at the end of that post I said I was always up for a challenge if anyone had any other suggestions for me. Lis of La Mia Cucina said she wanted to see my take on tiramisu.


Well, here it is! It’s actually Dorie’s take on tiramisu by turning it into a cake, combined with my take on SHF by substituting cacao nibs for chocolate chips in between the layers and on top of the cake. Oh and it has Armagnac in it instead of kahlua. As you may have noticed, I’m hooked on Armagnac right now. Soon I’ll find a new flavour and use it in everything, but for now, it’s Armagnac. I was happy with how this cake turned out. I think it’s pretty and it only gets better with time! It has the elements of a classic tiramisu but it’s served as a cake instead of in a bowl which, in my opinion, makes it much more elegant. You can’t get a perfect slice of a traditional tiramisu, you just get a glob on a plate. Sure it looks nice in the bowl, but you can’t eat it without ruining it! That’s why a tiramisu cake is so much better. And in this case you also get the added bonus of cacao nibs, what’s not to love? I have a feeling cacao nibs will be making many more appearances here… Look out Armagnac, you’ve got competition!


Technorati Tags:

+ + + +

March 23, 2007

Bring on Spring!


Roses are red
Violets are blue
This is neither
But it will do!


March 22, 2007

From Jamaica to Thailand


Last night I sampled some Jamaican fare and tonight I took a trip all the way to Thailand. This trip was made possible by Paula, The Cookbook Junkie who drew my name as the monthly winner of her cookbook draw and kindly sent me the Quick From Scratch Pasta Cookbook from Food & Wine magazine. I love getting real mail! It’s like my birthday or Christmas or a step back in time. Who really sends snail mail anymore? It doesn’t happen very often, so when it does, I’m happy. And when I get things in the mail it doesn’t just benefit me, it benefits the wonderful girl who works at the post office too. Lately I’ve taken to bringing her sweet treats every time she has a package from me. It’s like a reverse version of “don’t shoot the messenger.” She’s not the one sending me the package, but since she’s the one giving it to me, I feel like she’s partly responsible for my happiness. A couple days ago when I got the note from the post office telling me that my package from Paula had arrived, I had just finished making my Leftover Danish Cookies so I packed some up and brought them along with me. I was thrilled to receive my package and the post office girl was thrilled to give it to me as I handed her cookies in exchange. She also thanked me for the alfajores that I brought her last week when she had a book for me and went on to wonder aloud why she hadn’t married me for my baking. Now she’s onto something… That’s exactly what I need, someone to marry me for my baking! Preferably someone rich enough to take me to Thailand and Jamaica so that I can experience their food and then write you a real post about them. Until that happens, here’s a Thai inspired pasta dish, adapted from my new cookbook.


Spaghetti with Chicken, Broccoli and Thai Peanut Sauce (Adapted from Quick From Scratch Pasta Cookbook by Food & Wine Magazine)


3 T soy sauce

Zest and juice of 1 lime

1 T peanut oil

5 cloves garlic, minced

1 inch chunk of ginger, peeled and grated

3 boneless, skinless chicken breasts, cut into chunks

½ cup peanut butter and a handful of peanuts

1 cup chicken stock

1 tsp sugar

½ tsp red pepper flakes

3 scallions, chopped

1/3 cup chopped peanuts

3 stalks of broccoli, cut into florets and steamed

Spaghetti


In a shallow dish, combine soy sauce, lime, oil, garlic and ginger. Add the chicken and marinate for 1 hr.

In a medium stainless steel saucepan, combine peanut butter, broth, sugar and pepper. Pour the marinade from the chicken into the sauce pan and bring the mixture to a boil.

Using a non-stick frying pan, cook the chicken, a few minutes on each side until fully cooked.

Cook spaghetti and steam broccoli.

Toss everything together and serve with chopped peanuts and scallions scattered over the top.


Technorati Tags:

+ +

March 21, 2007

I Want To Try It All


Living in Canada has exposed me to a wide variety of cuisines. I’m grateful for that but at the same time I can’t help but wonder how authentic anything can really be when it’s out of its original context. What North Americans call Italian or Indian or Chinese cuisine can often vary greatly from what natives to these countries would consider everyday food. I have not traveled as extensively as I would like to and therefore haven’t tasted all the fares of the world. Instead, I have to rely on cookbooks to help transport me to other lands. This quite often results in some new flavour combinations and tastes that may be wonderful on their own but that leave me wondering if the dish turned out the way it was supposed to. I think that instead of calming my urge to travel, cooking new dishes from other cultures intensifies it. I want to see where the ingredients come from and how they’re prepared. I want to know how the dish is supposed to be eaten and under what circumstances. Some experiences just can’t be replicated outside of their natural environment. The act of eating encompasses more than simply the flavour of the food. That’s why so many of our memories are linked to food, because eating is a complete sensory experience. Putting a fork into your mouth is a small part of a complex interaction of sensations that requires all of your senses.


I can’t tell you what an authentic Jamaican seafood curry tastes like because I’ve never been to Jamaica. I can, however, describe the maple syrup experience which is uniquely Canadian. Although tasting maple syrup is a wonderful thing no matter what part of the world you’re in, (it’s like liquid gold) you’ll never truly know maple syrup without coming to Canada. To truly know Canadian maple syrup you must also know its beginnings. You must have trekked into the sugar bush during the early days of spring to watch the syrup run when the days are warm and the nights are cool. To truly know Canadian maple syrup you must have drank a cool glass of fresh syrup, straight from the tapped trees. You must have eaten maple sugar candy until your teeth hurt and still gone back for more. It’s a unique experience. And because of that, when I make a new dish, I savour the immediate flavours but I still long for the experience.


Brilynn’s Jamaican Seafood Curry Remix (Adapted from The Caribbean Central & South American Cookbook by Jenni Fleetwood and Marina Filippelli)


1 ¼ lbs mixed seafood

2 T peanut oil

2 cardamom pods

1 cinnamon stick

6 allspice berries

½ tsp cloves

1 onion, chopped

4 garlic cloves, chopped

1 inch piece of ginger, grated

2 tsp ground cumin

1 tsp ground coriander

½ tsp cayenne pepper

2 tomatoes, chopped

1 can tomato paste

1 sweet potato, peeled and cubed

1 cup water

1 cup fish stock

2 ½ oz creamed coconut

2 bay leaves


Heat the oil in a heavy bottomed pot and stir fry the cardamom pods, cinnamon, allspice and cloves to release their aromas.

Add the onion, garlic and ginger. Continue cooking over gentle heat until onion is soft.

Add the cumin, coriander and cayenne and stir to combine.

Stir in the tomatoes, tomato paste, sweet potato, fish stock, water, creamed coconut and bay leaves. Bring to a boil and then lower the heat, cover and simmer for 15-18 minutes until the sweet potato is tender.

Add the seafood and cook through, a few minutes, depending on what you use.

Serve over rice.


Technorati Tags:

+ +

March 19, 2007

Bringing Life to Leftovers


These might not look like leftovers, but they are! This is what I made with the leftover egg whites and pastry cream from my danish making adventure. For a while I thought about using the egg whites to make something healthy like an egg white omelet, but then I’d still have pastry cream leftover and continuing to eat it with a spoon didn’t seem like the best possible use for it. I also thought of trying to make macarons again but I just didn’t have the energy for failure. When I decide to make macarons again I’m determined to go at it gangbusters style. You know my motto, go big or go home and today I wasn’t prepared to go big. So I wimped out and went for what was supposed to be simple meringues. I still managed to mess them up. I have not yet mastered the art of whipping egg whites. I never know how far to go or when to stop. I suspect today that I did not whip them enough. I also fear over-mixing the dry ingredients into the egg whites and as a result I under-mix them. Today was no exception there either. But despite my meringue ineptitude it still produced some pretty good cookies, especially after I sandwiched them together with pastry cream. And that my friends, is how leftover egg whites and pastry cream avoided a slow and painful death in the back of the fridge and rose to new heights in a meringue sandwich cookie. Mission accomplished.

These cookies, which I’m dubbing Leftover Danish Sandwich cookies are my submission to the third round of Leftover Tuesdays which is being hosted by Megan of What’s Cooking and was started by David of Cooking Chat. Hurrah for tasty leftovers!


Leftover Danish Sandwich cookies (Adapted from Alice Medrich’s Melting Chocolate Meringues)


8 oz bittersweet chocolate, coarsely chopped

3 egg whites

2/8 tsp cream of tartar

¾ tsp vanilla extract

¼ cup sugar (generous)

1 package cappuccino mix (individual serving)


Preheat oven to 350F.

Melt the chocolate, and set aside.

In a large bowl whip the egg whites, cream of tartar, and vanilla extract until soft peaks form. Gradually add the sugar and cappuccino mix and whip till the peaks are stiff, but not dry. Fold in the melted chocolate.

Drop by rounded teaspoon on a silpat lined cookie sheet and bake 8-10 minutes. Leave on the baking sheet to cool.

Sandwich with leftover pastry cream from the danishes you made… yes, you have to make danishes first.

Eat them. Enjoy them. Delicious.


Technorati Tags:

+ + +

March 18, 2007

Just the Sight of Them Takes Me Back


Were you a good little girl or boy? If so, you get a danish!


Ellie, of Kitchen Wench is hosting a wonderful one-off event called The Nostalgia Tastes Bittersweet. As so many of our memories are linked to food, Ellie has asked us to take a trip down memory lane and make a recipe that evokes a sense of nostalgia. I hummed and hawed over what I was going to make, lots of memories have a flavour of some sort attached to them. Eventually, the food memory that I decided on required me to make something I have never made before: Danishes.


Before I delve into today’s baking adventure, let’s go back to a time when I was just a young pup, still wet behind the ears. My family used to go to 9am mass every Sunday morning and I hated it. In general, I was a good kid but once you got me to church I turned into a little hellion. I would cry and scream and insist that I didn’t want to go and I didn’t want to be there. Mom would shamefully have to take me to the Crying Room where I may very well have been the oldest kid there. The Crying Room was a glassed-in, soundproof room in the back of the church that allowed mothers of new borns and toddlers to watch mass and listen as it was piped through a set of speakers, without disturbing the rest of the parishioners with a crying baby. It was not intended as a playroom for bratty kids who couldn’t sit still for one hour a week, like me. It got to the point where I was old enough that Mom didn’t even have to be in the Crying Room with me, I could look after myself in there. I guess I didn’t clue in to the fact that maybe church was the last place I should be misbehaving...


Once I was a little bit older I was put into the choir and became an altar server which kept me busy enough that I didn’t have time for crying. What does all of this have to do with danishes? Well every Sunday after church we would stop at the bakery on the way home and pick up freshly made, delicious danishes! I recall on more than one occasion, being threatened to be quiet or else we weren’t stopping at the bakery. That usually reduced to a whimper as opposed to full out shrieks. I loved that bakery. It was a small one and strictly a bakery with bread and pastries, nothing else. The smell that would hit me when I walked into the store was heavenly! Sometimes we would get a turnover or two with our danishes, or if my Grandmas was visiting she might treat me to one of the nicely decorated gingerbread men, but about 98% of the time we got danishes. They came in all sorts of flavours too; cherry, raspberry, lemon, blueberry… My favourite was cherry. When I was in grade 8 we moved away from there and never resumed the danish tradition in our new town. There just wasn’t a bakery like the old one. Consequently, I pretty much stopped eating danishes entirely except for the rare time that I’m in a bakery in another city and one catches my eye. So the danish has a special place in my heart. The bitter is obviously my dislike of church and deplorable behaviour. But the sweet is the memories of my old house, my family being together and of course, the sweetest thing of all, danishes!


Despite my childhood love of danishes I had never tried to make them. For a long time I never even considered it. Danishes were in the same boat as croissants and ice cream, something you just didn’t make at home. I have since conquered croissants, (ok, only once) and ice cream (multiple times, just ask my protruding belly) so I thought to myself: If you can dodge a wrench, you can dodge a ball! Err, I mean, if I can make croissants, I can make danishes! As luck would have it, the über talented Helene of Tartelette had recently made danishes from a recipe she saw on the also uber talented Gattina’s blog, Kitchen Unplugged. After seeing the amazing results this recipe produced for those bakers, I knew I had to give it a try. The step by step pictures on Gattina’s site, along with my previous croissant making venture really helped to make this a smooth process. And heck, since making the dough went so well, I thought why not make my own pastry cream, (from Dorie’s Baking: From My Home to Yours) and homemade quick cherry-currant jam. I don’t even have any disaster stories for you today! I suppose that makes for boring reading, but these were just really really good danishes and not difficult to make either! You’ll want to make these danishes if only for the divine way they’ll make your kitchen smell as they bake. Sigh…


Cherry-Currant Danishes (Recipe adapted from Helene who adapted it from Gattina who adapted it from Beatrice Ojakangas's The Great Scandinavian Baking Book)

14 g active dry yeast
1/2 cup lukewarm water
3 1/2 cups all purpose flour
330 g chilled unsalted butter, cut into 1/4 slices. (about 3 sticks)
1/2 cup heavy cream
2 pinches of salt
2 eggs
1/4 cup sugar
Pastry Cream, (just go buy Dorie’s book and I’ll give you the page number…)

Cherry-Currant Jam (rough recipe to follow)


Dissolve the yeast in lukewarm water and let stand for 5 minutes. Stir in cream, salt, eggs and sugar.
In a large mixing bowl, add flour and sliced butter, use a pastry blender to further cut the butter to the size of kidney beans
Add the yeast mixture into flour mixture, combine carefully with a big rubber spatula, the mass is just moistened enough and hold together. Cover, refrigerate 4 hours or overnight.
Lightly flour the work table, turn out the chilled dough, pound and flatten to make a 16 - 20 inch square. Fold into thirds making 3 layers. Turn dough around and roll out again. Fold from the short sides into thirds.
Rest in refrigerator for half an hour, repeat folding and rolling one more time. Wrap and chill the dough 30 minutes or overnight before you proceed pastry making.
Cut the dough in half and working one portion at a time (refrigerate the unused one in the meantime), roll the dough to make a 12X9inch rectangle. Cut out 3 inch squares. Fold the corners of each square toward the center and make an indentation with the back of a spoon. Cover with plastic wrap and let rise for about 45 minutes.
Before putting them in the oven preheated at 375, brush with eggwash (egg beaten with a dab of milk). Bake for 15 minutes or until golden brown.

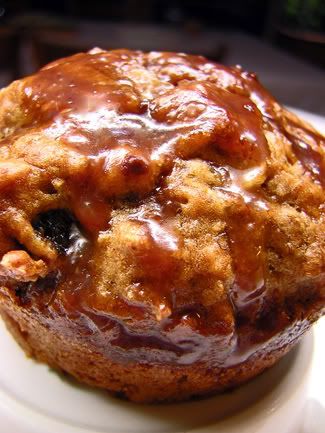
Fill with pastry cream, top with jam and then drizzle with icing sugar, (oh yeah, this was decadent!).

Yield: 24 servings


Quick Jam


Sour Cherries, (a margarine container’s worth)

Red Currants, (whatever was left in the freezer, about ¾ cup)

Sugar ( ½ cup – ¾ cup)

Juice of half a lime

Cornstarch, (about 1 tablespoon)


There are no hard and fast rules for this one, I just combined the first 3 ingredients in a sauce pan and brought them to a boil. I kept it around a light boil to reduce some of the juice, (probably about 20 min) but it still wasn’t thickening as much as I wanted so I added some cornstarch and while I was at it, some lime juice. After that it thickened nicely so I removed it from the stove and stuck it in a snowbank to cool off. If you don’t use all of the jam on the danishes, just stick it in a jar in the fridge to use on toast the next morning.


Technorati Tags:

+ + + +

March 17, 2007

I'll Trade You Rolls For An Answer

Image Hosted by ImageShack.us


These are lobster and mango cold rolls. Is anyone's browser having trouble seeing my pictures, or with my template in general?

***Some of you have asked about a recipe, there isn't really one. I just rolled up lobster, mango, vermicelli noodles, orange pepper and some mint in rice paper wrappers. You can make cold rolls with pretty much whatever you want. You could even stuff leftovers in a cold roll instead of a pita.

March 15, 2007

Argentina Can't Quite Be Replicated in My Kitchen

Image Hosted by ImageShack.us


A while back I mentioned in a post that if someone suggesting a recipe for me to make, I’d probably do it. The only person to put something out there was Marce of Pip in the City. She blogs from Argentina and suggested that I make alfajores and dulce de leche, both Argentinean specialties. Marce had recently made these on her blog so I went to find out what they were. What I learned was that alfajores are sweets made by joining two cookie-like layers with a sweet filling such as dulce de leche. Sounds good to me. The only sticking point, (pun intended, I’m sooo funny) was the dulce de leche. I had never made it before because I thought the experience would be something like making caramel, ie- a disaster. But I never refuse a challenge, so I was going to give it a try anyways. To begin with I had to boil whole milk, reduce the heat and skim off the skin, and then repeat this process three more times. You know what they say, a watched pot never boils, so I busied myself about the kitchen. I was in the process of washing grapes when one of them jumped out of my hand and rolled away. I stopped what I was doing, stood still and scanned the kitchen floor for the missing grape. I knew if I didn’t find him immediately, I would end up squishing him at a most inopportune time, (um, I guess no matter when I stepped on him it would be inopportune).


Image Hosted by ImageShack.us


Where on earth did it go? I got down on my hands and knees to search for the escapee and found him hiding under the stove. Not only was he under the stove, but he’d gotten himself far enough back that I couldn’t reach him without some help. A wooden spoon was perfect for the job. As I lay flat out on the kitchen floor, trying to scoot a grape out from under the stove with my spoon, I suddenly heard an unfortunately familiar sound: The sound of milk bubbling up over the top of the pot and scorching on the stovetop. This sound is quickly followed by the smell of scorched milk. Blech. With a flick of my wrist I hit the grape with the back end of the spoon, jumped to my feet and tried to salvage my bubbling cauldron of death. Er, dulce de leche. And where did that grape go again? As I mopped the milk off the stove I quickly discovered the answer to that question. Squish. Under my foot. Well isn’t that just fantastic? One more thing to clean up. With that mess out of the way I continued with the dulce de leche recipe. It was supposed to stay on the stove for a total of 3 ½ hours, after 2 ½ hours the sauce was really dark, quite flavourful and rapidly disappearing. I felt that if I left it any longer there would be nothing left. So I poured it into a jar and began to make the cookies.


Image Hosted by ImageShack.us


I wasn’t too sure about them either after reading the recipe, it had more cornstarch in it than any other recipe I’ve ever made. They also sounded suspiciously like a shortbread cookie and I’m not a huge fan of shortbread cookies. However, as I read further into the recipe, one of the ingredients piqued my interest: Armagnac. Fantastic, another way to use my new favourite alcohol! These cookies were starting to look up! And they were a whole lot easier to make than the dulce de leche, no boiling milk and no squished grapes involved.


Once the cookies were cool, I went to the fridge to retrieve the dulce de leche. I open the jar only to find that it had not thickened at all and was very much a syrup. I then returned to Marce’s blog where she informed me that if I was making alfajores it was better to use store bought dulce de leche because the homemade stuff would be too thin. Hmph. My homemade version was delicious, but thin. Perfect over ice cream, but thin. And so, despite the fact that Marce herself had told me that the dulce de leche would be thin, I was convinced that it would thicken up if I just gave it some time. I put it in the fridge and left it there overnight. Come morning it was still a syrup. Desperate times call for desperate measures. I poured the contents of the jar back into a sauce pan and set it over low heat for FIVE hours. Take that dulce de leche! I then scraped the measly contents back into the jar. This time around it only filled the jar half way, where did it all go? After all of my efforts, I have a ridiculous number of cookies and only enough dulce de leche to sandwich a few of them. Once again, although the dulce de leche thickened up a little bit, I didn’t let it cool completely so it still wasn’t as thick as I would have liked. At this point my patience had completely run out so I spooned the dulce de leche over my cookies and tried to ignore the fact that it immediately dribbled out the side.


Image Hosted by ImageShack.us


If I had of listened to Marce, I wouldn’t have this problem. But I’m stubborn and I didn’t listen to Marce. I’m glad I made the alfajores though, I love trying new things. I don’t think I’ll be making dulce de leche again anytime soon, but it was worth a shot. Thanks for the recipes Marce! If anyone else is feeling adventurous you can see the recipe for alfajores here, and dulce de leche here.

** Edited to add: The alfajores really are delicious! The ones I ate with my dulce de leche were amazing. I just wasn't able to produce enough of it!


Technorati Tags:

+ +

It's Ok to Love it THIS Much!

Image Hosted by ImageShack.us


This ice cream is so good that it makes me want to cry! Alright, maybe not cry, but it makes me want to eat a whole lot of it. That’s why, although it’s my new favourite flavour, I can never make it again because I would have no probably devouring an entire tub in one sitting and that’s just not right. The strange thing is that this isn’t a flavour I would have even considered a mere few weeks ago. There’s no chocolate in it, no caramel, it doesn’t seem to make any sense. But once you taste it, everything comes together. What is this miracle flavour? It’s a vanilla custard based ice cream with prunes flamed in Armagnac and it should come as no surprise that the recipe is courtesy of all things good, Dorie Greenspan. I first experienced this flavour combination when I made the cake that got Dorie fired. Right away I was hooked.

Prior to that experience I didn’t know that I liked Armagnac, but apparently I really do. My Armagnac of choice has been Armagnac de Montal and I’ve been trying it in more than a few recipes and it’s superb. I didn’t know I liked prunes that much either until the cake. I had never baked with them and I think my exposure to prunes was limited to eating stewed prunes at my Grandma’s house. So I had no idea that prunes and Armagnac were good on their own let alone together. The technique of flaming dried fruits in alcohol was also something I’d never done before but that inspired me to play around with it and try different fruits and different alcohols. One of the best things to come out of my experimentation was a wonderful Chocolate, Cherry & Rum cheesecake.

As good as it was though, I still loved the flavour of prunes and Armagnac and wanted to try it out in more than just cake. What do I love more than cake? Ice cream! Who makes great ice cream? Dorie! And it just so happened that I had three egg yolks leftover from when I made my Lime, Mango and Ginger Meringue pie, (from another fantastic Dorie recipe) so it was like I was destined to make this ice cream. It’s unlike any other ice cream I’ve ever had and I’m completely in love with it. Don’t turn your nose up at it until you’ve tried it, it may just replace chocolate in your life…


Image Hosted by ImageShack.us


Best Ice Cream EVER (Adapted from Baking: From My Home to Yours by Dorie Greenspan)


1 cup 1% milk (that’s what was in the fridge, feel free to up it to whole)

1 cup heavy cream

3 large egg yolks

½ cup sugar

1 tsp vanilla

10 prunes, chopped

¼ cup Armagnac

¼ cup water


Put the prunes and ¼ cup Armagnac in a small saucepan over medium heat and cook until most of the water evaporates. Remove the pan from heat and light it on fire! Weeeewww!!!! Look at those flames go! When the flames die out, pour the prunes and any leftover liquid into a bowl to cool.

Bring the milk and cream to a boil in a heavy bottomed saucepan. Meanwhile, in a medium bowl, whisk the yolks and sugar together until well blended and slightly thickened. Continue whisking and pour about 1/3 of the hot liquid into the egg mixture to temper it. Continue whisking and pour the remaining liquid into the egg mixture. Pour everything back into the saucepan and cook over med heat, stirring constantly until the custard thickens enough to coat the back of a spoon. (Dorie says the custard should reach 170F but not more than 180F… I don’t have a thermometer so I wouldn’t know). Remove the pan from the heat and strain into a clean, heatproof bowl. Stir in the vanilla and Armagnac mixture and refrigerate until thoroughly chilled. Pour the custard into an ice cream maker and follow manufacturer’s directions.


If you’re wondering about other fantastic ice cream flavours that Dorie inspires, I suggest you add world peace cookie dough to chocolate ice cream. Oooooh yeah!


Image Hosted by ImageShack.us


Technorati Tags:

+ + +

March 14, 2007

Where's the beef? (Or Bacon?)

Image Hosted by ImageShack.us


There’s no need to be alarmed, I’m not turning into a vegetarian! I would never do that to you. In fact, there’s a ham curing in my fridge as we speak, (more fun with Charcuterie!) so don’t worry, meat will return shortly. This curry was created because I had some broccoli and cauliflower that needed to be used up and I was in the mood for a little spice so it was a natural choice. Paired with some wild rice it was a pretty easy dinner to put together. Not as easy as prechopped vegetables, readymade sauce and instant rice but I never said this was a 5 minute, tasteless meal. Maybe if I did, I would be the new Dunkin Donuts spokesperson…


Now then, I’ve got a question for you: What do you think of me posting recipes that I’ve sampled from other blogs? Would you rather see something new, or do you like variations of recipes you may have seen elsewhere? From my point of view I like seeing how different people make the same thing and what spins they put on it. Also, the more people I see make a recipe that looks difficult, the more confidence I have in making it myself. But that’s just me, feel free to disagree.


Image Hosted by ImageShack.us


Brilynn’s Veg Curry (Adapted from The Ultimate Hot & Spicy Cookbook, Ed. Jenni Fleetwood)


3 garlic cloves, chopped

1 inch of fresh ginger root, grated

1 fresh red chili pepper, seeded and minced

1 T oil

1 onion, sliced

1 small potatoes, sliced

2 T butter

1 T curry powder

Pinch of saffron

1 cauliflower, cut into florets

2 broccoli stalks, cut into florets

2 cups stock

3 T creamed coconut

1 can chick peas, drained and rinsed

Handful of yellow sultanas, (I like that word better than raisins)

Squeeze of lemon juice

Salt and pepper


Combine garlic, ginger, chili, curry and oil in food processor or with a mortar and pestle to form a paste.

Heat butter in a large pan, add onion and potato and cook for about 5 min. Add the paste and stir to combine.

Add the cauliflower and broccoli florets and stir well, then pour in the stock. Bring to a boil and then add the coconut. Stir until it melts and combines.

Season well, then cover and simmer for 10 min. Add the chick peas and sultanas and cook, uncovered, for another 12 minutes.

Add saffron, lemon juice and salt and pepper to taste.

Serve over wild rice.


Technorati Tags:

+ + +

March 12, 2007

I Couldn't Decide On a Title, You'll Soon Understand Why

Image Hosted by ImageShack.us


I cracked open my first coconut a little while ago and after making some coconut ice cream I still had some grated coconut to use up but wasn’t sure what I wanted to do with it. I rifled through some cookbooks, checked out epicurious, read some blogs… You see, I have a problem with making decisions. I saw tons of recipes that I could make, that I had the ingredients for and that sounded delicious, I just couldn’t choose which one I wanted to make. This happens every time I’m about to step into the kitchen. Unless I’m struck with a sudden craving and know exactly what I want and the recipe I want to use, it takes me forever to decide. I can sit for hours and look at recipes without ever deciding what to make. I’ll ask other people for suggestions and then reject what they give me, which leads to frustration on their part and a reluctance to offer up further suggestions. I’m like the annoying kid who says something like “Guess what I did today?” and when you give them an answer they respond “Nope, guess again!” Except in my case it’s “I don’t want to make that, tell me something else.” Eventually, like the annoying child, I am ignored.


Image Hosted by ImageShack.us


All of this is to say that it took me forever to figure out what I was doing with the leftover coconut before I finally hit upon a recipe for Bill Granger’s Coconut Bread that I found at bakingsheet. It was supposed to make one loaf, but I decided to take this opportunity to use my mini loaf pan again, which made 8 mini breads. Mini breads are also more appropriate finger food for Stephanie’s monthly Blog Party. This month’s theme is Showers; baby showers, wedding showers, food showers… Ok, so I made that last one up, but other than the water kind that I take each morning, showers are not something that I attend. But any reason to make food is a good reason so long as you give me a lifetime to plan it. Eventually I will produce something like these little mini coconut loaves which are especially good when paired with some raspberry jam. You may have noticed a trend in what I bring to Stephanie’s parties, it’s always something sweet like cookies or fudge. I think I’m starting to become predictable and I don’t like that.


Image Hosted by ImageShack.us


This time around I wanted to assure people that I could do more than just sweets so I also decided to bring some stuffed mushrooms as an appetizer. Choosing what to stuff the mushrooms with took considerably less time than deciding what to do with the coconut. That’s because cooking is much more lenient than baking, I can throw whatever I want into a pan and for the most part it will turn out alright. These stuffed mushrooms are an example of that. I combined chopped garlic, shallots and mushrooms and sautéed them in a little olive oil. I then blended this mixture with cream cheese, goats cheese, bread crumbs and a little white wine. I spooned it into some hollowed out mushrooms and baked them for 10 minutes at 400F. My appetizer was done in no time. I really liked the filling, but I can’t say the overall package appealed to me as much. If you like mushrooms though, I can confidently say that you’ll probably like these. The only reason I didn’t was because I used to have issues with the texture of button mushrooms, (though not morels or puffballs) and for some reason those issues flared up again. I like the taste of mushrooms, as evidenced by the fact that I liked the mushroom filling, but I just couldn’t eat the whole mushroom. I felt like a five year old as I scooped out the inside and ate it, leaving the mushrooms on my plate. Shame on me.


Image Hosted by ImageShack.us


I can only hope that my drink is redeeming. It’s pretty, it’s fruity, it’s adaptable, what’s not to like? For a Mama-to-be you can make them au naturel, but for everyone else, I highly recommend the addition of coconut rum. I think I’ll call this little concoction a Fruit Shower in honour of the event. With my precious Blendtec, it’s simple to make, just throw some frozen peaches into the blender and puree until smooth. Pour into glasses, filling halfway. Then fill the blender with strawberries, raspberries and a big spoonful of frozen pineapple juice concentrate and give it another whirl. You might want to soften your fruit first if your blender doesn’t have a three horsepower motor. Or you can invite me to the party, I’ll bring the Blendtec, it’ll be a good time.


Image Hosted by ImageShack.us


Technorati Tags:

+ + + +