April 30, 2007

When Life Hands You Lemons...


Only those eternally optimistic, in your face cheery people say things like “When life hands you a lemon, make lemonade!” When what you really want to do is take those lemons and throw them right back, adding in a few lemons of your own. In this case, the metaphorical lemon would be the disaster that was the crepe cake and although pulverizing it in my 3 horsepower blender would have been entertaining, it wasn’t going to make me any lemonade. Therefore, I turned to the one person I knew would never, ever disappoint me with a bad recipe: Dorie Greenspan. Just opening up my copy of Baking: From My Home To Yours was enough to soothe my shattered nerves. I knew there was no risk of failure so I was free to choose whichever recipe I wanted. When I came across the Tartest Lemon Tart I knew it was meant to be. The lemon analogy comes full circle.


As is always the case with a Dorie recipe, this tart was wonderful. And the title is as fitting as any you’ll ever see. The use of whole lemons in this tart certainly renders it the most tart of tarts. If you’re a citrus lover, this is certainly the tart for you. The intense lemon flavour tantalizes all of your tastebuds and is never sour or overwhelming. As I’ve said before, I love the suggestions that Dorie has for variations to each of her recipes. Once again, this tart was no exception. The sidebar suggested making it a brulee tart. A brulee tart??? Heck yeah! Brulee meant another reason to use my mini torch. The mini torch gave its all for this tart, may it rest in peace. It just couldn’t handle the awesomeness of the tart and fizzled out, but not after creating a perfectly crunchy top layer. I think I need to invest in a real kitchen torch, once you’ve had a brulee crunch, there’s no going back. I’m a believer.


As I stood and looked at the completed tart, I couldn’t help but feel that something was missing. That something was a splash of colour. I contemplated making a raspberry coulee, (the recipe for that is also in Dorie’s book) but why make a raspberry coulee when you can make a blackberry coulee? It’s as simple as whirring together some blackberries and sugar but the result was spectacular. Not only did the dark blackberries lend contrast to the tart but some excellent flavour too. This is where I patted myself on the back for a job well done. I’m back on track after the crepes and it’s all thanks to Dorie. I guarantee if she had a crepe cake recipe, it would be a fabulous one.


Not only did this tart taste delicious, but it was for a good cause too. The ever busy Barbara of Winos and Foodies is hosting A Taste of Yellow for Livestrong Day and has asked us all to make yellow dishes for the event. LIVESTRONG Day is the Lance Armstrong Foundation's (LAF) grassroots advocacy initiative to unify people affected by cancer and to raise awareness about cancer survivorship issues on a national level and in local communities across the country. LIVESTRONG Day 2007 will occur on Wednesday, May 16 so you’ve got plenty of time to get baking!


Technorati Tags:

+ + + +

April 29, 2007

After This, You May Never Hear From Me Again

Photo Sharing and Video Hosting at Photobucket


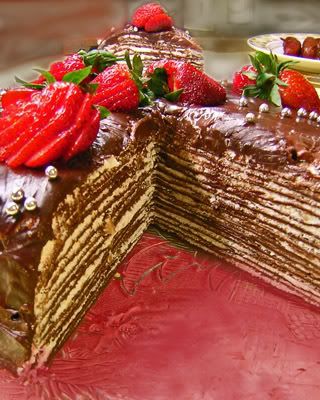
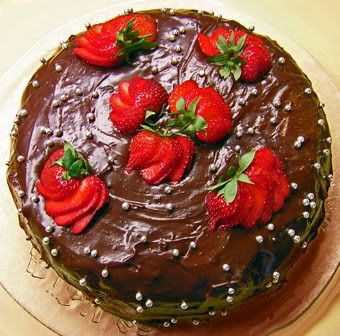
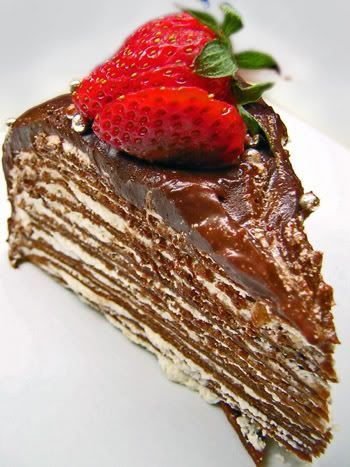
If you never hear from me again it’s because the Daring Bakers put a hit out on me. And I wouldn’t blame them either. I’m responsible for the disaster that was this month’s Daring Bakers Challenge. It was my turn to choose a recipe and I chose Martha Stewart’s Darkest Chocolate Crepe Cake. Martha suckered me in with beautiful pictures and then pulled a Nigella fast one on me with an awful recipe. Other than my experiences with Nigella, I’ve never been so angry at a recipe. It’s not like I put out a small amount of effort either. This recipe required a serious amount of work, and a ton of ingredients, mainly butter. Despite my best efforts and following the recipe to a T, (highly unusual for me) the proportions were not right. I couldn’t even pinpoint what the problem was. I ended up adding more milk and an egg but I hear from the other Daring Bakers that some of them added extra flour. No matter what we did, the crepes were just off. Luckily though there was an amazing mousse to accompany the lousy crepes because otherwise I think I would have dumped this cake off the back porch for the raccoons and coyotes.


Photo Sharing and Video Hosting at Photobucket


From the crepe batter I was supposed to be able to make 32, 8 inch crepes. I only have a 10 inch crepe pan so I used that and ended up with 16 crepes. I would have had at least 6 more but I ate them when they fell apart as I tried to flip them. I didn’t even enjoy them when I ate them. It was simply out of angry. Eating them wasn’t even enjoyable but I wanted to destroy them and decided that mashing the crepes up in my mouth and swallowing them was the best way to achieve total destruction. Once the crepes were done though, most of the rest of the experience went alright. Or maybe I’ve just had time to cooldown and have forgotten about what it feels like to have spun sugar shoved under my nails. Ah yes, that’s a wonderful feeling, sharp, jagged pieces of sugar lodged under my finger nails. The cake was supposed to be decorated with a stunning arrangement of hazelnuts dipped in hot sugar to form long tails. The sugar covered hazelnuts were supposed to complement the hazelnut filling in the cake. But I didn’t make a hazelnut filling, I made a cashew filling.


Photo Sharing and Video Hosting at Photobucket


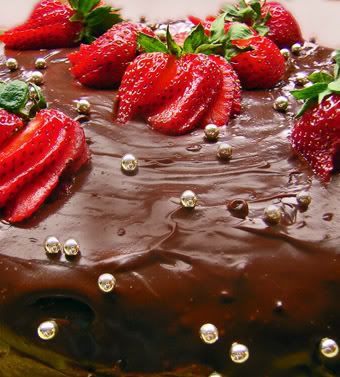
So I decided that my stunning sugar masterpiece would be a globe of spun sugar, studded with cashew pieces. I have no clue what made me think that I was capable of such a creation. I had never even seen it done before but for some reason I thought I could create it. I will take this opportunity to remind you that hot sugar has long been a nemesis of mine. This was no exception. I tried to drizzle the sugar over the top of a greased bowl with the idea that when the sugar hardened, it would just pop off the bowl and I could place it on my cake. Nope. Instead, it hardened to the bowl and refused to come off. This is where I ended up with sugar spears stabbing my fingers. I tried to pry the sugar off using my nails and instead of coming off in one lovely piece, it broke off in chunks. I ended up with a pile of broken sugar chunks that were certainly not stunning. I still thought I could make something out of sugar so I decided to try a different approach, I tried to gather spun sugar into a ball, to make a nest to put on top of my cake. Once again, failure. My patience had long since left me and I threw all of the hardened sugar into the garbage. This stuff wasn’t even good enough for the raccoons. I had just about resigned myself to the fact that my cake would not have a beautiful decoration adorning the top, when I spotted a box of fresh strawberries sitting on the counter. Strawberries require nothing more than a wash and a slice and I was certainly capable of that.


Photo Sharing and Video Hosting at Photobucket


The assembly of the cake was another pain. The crepes wanted to slide all over the place and the chocolate ganache kept pooling at the bottom of the plate instead of staying on the cake. Fortunately, the ganache was extremely tasty to I scooped it off the plate and into my mouth. You didn’t hear that…

When the cake was finally complete I didn’t even want to look at it let alone eat it. I served it to some friends and they absolutely loved it. That was perhaps the only redeeming part of the cake. It received rave reviews and requests to make it again. Ha! That won’t be happening! I still like the concept of the cake though. A tower of crepes covered in chocolate is a good thing, but this recipe wasn’t. Even when I had a piece, a day later, I wasn’t impressed with it. I could taste grumpiness in the cake. With each bite my mood worsened until it was like I was making the cake all over again. With all this misery I could write a country song.


Technorati Tags:

+ + + +

April 26, 2007

This One's For the Team

Image Hosted by ImageShack.us


I’m constantly reading blogs, magazines and cookbooks that proclaim they have “The Best” recipe for . Proper logic tells me that can’t possibly be true. They can’t all be “The Best.” With so many recipes out there I think it’s a pretty gusty move to claim yours as the ultimate. Personal preferences play a huge roll in determining how much I like something compared to how much you like it. For example, anyone who tries to tell me that thin, crunchy cookies are “The Best” is fighting a losing battle. There’s no way I’m going to agree with them. The same goes for cakey brownies. You might believe with all your heart that a certain version of a recipe is the be all and end all but I have no doubt there’s a slew of people who will disagree with you. People are crazy that way, (case in point, people who don’t like things they’ve never tried.) With all of that in mind, I won’t try to tell you that these cookies are “The Best” you will ever have, but they very well could be, they’re amazing! And for the record, I’ve heard many, many people say they’re the best they’ve ever had.


Image Hosted by ImageShack.us


So just what kind of cookies am I talking about? Team Cookies. Also known as the perfect balance of peanut butter, oatmeal and chocolate chips. I’ve eaten hundreds of these cookies but this is the first time I’ve ever made them myself. I was introduced to Team Cookies 5 years ago when I played University basketball. Pam, my teammate and roommate and best friend’s Mom, made a mountain of these cookies and brought them to one of our games in a plastic bucket. There were so many cookies that they couldn’t be contained in a mere cookie tin, they actually required a bucket. Go big or go home! As soon as I tasted one though, I understood why there were so many. Pam had been baking these cookies for basketball teams for a long time and it never mattered how many she made, they would always disappear. The cookies are so good that they developed a cult following all of their own. It began with the women’s basketball team and quickly spread to the men’s team as sharing a bus with them meant sharing our cookies too. Then someone gave one to a volleyball player and soon they were on the lookout for the cookie bucket. And I don’t know if it was my imagination but it seemed like we had more friends and fans in the stands when Pam and her cookies made an appearance… Luckily for all of you, Pam believes that recipes should be shared and not hoarded so without further ado, I give you Team Cookies:


Image Hosted by ImageShack.us


Basketball Team Cookies


1 cup peanut butter, (crunchy preferred)

1 cup soft butter

1 cup white sugar

1 cup lightly-packed brown sugar

2 eggs

1 teaspoon vanilla

2 cups « quick » rolled oats

2 cups all-purpose flour

1 teaspoon baking soda

1-1½ cups of semi-sweet chocolate chips


Cream together peanut butter, butter, white and brown sugar and brown sugar. If you don’t use crunchy peanut butter, I would suggest adding in salted peanuts when you mix in the chocolate chips.

Add eggs and vanilla and beat until light and fluffy.

Combine oats, flour and baking soda, and stir into peanut butter mixture.

Add chocolate chips. If the dough is still really sticky, add in a little more flour.

Drop by spoonfuls onto ungreased baking sheets. Place in oven at 325-350 degrees for 10 minutes or until lightly brown, do NOT overcook these.

Cool on rack. Makes 4 dozen.

* The only disclaimer I must put on these cookies is that when you make them, they will never be as good as when Pam does.


Technorati Tags:

+ + +

April 24, 2007

Enlivening Picnics All Summer Long


The weather is slowly starting to change for the better. Flowers are starting to pop up, birds are chirping and I’m able to go biking without getting frost bite. That’s a good thing. Warmer weather also means eating al fresco. That’s a good thing too. And when I think of eating outdoors I think of picnics and when I think of picnics I can’t help but think of potato salad. Somewhere along the way potato salad seems to have become a quintessential summer food that’s required at all summer bbq’s, potlucks and picnics. This has potential to be a good thing, but often it’s not. Cursed are the potato salads that are swimming in a sea of mayonnaise with nary another vegetable to be seen. Ditto for those that feature marshmallows and fruit among the potatoes. For my first outside eating experience of the year, I certainly did not want any of these atrocities taking over my table. With that in mind, I made up my own recipe, free of mayo and marshmallows and full of bright, fresh flavour.


Brilynn’s Asian Inspired Potato Salad


6 baked potatoes, cut into cubes

2 hardboiled eggs, chopped

2 spring onions, chopped

3 big cherry tomatoes, chopped

1 ½ cups shelled edamame

Large handful chopped parsley


Vinaigrette

2 T olive oil

½ tsp sesame oil

2 T rice vinegar

1 ½ tsp sugar

½ tsp soy sauce

½ inch grated ginger

1 ½ T grainy mustard


Bake potatoes and allow to cool completely, I did this the night before. Boil the edamame in salted water for 5-8 minutes until softened, drain. Combine the first 6 ingredients in a large bowl. Whisk together all of the ingredients of the vinaigrette and pour over potato combination, stir gently.


Technorati Tags:

+ +

April 23, 2007

Excuse me? Waiter? There's Something Wonderful in My...

Image Hosted by ImageShack.us


One of the most wonderful scents there could ever be is the one that fills your house when there’s a loaf of bread in the oven. When you combine that smell with the taste of warm bread, adorned simply with a pat of butter, it’s heavenly. Unfortunately, I have not mastered the art of bread making, (and I’m not sure that I ever will) but I keep trying and I’m thrilled with each success that comes out of my kitchen. When Andrew of Spittoon Extra announced that bread was this month’s theme for Waiter There’s Something In My I knew that I would be participating, but I wasn’t sure with what. Then I saw a post by Bea at La Tartine Gourmande for ‘Simple Brioche and my mind was made up. For some reason I had always believed that brioche was difficult to make, I classified it as some sort of croissant variation. I couldn’t have been more wrong. Whereas my croissant making venture took 3 days and a ridiculously long recipe, brioche making required little work and was done in no time, (comparatively). And the smell, the smell! I was rewarded with the mouthwatering scent of flour and yeast as my brioche puffed up and baked. It only got better from there as I removed a loaf from the oven with a shiny, golden crust which gave way to a sweet and tender crumb. It was as good as any I’ve had from a bakery. Now if only I had seen Peabody’s brioche earlier, I might have added something else to my brioche like chocolate chips. Ah well, there’s always next time, and there will definitely be a next time.


Image Hosted by ImageShack.us


The Simplest Brioche (From Bea of La Tartine Gourmande)


You need:

  • 8 3/4 oz (1 2/3 cups) all-purpose flour
  • 2 3/4 oz butter, at room temperature
  • 2 eggs, at room temperature
  • 1 dose dry baker’s yeast (1 Tbsp)
  • 2 Tbsp fine sugar
  • 1/3 cup warm milk
  • 1 pinch salt
  • 1 egg yolk for glaze


Steps:

  • In a bowl, mix the flour with the yeast, make a hole in the middle.
  • Add the warm milk mixing with the tip of your fingers (if using a stand mixer, pour the milk slowly and steadily while mixing, with the hook attachment.)
  • Add the sugar and a pinch of salt, then add the soft butter, piece after piece, waiting each time that each piece is asborbed.
  • Then one by one, add the eggs, mixing well between each. Work the dough until it is elastic and detaches from your fingers more easily (or from the bowl of the stand mixer).
  • Cover and let rest in a warm place, away from drafts, for two hours, until it doubles in size.
  • Work the dough again for 10 min and divide it in four balls. Place them in a greased rectangular mold and cover. Let rise for an hour again.
  • Preheat the oven at 400 F.
  • Brush the brioche with the egg yolk mixed with a dash of sugar. With a pair of scissors, make small cuts at the top of each ball.
  • Place in the oven to bake for 10 min at 400 C, then reduce the heat to 350 F and bake for about 20 to 30 min.
  • Remove, unmold and let cool on a rack.
  • Makes 1 loaf, mold 10 ” long


Technorati Tags:

+ + +

April 21, 2007

Lots of Great Things Start with B- Bacon, Bananas, Brownies, Brilynn...

Image Hosted by ImageShack.us


Myriam of Once Upon A Tart is hosting a new event called Browniebabe of the Month. I had to participate because who doesn’t love brownies? Note- if you don’t love brownies, I don’t want to hear about it because that’s just not right. It’s almost as sacrilegious as saying fried bologna tastes like bacon, (yes, I actually heard someone say that). Brownies or blondies, nuts or fruit or chocolate chips, no matter what you put in your brownies, they’re all good. I have to like a more dense brownie, but if you like a cakey brownie, that’s alright too. I was surprised at the consistency of my ‘naner brownies. It definitely wasn’t cakey, but it wasn’t fudgy either. It was some sort of hybrid of the two. Is it possible for a brownie to be dense and light at the same time? If so, these are it. They’d probably be even better if you topped them with banana or chocolate ice cream and some hot fudge sauce. But that could be said about most desserts. I added cacao nibs to these ones and I think it was a pretty good decision. It also makes means they’re much more portable than ice cream topped brownies, but still special.


Image Hosted by ImageShack.us


Banana Brownies (Adapted from Chocolatier magazine, Spring 2007)


¼ cup butter

4 oz unsweetened chocolate, finely chopped

1 egg + 1 egg yolk

1 tsp vanilla extract

½ cup brown sugar

½ cup white sugar

2 large bananas, mashed

¾ cup quinoa flour

1/8 cup cacao nibs


Preheat oven to 350F. Grease an 8 inch square pan and line with parchment paper.

In a large bowl set over simmering water, melt butter with chocolate. Set aside to cool slightly when combined.

In another bowl, whisk eggs and sugar together until combined. Stir in mashed bananas and vanilla.

Stir in butter and chocolate.

Fold in flour until just incorporated. Add cacao nibs and mix in lightly.

Pour batter into prepared pan and bake for 35 minutes. Centre should be very moist but not runny.

Transfer hot pan to refrigerator and chill for 1 hour. Return to room temp before dusting with icing sugar and cutting into squares and serving.


Technorati Tags:

+ + +

April 20, 2007

I'll Take 'S' words for $100 please Alex. -->That's 'Swords' Mr. Connery, Like Swordfish, Like My Dinner...

Photo Sharing and Video Hosting at Photobucket


I used to play competitive basketball. Something that I heard from all of my coaches was that our team had to play to the best of our ability regardless of what the other team was doing. This was especially true when going into a game that we knew we should easily win. Sometimes when our opponent was a weaker team we’d find ourselves playing down to their level; our passes would be sloppy, we’d be lazy about bringing the ball up the court, we’d take bad shots and make poor decisions. There was no physical reason for this and we should have been the dominant team. The problem was a mental one. We let the other team affect our view on the game and how we were playing. It was like we lost our abilities simply by being around the weaker players, like they were sucking out our energy.


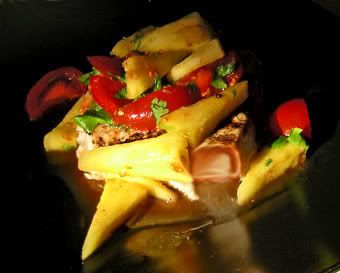
This past week has been like that. I feel like the people around me have sucked out my energy and part of my brain power while they were at it, (whatever there was to take…). As much as I wanted to write something, each time I sat down at my computer, nothing came out. I would stare at the screen but couldn’t even begin to compose a post. It was the same thing in the kitchen. I wanted nothing more than to cook and bake but I was just drained. Once again, it was more of a mental thing than a physical thing. I hadn’t done anything physically demanding, but I was exhausted. Night after night I couldn’t bring myself to put anything together and post about it too. Half way through the week I managed to make some one-bowl brownies but still haven’t got around to putting them up. Tonight though, just knowing that the weekend is ahead of me gave me the strength to get back in the kitchen. Dinner was grilled swordfish with a chunky pineapple salsa and pasta and then I attempted butterscotch pudding for dessert. The consistency wasn’t right on the pudding so I’ll have to work on that one. The fish on the other hand, was thick, hearty and was enhanced by the salsa. Plus, it was done on the bbq so you know it was good. Perhaps what was even better though was that the weather is currently beautiful and the weekend promises to be equally as nice. I’ve got my fingers crossed that it will stay that way and that we might even see some morels pop up.


Photo Sharing and Video Hosting at Photobucket


Grilled Swordfish with Chunky Pineapple Salsa

1 large swordfish steak, (about an inch thick)

1 lemon, cut into slices

Juice of half a lemon, (use the other half in the salsa)

1 inch piece of ginger, peeled and grated, (use half in salsa)

A few dashes of soy sauce


Pineapple Salsa

1/3 of a pineapple, peeled and cut into chunks

5 large cherry tomatoes, cut into sixes

A handful of cilantro, chopped

1 tsp liquid honey

Lemon juice

Grated ginger

Salt

Pepper

Dash of paprika


Coat the swordfish with lemon juice, grated ginger and a few dashes of soy sauce. Set aside while you make the salsa. For the salsa, just combine everything in a bowl and mix it up. Heat the bbq and when it’s hot, put the slices of lemon onto the grill, creating a bed for the swordfish and then lay it on top. Flip once, halfway through cooking. Place on a plate when finished and cover with salsa.


Technorati Tags:

+ + +

April 16, 2007

A Bowl of Sunshine on a Rainy Day

Image Hosted by ImageShack.us


I’m grumpy. Spring is nowhere to be seen and I almost got blown away when I stepped outside this morning. I then proceeded to spend the day in a small room with seven other people who seemed intent on making meaningless chit-chat so as to prolong our miserable stay there. It was certainly an exercise in patience on my part. The only entertainment I got out of the day was observing what the others chose to eat for lunch. I felt like I was in some sort of weird behavioural science experiment where I was the only sane one. I brought my lunch from home and it consisted of leftover lasagna that I made last night, (and was the BEST pasta I have ever made in my life, I got all the way down to ‘1’ on my pasta roller while making the noodles!), a yogurt, a banana, an apple and a bottle of water. Only one other person brought a lunch, if you can call it that. He unpacked a can of diet coke, a twinkie, a pudding cup and a fruit by the foot. Another person bought a sandwich out of the vending machine that had no expiry date or ‘made on’ date, which I found highly suspicious. Three people bought frozen, microwaveable meals from the vending machine which most likely had no more taste than the cardboard they were packaged in. Two people consumed pop and cigarettes and the last person left so I wasn’t able to analyze his lunch. I watched them eat like I would watch a train wreck. It was disgusting and awful but fascinating at the same time and I couldn’t look away. How do people live like this? I wanted to cook for them and show them what they were missing. Getting paid for this would be ideal…


Upon returning home I wanted something sweet and delicious to take the bitter edge off. Despite the frigid weather there’s always room for frozen delights on my plate. So I scooped myself a bowl of homemade pineapple frozen yogurt, topped with fresh pineapple and tried to imagine myself somewhere warm and tropical. While in dreamland I decided that this wonderful fro-yo would be perfect for a new blogging event which is being co-hosted by the lovely Ilva of Lucillian Delights and Joanna of Joanna’s Food called The Heart of the Matter which focuses on creating heart healthy foods. The theme for the second edition, (I shamefully missed the first one) is puddings, or desserts for the North Americans. And although I ate my Pineapple Fro-Yo before dinner, it would still make an excellent dessert.


Image Hosted by ImageShack.us


Pineapple Frozen Yogurt (Adapted from Baking Bites)


2 egg whites

2/3 cup sugar (ground in the blender to a powder, or use confectioners sugar)

250 grams 1% plain yogurt

250 grams non-fat mango-passionfruit yogurt

1 tsp vanilla extract

1 cup pureed fresh pineapple


Combine yogurts and vanilla and whisk until it is smooth.

Beat egg whites until frothy, add sugar gradually and continue beating at medium-high speed until you have soft peaks. Mixture will be gooey, kind of like marshmallow.

Fold yogurt into egg whites in 4 additions, making sure it is well incorporated. Fold in pineapple and pour mixture into your ice cream maker. Freeze as directed and store in an airtight container in the freezer if you are not going to eat it right away.

If your pineapple is nice and sweet, you could cut back on the sugar.


Technorati Tags:

+ + +

April 14, 2007

If I Made Two Types of Mousse Does That Give Me Mice?

Photo Sharing and Video Hosting at Photobucket


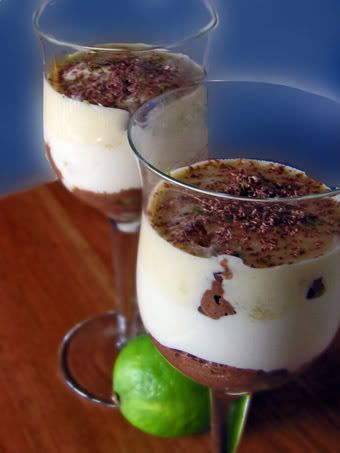
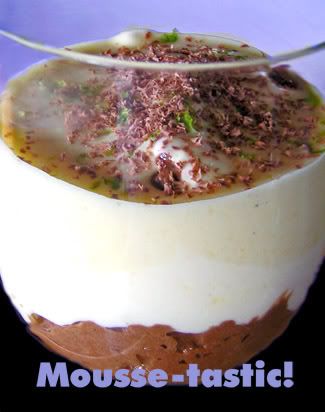
The recipe I used to make these chocolate and lime mousse/mousses/mice was meant to serve six people. I made it today with plans to let it set overnight and then to serve for dessert tomorrow with company. Not too long after I had put the mousse in the fridge, I found out that instead of five people for dinner tomorrow there would be eight. There was no way that mousse for six would feed eight, not with the portion sizes I serve. That meant I would either have to make more mousse or eat the mousse tonight and make something else for tomorrow. Easy decision. Three of us ate all of the mousse and I’ll be making a cake for tomorrow. I think it was an excellent choice, the combination of bittersweet chocolate and lime was irresistible. Each of us licked the bottom of our glass clean. No sooner were the glasses gleaming than I started to get comments like “I’d eat that again”, “I wish there was more of that”. “When are you making this again?”, “Are you sure there’s none left?”. “Mmm, the chocolate and lime was really nice together”, “I looove mousse”. “I could eat more”, “It’s a good thing you didn’t save these for tomorrow night”, “Yup, that sure was good.” You’d think I fed an army with the mousse, but no, these comments were coming from two people who just kept going on and on about the mousse. It’s too bad for them that I don’t like making the same thing twice…


Photo Sharing and Video Hosting at Photobucket


Who knows if I could even recreate the same mousse again anyways? It was a combination of recipes for this month’s round of Hay Hay it’s Donna Day, hosted by Helene of Tartelette. HHDD was originally started by Barabara of Winos and Foodies and is now in its 11th edition and going strong with mousse as the theme. Yummy, yummy mousse.


Chocolate Mousse (Adapted from Bon Appetit Cookbook)


¼ cup milk

2 egg yolks

2 T sugar

3 oz bittersweet chocolate, chopped

1 teaspoon vanilla

3 large egg whites

Pinch of salt


Whisk milk, egg yolks and 1 T sugar in a heavy saucepan to blend. Stir over med-low heat until mixture thickens enough to coat the back of a spoon. Remove from heat and add chopped chocolate, whisk until smooth. Whisk in vanilla. Transfer mixture to bowl and cool to lukewarm, stirring occasionally, about 10min. Beat egg whites and salt in large bowl until soft peaks form. Gradually add remaining sugar, beating until stiff. Fold whites into cooled chocolate mixture in 3 additions. Cover and refrigerate at least 6 hours.


Lime Mousse (Adapted from Bon Appetit Cookbook)


½ cup sugar

¼ cup water

1 teaspoon vanilla

4 T fresh lime juice, divided

½ teaspoon unflavoured gelatin

1 large egg

½ cup chilled whipping cream


Syrup: Combine sugar and water in a small heavy saucepan. Bring to simmer until sugar dissolves and mixtures thickens slightly, becoming syrupy. Remove from heat, add vanilla and 1 T lime juice, refrigerate.

Mix gelatin and remaining lime juice in a small bowl. Let stand until gelatin softens, about 10min. Heat in microwave on short bursts of heat until gelatin dissolves.

Beat egg in a stainless steel bowl at high speed until egg falls in heavy ribbons when beaters are lifted. Gradually beat in the lime juice and gelatin as well as 3T syrup mixture. Place bowl over a pot of simmering water and beat until temp reaches 140F on instant read thermometer, about 5 minutes. Place bowl over a larger bowl of ice and whisk until cool.

Beat whipping cream until peaks form, add in 1 T syrup and combine. Fold the whipped cream into the egg-lime mixture. Cover mousse and refrigerate at least 6 hours.


To serve: Layer the two mousses into glasses. If you have leftover lime syrup, pour it on top. Zest some lime peel and grate extra chocolate for garnish.


Technorati Tags:

+ + + +

April 12, 2007

Where Have I Gone This Time?

Image Hosted by ImageShack.us


Why try one new recipe in an evening when I can try 4? That means I have 4 times the chance of messing something up. To throw another wrench into the machine, I’ve also ventured into the unknown territory of Arabian cuisine. Let me apologize upfront for the bastardization of any recipes that I try in my attempt to make new things. I mean well. If any of you know how to make these dishes properly, you’re welcome to come over to my house and serve them to me. So what possessed me to take on this dinner, composed of foods that I shamefully know nothing about? Meeta of What’s For Lunch Honey? has chosen Arabian cuisine as the theme for the 9th Monthly Mingle. I’m never one to turn down a challenge and I love traveling to new places via my kitchen so all that was left was to find a recipe. But I found many recipes and had trouble narrowing things down to just one, so I didn’t. I chose 4; Green Lentil Soup, Lebanese Kibbeh, Persian Rice and Baklava.


Image Hosted by ImageShack.us


The Green Lentil Soup was mild but flavourful and served as a nice starter to the meal. It was quick to make too and didn’t require much attention. That was a bonus as the Kibbeh certainly required more work. Kibbeh is basically a fried oval shape made up of a mixture of lamb and bulgar which coats another mixture of lamb and spices. As is often the case with me, I made things more difficult than they had to be. I thought I was being so smart too. I looked at the recipes, made a shopping list and went into town to get my ingredients. I didn’t even consider putting bulgar on my list, (a key ingredient in the Kibbeh) because I thought of course I would have some in the cupboard. I was already well on my way to assembling ingredients and putting things together when I realized that all I had in the cupboard was an empty bulgar container. But at this point there was not going to be another trip to the store so I had to look for a substitution. In retrospect I should have used couscous. In reality, I used pearl barley. I don’t think I’ve ever used pearl barley for anything before so why I decided to use it in a brand new recipe, I don’t know. It wasn’t the right choice.


Image Hosted by ImageShack.us


One bad choice led to the need for more changes to the recipe. When I tried to blend things together there was way too much liquid so I started adding multigrain flour despite the fact that flour is not called for at all. Then I forgot the cilantro and had to go back and add it in. The end result wasn’t awful, but I know it could have been much better. The barley was chewy and my Kibbeh was dry. To try to hide the dryness I slathered it with a yogurt sauce that I made up by draining yogurt on cheesecloth and then adding about a teaspoon of za’atar. Za’atar is combination of spices that I’ve never used before either, I just picked some up a few days ago and I thought it sounded Middle Eastern, so I decided it fit in with the rest of the meal. The tangy and cool yogurt was a welcome accompaniment to the unfortunately dry Kibbeh. I’ll have to remake this recipe properly one day because I know it has potential. I love lamb so I should really get into more Arabian cooking as many of the recipes call for it. I’m sure Meeta’s round up of the Monthly Mingle will be chockfull of excellent recipes that will soon be plastered all over my kitchen.


Image Hosted by ImageShack.us


The final recipe that I made was Baklava and I hope that it will find its way into some of your kitchens. My Aunt used to make baklava and I’ve always loved it. I remember thinking it seemed exotic and unlike most sweets that graced the holiday table. Mom enjoys baklava as well and has been pestering me to make it for ages. I’ve been putting it off because of the phyllo dough. I don’t enjoy working with phyllo dough. I find it fiddly and aggravating. It either gets too dry and cracks or too wet and clumps together. And it’s never the right size for what I need. And basically I’m a big baby. I’ll try to keep my whining at bay while I tell you that this recipe was actually quite simple to put together and produced excellent results. The only thing I was irritated by was shelling pistachios. If you can find them unshelled, you’re all set. Then you too can add baklava to the list of dishes you’ve made successfully! I’m hopeful that one day my success list will surpass my failure list. I’d better get back in the kitchen…


Image Hosted by ImageShack.us


Baklava (Adapted from Medierranean: Food of the Sun by Jacqueline Clark and Joanna Farrow)


1 ½ cups shelled pistachios

¾ cup almonds

¾ cup walnuts

1 T ground cardamom

2/3 cup butter, melted

1 ¼ cups confectioners’ sugar

18 sheets phyllo pastry

2 cups sugar

1 ¼ cups water

2 T orange blossom water


First you will make a simple syrup by combining the 2 cups of sugar and water in a saucepan. Bring the mixture to a boil and then simmer for 10 minutes. Remove from heat, stir in the orange blossom water and let cool.

Preheat oven to 325F. In a food processor, combine all of the nuts and pulse until lightly ground. Add the confectioners’ sugar and cardamom and pulse again to combine.

Brush a 9 x 13 inch baking pan with melted butter. Using one sheet of phyllo pastry at a time, (and keeping the rest covered with a damp towel) layer 6 sheets of phyllo into the pan, brushing each one with butter after you lay it down. Pour half of the nut mixture on top of the phyllo and press it down evenly. Continue to layer 6 more sheets of phyllo, brushing with butter between each one. Pour the rest of the nuts on top of the phyllo and repeat the layering process one more time, using up your remaining 6 sheets of phyllo. Pour any leftover butter over the top. Cut the pastry diagonally into small bars using a sharp knife, (it’s easier to do this before the pastry is baked as it is softer at this point).

Bake for 20 min and then increase oven temperature to 400F. Bake for 15 more minutes until golden on top.

Remove from the oven and drizzle with the orange flower blossom syrup. Let stand about an hour so that the syrup can be soaked up. Remove from the pan and try not to eat them all in one sitting.


Technorati Tags:

+ + + +

April 11, 2007

Like Cocaine for Pig Lovers

Photo Sharing and Video Hosting at Photobucket


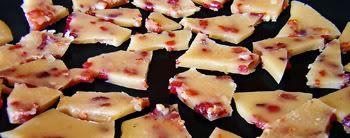
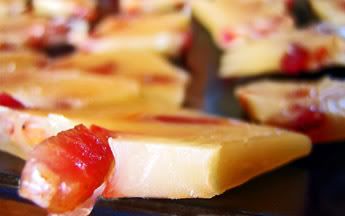
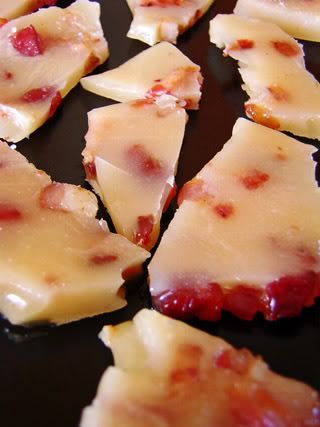
I think I need to clear something up. It appears that some of you may be confused. I received the following comment on my post about mango wrapped thai shrimp: “Just add bacon and I'm hooked.” Well duh! Bacon makes everything better, EVERYTHING! Do I really need to put a disclaimer at the bottom on my posts stating: “This would be better with bacon.” I thought that was assumed. I also thought it was obvious that bacon is even better when you make it yourself, (Ruhlman’s Charcuterie can help you with that). So with those two important points in mind, I bring you BACON BRITTLE!!! It’s the best of both worlds, salty and sweet and chockfull of homemade bacon. Don’t you dare turn your nose up at it either because one taste and you’ll be converted. I brought this platter of bacon brittle to a dinner party and people were hesitant at first to try it, (I didn’t tell them what it was, they just looked at it warily). Then one brave soul took a bite and her eyes lit up as she exclaimed “Bacon brittle!” She had never had it before and I was thrilled that she knew immediately what it was and even more thrilled that she loved it. Once the ice was broken the others grabbed a piece as well and I know I managed to sway more than a few of them over to the bacon side.


Photo Sharing and Video Hosting at Photobucket


I would love to take credit for Bacon Brittle, but I can’t. I learned about it from one of my favourite bloggers, Danielle of Habeas Brulee who wrote a little round up linking to food posts she’s enjoyed recently. Among those links was one for Bacon Toffee made by Off the Bone. Pure genius! I renamed it to Bacon Brittle because I like alliterations, but I followed their recipe exactly. I’m constantly printing out recipes that I see on other blogs with good intentions of trying them out, but more often than not they get filed into my big blue binder never to be seen again. Not this time. I started making Bacon Brittle seconds after reading the recipe. I felt compelled to make it, especially because I had just finished making some more homemade bacon, (once you start, you can’t stop). I went right into the kitchen and got to work. A couple hours later I was chewing contently on a piece of fresh Bacon Brittle, followed by another and another and another... You know you want to make it. Don’t fight the urge. Your taste buds will thank you.


Photo Sharing and Video Hosting at Photobucket


"Life expectancy would grow by leaps and bounds if green vegetables smelled as good as bacon." -Doug Larson


Technorati Tags:

+

April 10, 2007

Rolling Into Spring

Image Hosted by ImageShack.us


Marta from An Italian in the US is hosting this month’s Weekend Cookbook Challenge, (originally started by Sara of I Like to Cook) and the theme is Spring Foods. I suppose you could pretty much put anything you want into that category, so long as you could justify it. I had a ripe mango on the counter so I knew that I would have to find a spring-like recipe that included mango. Quite frankly I was tempted to just put out a plate of sliced mango and call it quits because mango doesn’t need any accompaniment. It’s pretty perfect all on its own. But since I didn’t find “Sliced Mango” as a recipe in any of my books, and this is the Weekend Cookbook Challenge after all, I had to search a little harder. Eventually I found a Thai shrimp and mango appetizer that’s bright and fresh, just like spring. Most importantly though, I got to have my mango and eat it too. There wasn’t a bit of flesh left on the peel or the pit when I was finished with it. The fleshy centre went towards wrapping the shrimp, but the pit and peel were all mine. Mango eating is one of those messy tasks that you need to stand over the sink with your sleeves rolled up to accomplish. Even then, you can’t escape that drop of mango juice that will inevitably roll all the way down your arm, past your elbow and (hopefully) into the sink. It won’t be alone either, because after one drop of juice gets away, others will follow like sheep. Messy, yes, but sweet and smooth and wonderful just the same.


Image Hosted by ImageShack.us


Mango Wrapped Thai Shrimp (Adapted from Food and Wine magazine, Summer 2002)


1lb shrimp, shelled and deveined

2 limes, zest and juice

1 inch ginger, peeled and grated

2 African devil chilies, crushed

2 cloves garlic, minced

1 T peanut oil

1 T fish sauce

1 tsp sugar

Pinch salt

1 mango


Combine all of the ingredients except the mango in a bowl and mix together. Cover and refrigerate for 20 minutes.

Peel mango and then, using either a sharp peeler or knife, slice the entire mango into thin strips.

Heat up a nonstick frying pan over med-high heat. Remove the shrimp from the marinade, add to the pan and fry until pink, 1-2 minutes. Remove the pan from the heat.

Wrap a strip of mango around each shrimp and secure with a toothpick.


Technorati Tags:

+ + +

April 07, 2007

Liqueur of the Day: Frangelico

Photo Sharing and Video Hosting at Photobucket


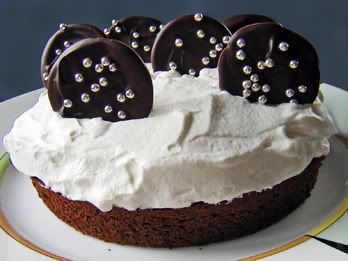
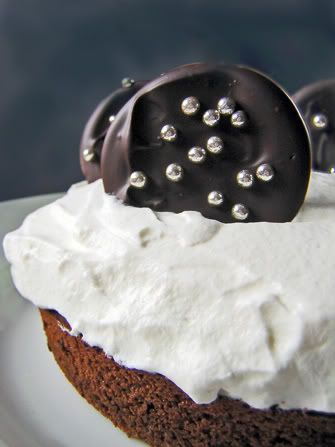
Despite the fact that I haven’t mastered any one technique for cake decorating, I’m always looking for new ones. I’m like a bee that flits around from flower to flower, getting a little bit of pollen from each one, never settling anywhere for very long. I’m kind of annoying that way too, lots of buzzing around the kitchen. But it’s a good idea to keep me around, because like the bee, I produce sweet treats. In this case, it’s a chocolate liqueur cake from Donna Hay’s Flavours. The chocolate decorations are also from Donna Hay’s book, though not as part of this cake. The whipped cream is my own addition too because I thought the cake looked plain. I’ve been adding alcohol to baked goods quite frequently lately. I don’t drink them much on their own but for some reason I love the flavour in cakes and puddings and ice cream. Mmmm ice cream. This new found interest has led me to try more liqueurs too. In this case, it’s frangelico. I’ve always known that it exists, but had no real desire to drink it. Why on earth haven’t I put it in a chocolate cake before? Chocolate + Frangelico = Alcoholic Nutella. That’s genius, pure genius. I’ll post the recipe in a few days, the book is currently a few hundred kilometers away from my current location.


Photo Sharing and Video Hosting at Photobucket


Frangelico Chocolate Cake (Adapted from Donna Hay’s Flavours)


1.2 oz 86% chocolate

3.5 oz bittersweet chocolate

4.5 oz butter

3 eggs

1/3 cup sugar

2/3 cup all purpose flour

1 ½ tsp baking powder

1 cup ground almonds

1 tsp vanilla

1/3 cup Frangelico


Preheat the oven to 315F. Place the chocolate and butter over a large bowl over a pot of simmering water and heat slowly until smooth. Remove from the heat and add all of the other ingredients and mix to combine. Pour the mixture into an 8 inch round cake pan that is greased and lined with non stick baking paper. Bake for 30minutes. Allow to cool and then whip cream with a couple tablespoons of frangelico and a touch of sugar and coat the cake. To make the chocolate decorations simply melt chocolate (I used semi sweet) in a double boiler or in the microwave and spoon circles of it onto a silpat. You can decorate them with whatever you’d like, I used silver sugar balls but you could also used coloured sprinkles. Place in the fridge for 30 minutes and then remove and set on counter. When they’re firm, remove them from the silpat and stick them on the cake.


Technorati Tags:

+ + +

April 05, 2007

The Bunny Returns with Good News

Image Hosted by ImageShack.us


The bunny’s back and it’s not even Easter yet. This wily little rabbit is at it again, baking cake and spreading Easter cheer. This time he’s even filled the cake with spring time jelly beans, what a good bunny! Why has he come early? Because Julia of A Slice of Cherry Pie is hosting her first event, an Easter Cake Bake. Well, you know the bunny loves a good cake bake as much as the next person, so he was eager to join in, or maybe it was me who was eager, no matter. I wanted to submit my monkey cake, just cause it was cool, but I couldn’t quite figure out how monkeys tied into Easter. I tried to think of a link, but the best I could come up with was: monkeys like bananas, bananas are yellow, yellow is a bright colour, bright colours are associated with spring, spring is when Easter is… Uh, right. No dice.


Image Hosted by ImageShack.us


But as luck would have it, one of the women who had a piece of the monkey cake liked it so much that she asked me to make her the exact same cake, except in the shape of an Easter egg nest with jelly beans in the middle. Short of making a bunny cake, you can’t get much more Easter than that. Hurrah, problem solved, sort of. She wanted the flavours to be exactly the same cake as the monkey cake, (banana cake with peanut butter cream cheese icing) but if you’ll recall, the middle of that cake was filled with a layer of caramel that was leftover from my failed attempt at making salted butter chocolate caramels. This twist in the plot meant that I would have to recreate failure. Failing on purpose is not a concept I’m familiar with. I couldn’t bring myself to do it. I had a brand new candy thermometer and was itching to try the caramels again, the proper way, cooking them all the way to 245F. But if I did things the way I wanted to, the caramel would be much too thick to layer in the cake. It seemed like I was doomed either way. Or was I? I like to have my cake and eat it too. I undercooked half of my caramel, then poured it into a pan that I had divided in two with parchment paper, then returned the pan to the stove to allow the rest of the caramel to reach the full temperature. Could it really be this easy? Yes, yes it could.


Image Hosted by ImageShack.us


Ladies and gentlemen, I have conquered caramel! I will no longer live in fear of hot sugar. My dreams won’t be haunted by the ghosts of caramels that could have been. If a recipe calls for caramel, I will make it with gusto! I think this calls for a song…


Image Hosted by ImageShack.us


Technorati Tags:

+ + + + +

April 04, 2007

Add Years to Your Life with Waffles

Photo Sharing and Video Hosting at Photobucket


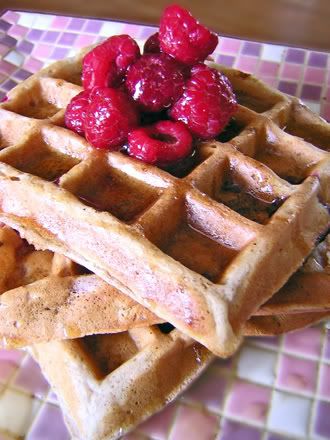
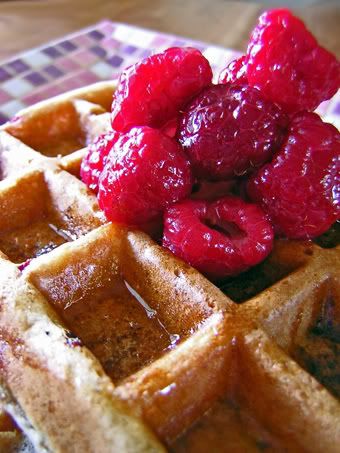
Some people might call a waffle iron a novelty item or just another gadget to clutter up the kitchen. I disagree. Waffle irons are a key factor in achieving life satisfaction. You can’t really ever be happy without a waffle iron. Think about it; wouldn’t your life be infinitely better if you woke up in the morning to fresh waffles drenched in maple syrup? Of course if you want to wake up and have them already made you’re also going to have to acquire someone to make them for you, or you can do what I do and make a large batch and freeze the rest. That’s the beauty of waffles, they toast up very nicely for a quick breakfast, brunch, lunch, lupper, supper or late night snack attack. Waffles are very versatile that way. And they like everyone. Although they’ve got a particular sweet spot for maple syrup, I’ve seen waffles schmoozing with bananas, raspberries and strawberries, (basically everyone in the fruit family) carrots, zucchini and sweet potatoes, (oooh, nutritious) and like everyone with taste buds, waffles love bacon. Mmmmm, bacon… I’ve got some in the making right now, but this isn’t a post about bacon, (tasty, tasty bacon) this is a post about waffles, so here you go: my version of Alton Brown’s waffles, enjoy! If you don’t have a waffle maker, what are you waiting for? Run, don’t walk to the store to buy yourself one. You’ll add 10 years to your life.


Photo Sharing and Video Hosting at Photobucket


Life Enhancing Raspberry Waffles (Adapted from Alton Brown’s Basic Waffles)

4 3/4 ounces all-purpose flour, approximately 1 cup
4 3/4 ounces whole-wheat flour, approximately 1 cup
1/2 teaspoon baking soda
1 teaspoon baking powder
1 teaspoon salt
3 tablespoons sugar
3 whole eggs, beaten
2 ounces unsweetened applesauce

10 ounces raspberry yogurt

6 ounces milk

1 tsp vanilla

1 cup raspberries, generous

Vegetable spray, for waffle iron


Preheat waffle iron according to manufacturer's directions.

In a medium bowl whisk together the flours, soda, baking powder, salt, and sugar. In another bowl beat together eggs and then add the yogurt, milk and vanilla. Add the wet ingredients to the dry and stir until combined. Allow to rest for 5 minutes.


Ladle the recommended amount of waffle batter onto the iron according to the manufacturer's recommendations. Close iron top and cook until the waffle is golden on both sides and is easily removed from iron. Serve immediately or keep warm in a 200 degree F oven until ready to serve. Top with more raspberries and some maple syrup.


Technorati Tags:

+ +

April 02, 2007

Here fishy fishy fishy...

Photo Sharing and Video Hosting at Photobucket


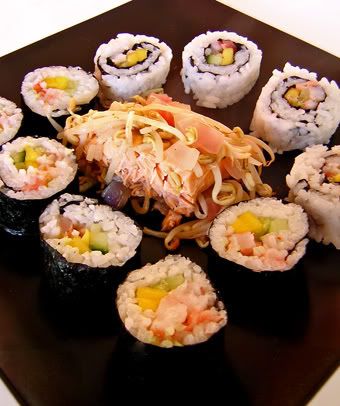
Rolling sushi is not like riding a bike. For all of the obvious reasons like how you don’t have to wear a helmet while rolling sushi, (well, you could if you wanted to) but mainly for the fact that once you’ve learned how to ride a bike, it’s engrained and you don’t have to learn again. For me, sushi is the opposite. Every time I roll sushi it’s like the very first time all over again. The first few rolls are lopsided, the rice is spilling out, usually somehow ending up in my hair, that stuff is sticky. And even once I’ve managed to roll something that somewhat resembles a proper cylinder, then I have to learn how to cut the thing. I think I need to add a kitchen ruler to my ever growing list of kitchen gadgets, that and someone to sharpen mine knife between each slice. By the time I finally learn how to roll and cut sushi, for the umpteenth time, I’m finished. The last roll is always the nicest one. Then time passes and my knowledge of sushi making is completely erased from my brain. As soon as I’m absolutely sure that I have no clue how to make sushi rolls, that’s when I decide to make them again and the whole process is repeated. Bike riding is so much easier. In case you were curious, these rolls contain shrimp, mango, cucumber, pickled ginger and wasabi. They were very good, even if they were misshapen.


Photo Sharing and Video Hosting at Photobucket


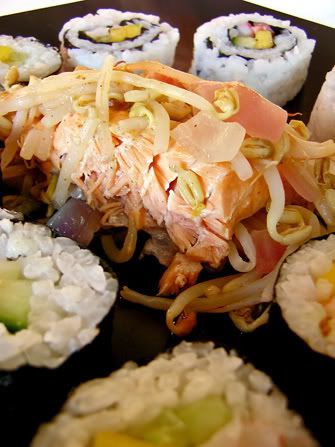
Aside from the sushi, I decided to give a new salmon recipe a try. Despite the fact that I had never made this before, it was a breeze. There was definitely no sushi-like learning curve for this one. I modeled the recipe after one I saw on Chef at Home. The recipe doesn’t seem to be online so I was just going with what I remembered. The reason this recipe stuck in my mind was because it involved cooking the salmon on a bed of bean sprouts. That’s not something that would have occurred to me, but after having tried it I’ll certainly be making it again. For the salmon I took a layer of tinfoil and lined the bottom with sliced limes, covered those in bean sprouts, layed the salmon on top and covered that with more bean sprouts, chopped red onion and some ginger. The whole thing was wrapped up in tin foil and put on the bbq until the salmon was cooked through. It was such a simple dish but it was packed with flavour. I’m giving this one a gold star. And hurrah for no longer having to bbq in sub-zero temperatures!


Technorati Tags:

+ + +