October 06, 2006

How To Make Apple Butter... Sort of.

Photobucket - Video and Image Hosting

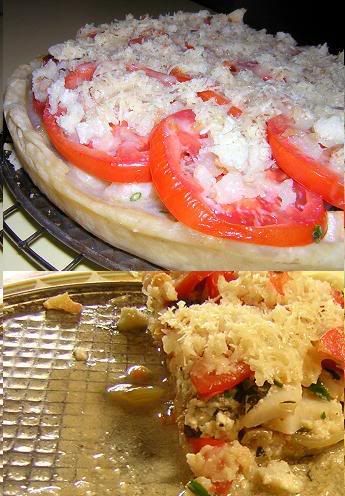
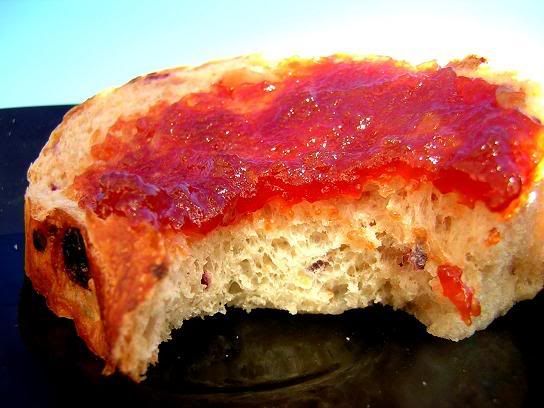
Let me start out by saying a few things: Yesterday’s post was boring, I know. I assure you the stuffed peppers were very good, but the post was not, sorry about that one. Second, the above picture is to show that eventually, I did manage to make apple butter, it just happened in a very roundabout way. I think the rest of this post ended up being a little bit wacky to balance out the boringness of yesterday. Now I’m even-steven and somewhat normal posts should resume tomorrow… whatever ‘normal’ happens to be. Anyways, enjoy the weirdness that follows.
**Some pictures may not be 100% accurate, my skin is not actually blue and there’s more stuff in my kitchen, use your imagination.

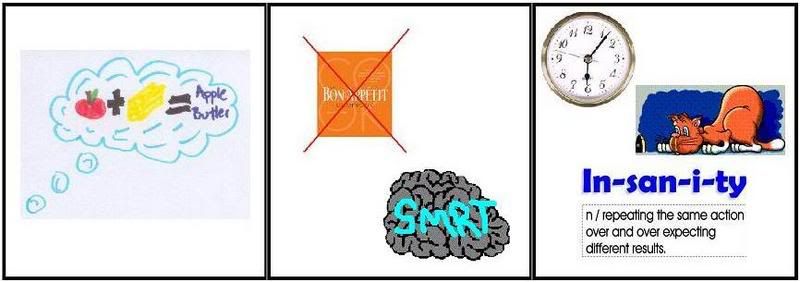
Given that I’ve recently discovered that I can make jam I thought that I could also make apple butter. I thought I could do this without consulting a recipe. After all, in the kitchen, I don’t need directions, (or at least this is what I have managed to convince myself). The following is the account of how I made apple butter. I suggest that no one attempt this process unless time is not a factor that matters, patience is in abundance and insanity runs in the family.
Photobucket - Video and Image Hosting

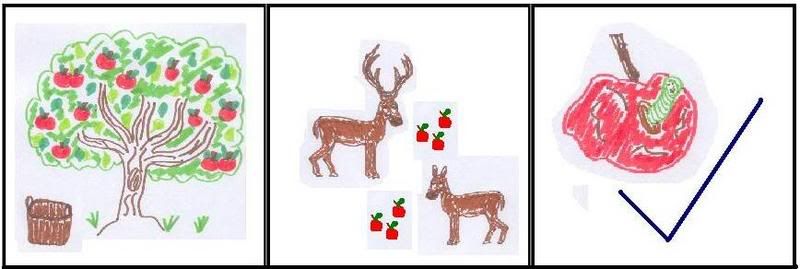
First I picked apples. You can’t make apple butter without apples, (or butter???). Off I trudged, into the backyard with a bushel basket, eager to get started. The deer like apples too, I saved them the bad ones.
Photobucket - Video and Image Hosting

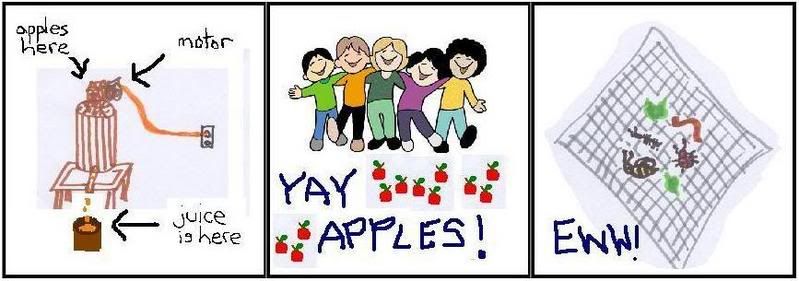
Then I had to turn my freshly picked apples into juice. To do this I used an old fashioned apple press, only because I don’t have a new fancy kitchen gadget (like a juicer attachment for Wilbur, it’s on the wish list). Actually, I don’t even have an old fashioned apple press, but I borrowed one from friends. This thing actually used to be cranked by hand, apparently it was great fun for the neighbourhood kids. Now it is attached to an old motor which turns the paddle that crushes the apples. Eventually you end up with apple juice. Unfortunately you also end up with some ‘extras’. It seems that my apple trees, free of pesticides, are full of pests. So I strained the juice through some cheesecloth.
Photobucket - Video and Image Hosting

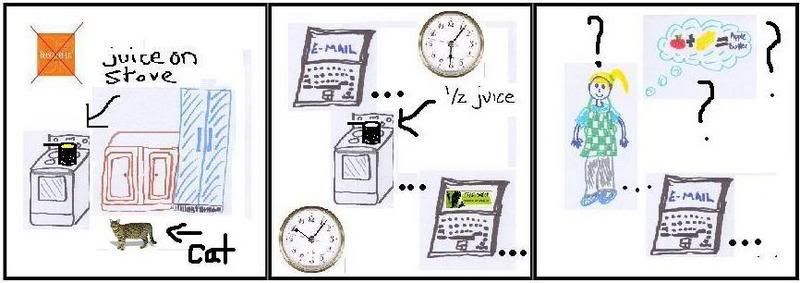
Back in the kitchen I set about making apple butter. First thing to do was NOT to consult a recipe. I would do it my way. I poured the juice into a pot and turned it up high until it boiled for a while, then reduced it to a simmer. This was going to take a while, so I went to check my email. Some time later I went back to the kitchen to check on my juice, it had reduced by about half. Still very much like juice, not so much like butter. I went to read a blog or two, or 20. The smell of apples got stronger. I went back into the kitchen to check on them. The juice had reduced by another half. Still not butter though. Hmmm… I went and checked email again.
Photobucket - Video and Image Hosting

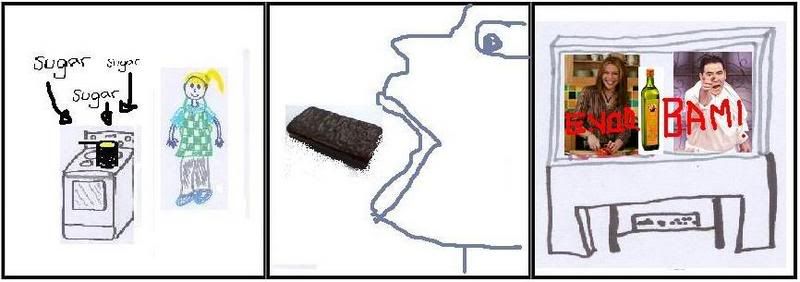
At this point I relented slightly and decided a quick look at a recipe wouldn’t be so bad, but I was definitely not reading the whole thing. A look at the ingredients list showed that to make apple butter you needed sugar. I didn’t look at the recipe long enough to see how much sugar was required, so I just threw some in at random. Then I ate some Tim Tams and went to watch TV. The first show that came on was the female Emeril’s new talk show. I can almost hear her saying “Now just add some E.V.O.O. and BAM!”. I shuddered and changed the channel.
Photobucket - Video and Image Hosting

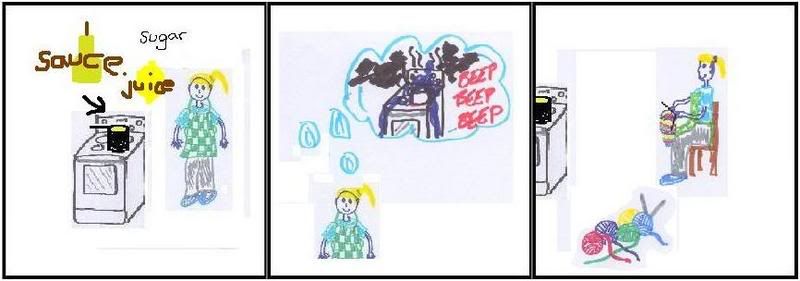
I wondered if the sugar was helping turn my juice into butter. I thought maybe I should sneak another quick peak at the recipe. I noticed that the recipe called for applesauce as well as apple juice. But I didn’t have any applesauce, I had turned all of my apples into juice. I did have some spiced pear sauce in the freezer though, so I put it in without regard for measurement. More TV. Another look at the recipe. Lemon juice was added along with some more sugar. At this point it seemed like a little thickening might be happening. I was concerned that if I left the kitchen and got distracted I would return to a replay of the horror that happened when I ignored boiling grape juice… I brought a chair into the kitchen and sat staring at the pot. That was awfully boring. I went and got my knitting. I’m making a sweater for the Baby Genius. I was now being productive. The sleeve I was working on is actually much more complicated than the drawing shows, more complicated than my abilities with Paint allow me to demonstrate. I spend a lot of time undoing rows of stitches to fix mistakes, it’s a wonder I ever get anywhere. What was I doing in the kitchen again? Right, I stirred the pot. Still not thick enough, but it was starting to look a little more interesting.
Photobucket - Video and Image Hosting

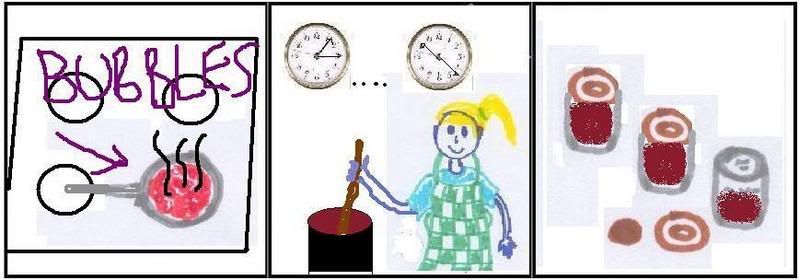
Back to the knitting, but not for long. There was a whole lot of bubbling happening in the pot and not a whole lot of apple left. The knitting was abandoned as I took up a permanent stirring position. I overestimated the readiness of the apples. I was Official Stirrer for a loooong time. Finally, impatience got the best of me and I decided that they would definitely thicken up a little after cooling so it was into the jars for my apple butter, (which, curiously enough, contains no butter, apparently for some people the consistency of the finished product is similar to butter, they probably follow a recipe or something). I looked at my cooling jars of apple butter. All of this work and I only get 2 and a half jars of product??? Good grief. A recipe probably would have warned me of this. But my way was more fun, right? Right?
Photobucket - Video and Image Hosting

Anyhow, I’m using this apple butter making adventure to announce my entry into the second round of Canadian Blogging By Post which is being hosted by Confessions of a Cardamom Addict http://cardamomaddict.blogspot.com/. The first round was hosted by Sweet Plaisir: Plaisir Sucré http://sweetpleasure.blogspot.com/ and had chocolate as the theme. This time it has been decided that the theme is Our Season’s Bounty. No matter what part of this great land we are in—city or country—our stores and markets brim with wonderful foods from our farmers’ harvests—apples, beans, corn, grapes, plums, spinach, tomatoes—it only makes sense for CBBP 2’s theme to be a spotlight on our season’s bounty. Packages away!

Photobucket - Video and Image Hosting


Technorati Tags:
+ + +

October 05, 2006

Everybody's Getting Stuffed!

Photobucket - Video and Image Hosting

A lot of my inspiration to make things comes from other blogs that I’ve read. Sometimes my end product looks similar, sometimes it’s completely different. Recently a lot of people have been getting stuffed; Meeta of What’s For Lunch Honey? made stuffed Greek tomatoes, and Jeff of C for Cooking made stuffed peppers, just to name a couple. After thinking about this for a while I finally got around to doing some stuffing of my own. I opted for peppers as I had picked up a basket of them at the farmer’s market along with some onions, corn, chorizo sausage and a few other goodies. I was also anxious to use my new Australian ground bush tomato spice from Ellie of Kitchen Wench. It was a match made in heaven.
I didn’t follow any sort of recipe but just used the ingredients I had on hand and I must say, it turned out very nicely. When all was said and done my peppers had been stuffed with wild rice, onions, corn, tomato, chorizo sausage, old cheddar cheese, mushrooms, a hot jalapeno pepper, Australian ground bush tomato and some parsley. The whole thing went in the oven until the peppers were soft and delicious. Stuffed peppers make a great side dish because the variations in the recipe are infinite. You can basically just use whatever you have laying around, if you want to use up a bunch of veggies, stuffed peppers are great. They’re also pretty enough to prepare for guests, you never know what you're going to find when you take off the lid.
To finish off my dinner I had some white fish with a chermoula sauce that I found in my new Australian delicious. magazine, no pictures of that one, but it was something different to make and fish is always easy. I love new things!


Technorati Tags:
+ + +

October 04, 2006

A Bagel To Call My Own

Photobucket - Video and Image Hosting

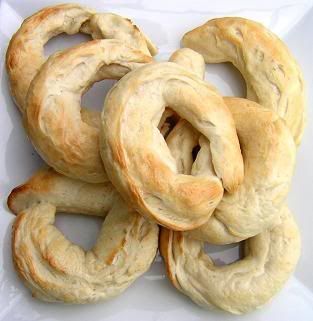
Despite the fact that I don’t really get along well with things requiring yeast, I keep trying. This recent adventure with yeast is a result of Nigella and her recipe for bagels. And it actually went very well! Maybe it won’t take so long for me to become a domestic goddess after all…
I set to work making the dough last night, Nigella warned that this was seriously dense dough and that it would require a whole lot of muscle or about 10 minutes with a dough hook. I’m not against manual labour so I let Wilbur, (you might know him better as my beautiful new Kitchenaid, but he will henceforth be referred to as Wilbur) do the first 9 minutes of kneading and then I took over for the 10th. Nigella doesn’t lie, the dough was thick. Instead of making the bagels last night though, I decided to let it rest overnight in the fridge, I had seen Alton Brown do this and I’d trust any of his methods to work. This morning I pulled the dough out, kneaded it again as per the directions and then shaped my bagels.
Bagel making is a two step process as you poach them first and then bake. I got a big pot of water boiling and then dropped in my first two rings. It was pretty neat. The bagels go in for 1 minute, and are flipped half way through. A couple of my rings weren’t very securely attached and separated into c-shapes during poaching but I had plenty that worked out near perfectly so I was ok with those ones. I always eat my mistakes. From the boiling water I transferred the puffy wet bagels into a very hot oven. Nigella suggested 500°F or as hot as your oven would go. They started steaming immediately when I put them in, creating a nice crust. 10 minutes later bagels were ready! I ate one immediately, hot out of the oven with butter and I was surprised to find that I had actually made bagels. These weren’t just rings of bread, they were real, chewy bagels with a nice, slightly crisp exterior. As with homemade bread, bagels are exponentially better when made at home as opposed to being purchased from the store where they've been sitting on a shelf forever. I just don’t know why it’s taken me so long to realize that bagel making is a possibility. I’m discovering new things everyday. Jam’s easy to make, bagels are easy to make, there’s no end to the madness!

Photobucket - Video and Image Hosting

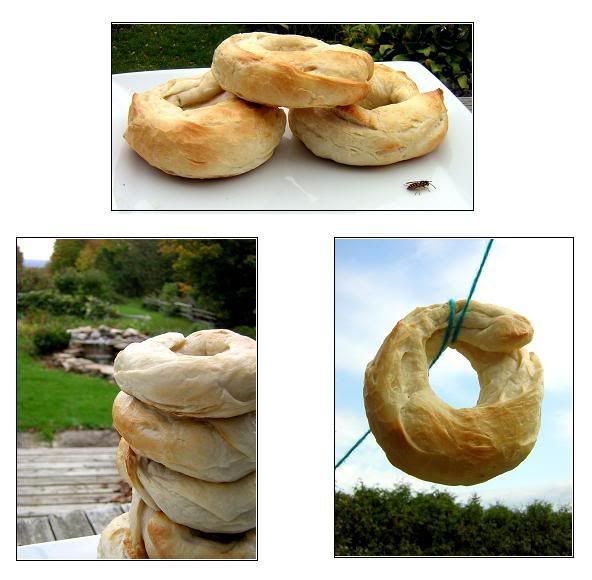
Evidently, once the bagels were made, I also enjoyed taking their picture. It was such a beautiful day that I decided to do this outside. I was having fun until the wasps started attacking. I then proceeded to run around the deck flailing my arms and yelling obscenities at the wasps, trying to escape them. This only made them angrier. My anger one upped theirs when they started chasing not only me, but going after my precious bagels as well. It was time to retreat to the house but as I reached to grab my plate of bagels, a wasp had beat me to them. So I took his picture. And then ran in the house.
Alternate titles for this post: “Excuse Me Waiter? There’s a Bee on My Bagel” or “Tower of Bagel”… I like bagels.


Technorati Tags:
+ + + +

October 03, 2006

Clafouti: As Fun To Say As It Is To Eat

Photobucket - Video and Image Hosting

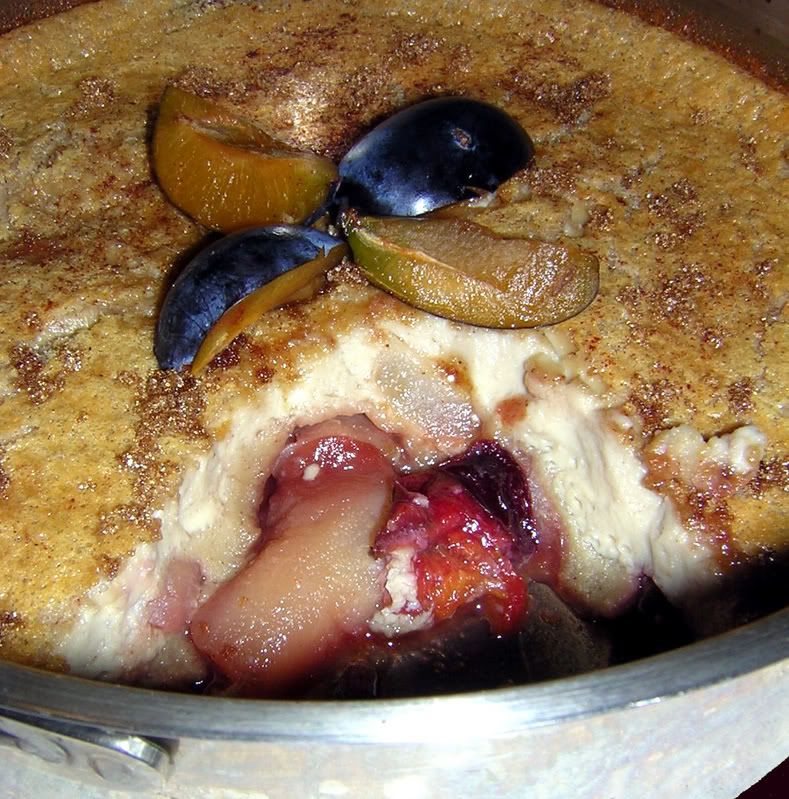
I’m going to admit that I didn’t really know what clafouti was until I made it. And the only reason I decided to make it was so that I could continuously say “I’m making cla-fou-ti!” in a sort of sing-song voice. It’s just a fun word to say, kind of like salsa. Say it out loud, do it! Clafouti. Salsa. Besides, as I later determined, clafouti is not just fun to say, it’s really good to eat! I was originally making mine just with pears, (to use up the last of another bushel brought over by the friends with the pear tree) but then Mom started asking if I was putting plums in and what else goes in clafouti, what about peaches and cherries and… And when I say she was asking, I mean she was suggesting that’s what should be put in. At this point I told her that if she wanted to make the clafouti she was welcome to, otherwise, get out of the kitchen. Of course I didn’t really want her to make it and neither did she. As a compromise I added some plums, but that’s where I drew the line. You can’t let other people think they can run your kitchen, you’ve got to show them who’s boss. Normally I’m not opposed to additions, but I was trying to be good again and follow a recipe. This one was for Roasted Pear and Cinnamon Clafouti from the Bon Appetit Cookbook, the recipe can also be found here http://www.epicurious.com/recipes/recipe_views/views/107530. And other than the plums, the only other thing I added was some fresh pressed pear juice at the same time as the maple syrup went into the skillet.

Although clafouti is fun to say and tasty to eat, it’s not necessarily the prettiest dessert to look at. At least mine wasn’t. I can see that is has potential, but not using this method per se. It would be nice in a slightly deep tart pan instead of a skillet. The bonus of the skillet method though is that it’s all done in one pan and goes from the stove top to the oven to serving without any fuss. I even made spiced pear buttermilk ice cream to accompany it, but like every time I make ice cream, I forgot to churn the freaking thing and hours later when I finally remembered it was solid as a rock and all crystallized. We went without ice cream. I’m actually currently trying to melt down the ice cream so that I can refreeze it, this time with churning. I don’t know if this will work, but I figure the texture can’t get any worse than it is.

Perhaps there are other people who don’t know what clafouti is either, and I fear my picture my not have resolved that at all. You begin with the bottom layer which is fruit and syrup reduced on the stove top and then you pour an egg mixture over this and pop it in the oven. About 40 minutes later you’ve got yourself a light custard consistency on top and warm gooey fruit on the bottom. For some reason I had it in my head that clafouti was cake-like. I was wrong, definitely custard and definitely delicious.

In other news, my $7 waffle maker caught fire this morning. Who would have seen that one coming? R.I.P. waffle maker, you were loved.


Technorati Tags:
+ + + + +

October 02, 2006

My Very Own Australia Day!

Photobucket - Video and Image Hosting

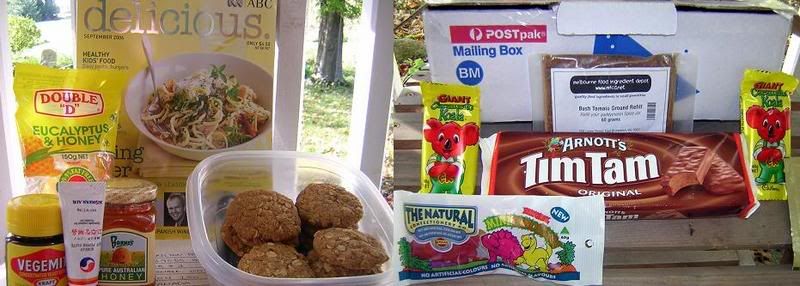
The mail was late arriving today and I was getting worried it wouldn’t come at all. But it finally did and when I saw the slip from the post office saying I had a package to pick up I literally ran back to the house to get the car keys and speed off to pick it up. My Blogging By Mail package was here! It came all the way from Australia and the absolutely amazing Ellie of Kitchen Wench. It was opened by customs but appears to all be in one piece. A million and more thank yous to Ellie, I was so happy when I got my package. She did an excellent job of including some Aussie favourites and things that I enjoyed regularly when I was there that I can’t get here, like Tim Tams! I think the reason I like Tim Tams the most (aside from the fact that they’re delicious) is that when I first arrived in Oz, after a 23+ hour flight as well as a 3 hour layover in Vancouver and a 17 hour layover in Taipai, the first thing that the Aussie who picked me up at the airport offered me to eat was a chocolate Tim Tam. I was hooked immediately. Later I was also introduced to the Tim Tam Slam. I thought the Tim Tam couldn’t get any better, but then I had it like this: you bite off opposite corners of the Tim Tam and use it like a straw to suck up a warm drink (hot chocolate, coffee, etc…) but just until the liquid hits your lips, then you have to shove the whole Tim Tam into your mouth or else it was disintegrate into your drink. It’s fabulous. Before I get going too much on the Tim Tams, I’ll explain what else was in my package:

-Homemade Anzac biscuits. I don’t know quite how this oatmeal-coconut cookie came to represent Anzac, but Anzac Day is celebrated every year in Australia and New Zealand to commemorate the two sets of troops fighting together at the Battle of Gallipoli. Or something to that effect. Darn good cookie. Or biscuit.
-September’s issue of delicious. magazine. I’ve been looking for delicious. here but have yet to find it. I’ve heard so many good things about this magazine, (voted the world’s best food magazine) and I’m very happy to have an issue.
-2 giant caramello koalas. Caramel filled chocolates in the shape of koalas. There are also some frogs and other animals filled with a variety of gooey goodness that I sampled while in Oz.
-Barnes Australian honey. I’m sure it will be wonderful.
-Vegemite. I’m sure this will not be wonderful… I’ve tried vegemite. Actually, I tried it shortly after my first Tim Tam. This only served to reinforce my belief that Tim Tams are amazing and vegemite is not. I hear it’s an acquired taste. I’m always willing to give something a second chance so I sampled some again in a very very thin layer on some buttered toast and for the record it wasn’t horrible.
-Eucalyptus and honey hard candies. I’m sure they’re good all on their own, but would especially help to soothe a sore throat.
-Ground bush tomato. I asked Ellie what this would be used for and she said as a rub on meats, as a spice, in soups, etc. It smells super.
-Ssangwha tea of dongsuh. This is a Korean tea, used for healing what ails you and is apparently quite potent.
-Natural confectionery co. dinosaur lollies. I was thrilled to get these! By North American standards they would be called gummy candies, but in Oz they’re lollies and I used to get them from the bulk bins at the lolly shop on campus to eat during class.
-Tube of Korean hot pepper paste. I like hot and spicy things so I’m looking forward to trying this very soon.

And that was my package! Once again, I’m infinitely grateful to Ellie for her generosity and excellent package. I’m so happy with everything!
Also a big thank you to Stephanie of Dispensing Happiness for organizing this event, I’m sure it wasn’t easy to sort out 89 bloggers and packages but she did a wonderful job. Hurrah!


Technorati Tags:
+ +

October 01, 2006

It’s Like a Giant Turtle

Photobucket - Video and Image Hosting

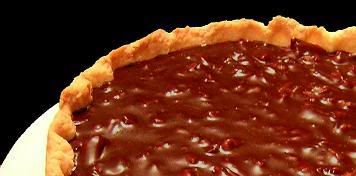
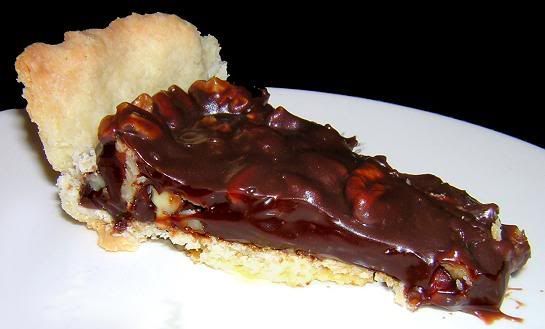
October’s issue of Bon Appetit is their 50th anniversary issue. It’s basically a look back at some of the hottest trends over the years, with new recipes that are updated versions of the classics, categorized by decade. Tonight’s tart takes us back to the 70’s, the decade when people were encouraged to buy local, seasonal produce, when Asian and Latin flavours started to appear on restaurant menus and when a young chef named Wolfgang Puck started building his empire. Of course what would the 70’s be without a little decadence? And so, Bon Appetit was inspired by a popular Wolfgang Puck dessert to create the recipe for Chocolate, Caramel and Walnut Tart. I was thusly inspired to change it to a Chocolate, Caramel and Pecan tart, but that is surprisingly the only substitution I made. I followed the rest of the recipe to a T.

It’s funny, when you actually follow a recipe correctly, it turns out pretty well. I seem to have trouble accepting this. The only problem that I had was with making the filling and my problem can be easily avoided if you heed the following advice: Don’t try to boil fresh pressed grape juice at the same time that you make the filling. It’s as simple as that.

I had picked a bushel basket of grapes yesterday and Dad pressed them today so that I could turn them into grape jelly and juice. He came into the house with the pressed grapes just as I was getting ready to make the filling and passed it on to me to finish. I placed the grape juice in a pot on the stove to boil. On another burner I placed a large pot for my tart filling and boiled sugar and water together until it reached, as started in the recipe, a dark amber colour. At this point you’re supposed to remove the pot from the heat and add in the cream. It was also at this point that my grape juice really started to boil. Up and up and up the sides of the pot it went. I was completely oblivious to this as I was concentrating on deciding when my sugar and water mixture had reached the proper shade of amber. Don’t turn your eyes away from boiling fruit for a second! That’s what’s I should have been telling myself. Instead, I was removing my dark amber mixture and adding in the cream. Suddenly, my attention was very much focused on the grapes as I watched in horror as they boiled well over the top of the pot and spread over almost the entire stove. As soon as the juice hit the hot elements it bubbled up and burned, smoke started filling the kitchen and sparks flew off of the burner. The smoke alarm began to blare. BEEP BEEP BEEP! Yes, I KNOW that there’s smoke, thank you very much, would you please shut up now? I shoved the juice off the burner, turned off all the elements, waved a towel in the general direction of the smoke detector and desperately attempted to whisk the cream and dark amber mixture. This whisking wasn’t going so well. My whisk had welded itself to the bottom of the pot via a huge chunk of solidifying caramel. This was not in the recipe. By this time Mom had wandered into the kitchen and was wondering why I was making so much noise. I’m sure I had a fairly pained look on my face and Mom took over the grape juice disaster so that I could focus on the lump of caramel that was supposed to be smooth.

As much as I was trying to follow the recipe exactly, I had to deviate here to fix the caramel problem. For a while I thought I would have to throw it out and start over. The huge lump of toffee was quite hard and was stubbornly refusing to come off my whisk. I heated it up and whisked away until I finally had a smooth caramel, (with maybe only a little bit still stuck on the bottom). After that everything was just super. I had to do some serious rearranging in the fridge to make the tart fit so that it could chill, but that wasn’t hard for a tetris pro like myself. Finally, a few hours later and without seconds of dinner (I had to save plenty of room) my chilled tart of 70’s decadence was ready and delicious.

Photobucket - Video and Image Hosting

The recipe is unfortunately not up on the website yet, so I’m actually typing it out for you, but be warned- this tart is sinfully good, sinfully.

Chocolate, Caramel and Walnut Tart (Bon Appetit, October 2006)

Crust
1 ½ cups all purpose flour
¼ teaspoon salt
½ cup chilled, unsalted butter, cut into ½ inch cubes
4 tablespoons (or more) ice water

Filling
1 cup sugar (preferably superfine)
¼ cup water
1 cup heavy whipping cream
¼ cup unsalted butter, room temperature
2 tablespoons honey
2 teaspoons vanilla
2 ounces chopped bittersweet chocolate (not unsweetened- I used 70% dark chocolate)
2 ounces chopped semisweet chocolate
2 ½ cups toasted pecans, cut into ½ inch pieces (I used pecans and decreased it to 2 cups and could have probably decreased it a little more)

For crust:
Blend flour and salt in processor 5 seconds. Add butter to processor. Using on/off turns, blend until coarse meal forms. Add 4 tablespoons ice water. Blend until dough just begins to come together, adding more ice water by teaspoonfuls if dry. Gather dough; flatten into disk. Wrap; chill at least 1 hour.
Roll out dough on lightly floured surface to 14” round. Transfer dough to 11” diameter tart pan with removable bottom, (mine was only 10”). Cut off all but ½ inch of overhang. Fold overhang in and press, forming double thick sides, (I was a little off here… it happens). Pierce crust all over with fork; chill 30 minutes.
Preheat oven to 400F. Line crust with foil, fill with dried beans or pie weights. Bake 20 minutes. Remove foil and beans. Bake until golden, pressing with back of fork if crust bubbles, about 20 minutes longer, (mine took more than 20min, but that might have been because it was thicker than it was supposed to be). Cool completely.

For Filling:
Stir 1 cup sugar and ¼ cup water in heavy large saucepan over low heat until sugar dissolves, increase heat. Bring to boil, brushing down sides of pan with a wet pastry brush. Boil without stirring until deep amber colour, swirling pan occasionally, about 8 minutes.
Remove from heat, add cream (mixture will bubble). Return pan to low heat, whisk caramel until smooth. Add butter, honey, and vanilla. Whisk until sauce thickens slightly, about 3 minutes.
Remove from heat. Add all chocolate, whisk until smooth. Stir in nuts. Spread in crust. Chill tart until firm, at least 3 hours or overnight.


Technorati Tags:
+ + + +

September 30, 2006

Sweet Little Tarts

Photobucket - Video and Image Hosting

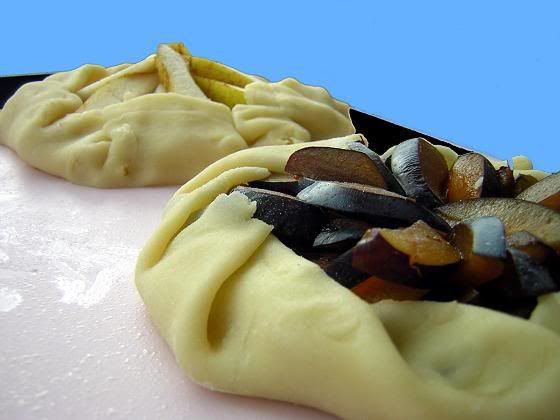
I was puttering around the kitchen this afternoon, trying to decide what I felt like making and decided to make up some little, (but not mini) tarts. I opened the fridge to get out some butter for the pastry and realized we were all out of butter. I hate it when that happens, especially when there are plums and pears on my counter telling me that they want to become tarts. Then I remembered that I had thrown some leftover sugar cookie dough into the freezer when I was making my surprise boxes for Sugar High Friday#23.

Photobucket - Video and Image Hosting

I rolled out the dough and decided there was enough there to make two small tarts. The problem is that I don’t have small tart pans, don’t even have a big tart pan. But, I have been seeing an awful lot of free form galettes lately and so here’s my contribution to the trend: 1 pear and 1 plum galette. The pears are from the same friend who brought over a basket of pears last week that was turned into pear sauce. The plums are from my Grandma’s plum trees. I had wanted to make a third one out of apples from my tree, but I ran out of dough. I guess I’ll survive with just the two… Sigh… I was slightly cheered when I pulled out my new pink baking mat to use for the first time. It looks pretty so I can only imagine that that it will work fabulously. The tarts are currently waiting their turn to enter the oven. It has been occupied for the last 4 hours by homemade baked beans which show no sign of making their exit and I don’t think the flavours would mingle in an altogether pleasing way so the tarts will wait. More patiently than me, I’m sure.


Technorati Tags:
+ + + + +

September 29, 2006

One Less Item to Buy at the Grocery Store

Photobucket - Video and Image Hosting

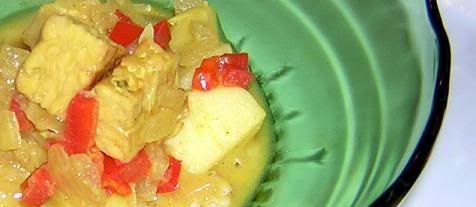
I learned two things today. The first was that I probably shouldn’t photograph things in green bowls. I assure you, the colour of my meal was not quite as awful as it looks. The second thing I learned was that I cannot properly cook tempeh. I’ve tried before and I’ve even followed recipes exactly (sort of…) but I have only ever enjoyed tempeh when I didn’t make it. It’s not like I’ve never had tempeh and then tasted this and decided I didn’t like it. I’ve had wonderful tempeh that I’ve had second and third helpings of, that just never happens when I’m in charge of the stove.

The recipe that I made for dinner was an adaptation of Culinary in the Desert’s adaptation of Cooking Light’s recipe for Tempeh Coconut Curry, and if you take out the tempeh, the curry was quite good. As usual I made some substitutions and some additions depending on what I had and didn’t have in my kitchen. The curry was spicey but not over powering and I think it would be good with a bunch of vegetables. I had originally intended to put cauliflower in mine, and had specifically bought one just for the occasion, but if I can forget to put yeast in bread then I can most certainly forget to add cauliflower to my curry. Some people would say that cauliflower is a good thing to omit, those same people are the ones who call it a white devil flower… But it’s really not that bad and the cauliflower will make it into tomorrow night’s dinner.

So here’s the recipe for the Vegetables-of-Your-Choice Coconut Curry. You will note that I am no longer calling it Tempeh Coconut Curry because I am pretending that the tempeh wasn’t there and that I fully enjoyed my dinner, (maybe I’m being a little dramatic here, it’s not like I had to throw it out, I ate the whole thing, I just wasn’t left wanting more).

Coconut Curry

1 tablespoon canola oil
1 ½ onions
2 ½ tablespoons fresh grated ginger
3 garlic cloves, minced
1 ½ teaspoons ground coriander
½ teaspoon tumeric
½ teaspoon crushed red pepper flakes
1 tsp curry powder
1 cinnamon stick
¾ cup water
¼ cup fresh apple juice, (I had just made some, but you could just increase the water to a full cup as fresh pressed apple juice isn’t something that’s necessarily always in the freezer)
3 small potatoes
¾ red pepper
1 can coconut milk
1 tablespoon fresh lime juice
2 teaspoons soy sauce
1 tablespoon brown sugar

In a large skillet, heat oil over medium-high heat. Stir in onion and cook until onion is tender, about 2-4 minutes. Add ginger, garlic, coriander, turmeric, red pepper flakes, curry and cinnamon and red pepper. Continue cooking for 2 minutes, making sure to stir frequently. Add potatoes, water, apple juice, milk. Bring to a boil, cover, reduce heat and let simmer for 15 minutes or until the potatoes are tender. Take off the cover and stir in lime juice, soy sauce and brown sugar. Simmer until slightly thickened. Remove and discard cinnamon stick. Serve over rice.


Technorati Tags:
+ +

September 28, 2006

Deconstructed Omelet

Photobucket - Video and Image Hosting

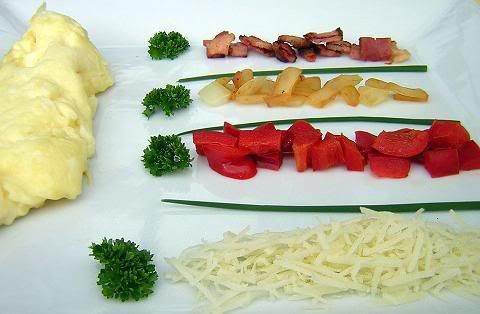
I’m bringing breakfast back! Mom however, would probably call this dinner when Dad and I are away. It’s been a long standing joke that if it were up to Mom to make dinner, we’d have omelets every night. This isn’t because my mother can’t cook, on the contrary, she’s a very good cook or at least she was when I was little and she didn’t work. As I’ve said before, when Mom went back to work she stopped making things like bread and jam except for when my brother would come home from university, then it was considered a special occasion and there would be bread for days. The omelet joke began a few years after Mom went back to work. I came home from school with a Mother’s Day gift that I had made for her in class. My teacher had us create collages that included symbols that represented our mothers to us. Mom sat down with me and was going through the collage, exclaiming over my pictures until she got to a drawing that stumped her. Being careful not to hurt my feelings by saying I had drawn a nice cat when it was really a duck on a pond or something, she asked me to tell her about how I decided to put this one picture into my collage. I proceeded to tell her that it was an omelet, because that’s what we eat when she makes dinner. Now whenever it’s up to Mom to make dinner, Dad and I usually make a production of exaggerated groans and comments like “omelet again?” or “maybe we should order a pizza…”. All of this is beside the point, my omelet is for breakfast and I’m bringing breakfast back! And I want to make them more interesting than plain cereal and milk. I’m not quite sure what inspired this, but since the waffles, I’m not satisfied with normal breakfasts. So over the next couple weeks watch out for some breakfast remixes.

Today’s feature is Deconstructed Omelet. I have to admit that most of the time when I try to make omelets they usually end up as scrambles. I’m impatient and I’m not gentle enough with the eggs which usually results in the whole thing being stirred together. The deconstructed omelet eliminated this problem. Eggs, bacon, red pepper, onion, cheese, chives and parsley; together or separate, they’re still an omelet to me.


Technorati Tags:
+ + +

September 27, 2006

Kitchenaid Mixer: Worth Its Weight In Gold

Photobucket - Video and Image Hosting

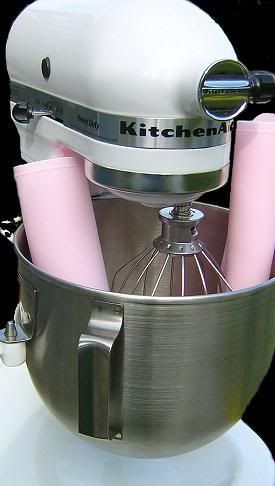
I’m back from a visit to Connecticut to see my brother and his family and I’ve got a new toy!!! Yes, this warrants three whole exclamation points, one would not suffice. As you can see, I am the proud new owner of a Kitchenaid mixer, (and some pink baking sheets, but those were just a bonus). I’ve wanted a Kitchenaid for quite some time now and this one was a steal of a deal, I couldn’t pass it up. The only problem is that my Kitchenaid doesn’t have a name yet. Ever since I opened the box I knew I’d be spending a lot of time with the new guy, so I feel he needs a name. This isn’t something I can rush into, I’ll have to mull it over, but I’m open to suggestions. I know we’re going to get along just fabulously, he’s already helped to produce bread and a chocolate cheesecake while still in Connecticut. I’m back in Canada now and he’s resting comfortably on my counter after the long trip, very happy in his new home.

Other than the bread and the cheesecake I didn’t really do any cooking while I was away. I spent the entire time in Connecticut being entertained by my little nephew, whom I will refer to as the Baby Genius. Baby Genius is two years old and his vocabulary and abilities just blow me away. Case in point: His neighbour was out watering her flowers and he told her “your chrysanthemums are exquisite!” I have to look up how to spell half the words he comes up with. Amazing.

I’m also impressed with his adventures with food, he’s a budding foodie and he doesn’t even know it. Unlike a lot of kids he’s not a fussy eater at all. He seems quite content to try anything if you tell him it’s good. While I was there I fed him some lobster and lamb, both of which were fine with him. He seemed to like the taste of the lamb a bit better and asked for more of it, but thoroughly enjoyed the whole production of making the lobsters and watching us eat them. We let the lobsters walk around on the kitchen floor a bit before they met their maker, this made Baby Genius squeal with delight. He would approach them with caution and then run away when they moved. During the meal he was constantly asking what we were doing, why were we breaking apart shells, what was inside? It was a big spectacle for him. And I have to admit, I always enjoy the show too.

Dinner wasn’t the only time I got to introduce Baby Genius to some new combinations. He often has Cheerios or oatmeal or cream of wheat for breakfast, but one morning I added some blueberries to his bowl to see if he’d notice. He looked at the blue blobs floating amidst his Cheerios and asked what they were but didn’t object to having them spooned into his mouth. He takes it all in stride.

The only thing that saddened me at first about Baby Genius was what I thought a lack of interest in food. Despite his willingness to eat whatever he was given, it was usually a struggle to get him to sit down and eat an entire meal. But then I started to think about this a little more and I realized that Baby Genius had outsmarted me again. I could learn a thing or two from him. He always ate what he needed to but knew when enough was enough. He wasn’t interested in shoving an entire chocolate cheesecake in his face just because it was there, (unlike some people…). And just because he attentive at the table didn’t mean he wasn’t enjoying the whole world of food. One morning Baby Genius was sitting in the kitchen with all the cupboards open, playing with some bowls, pots, a strainer, some spoons and a spatula. My brother asked him if he wanted to come to the table to eat some breakfast. He said no, he was busy cooking. I went and sat down beside him on the floor and asked him what he had in his strainer and what he was making. He looked at me and said “It’s not a strainer, it’s a sieve. I’m making things”. Once again, the little guy had bested me. Of course it was a sieve, how silly could I be? Baby Genius loves to spend time in the kitchen puttering around, pulling everything out of the cupboards, making things with his bear, (appropriately named Bear). Baby Genius and Bear entertain themselves for hours on the kitchen floor and they can’t be disturbed to do silly things like eat breakfast or go on an adventure. Whenever his mom would go into the kitchen Baby Genius would ask what she was doing and if he could help. Then he would stand on his stool and help his mom with whatever she was doing, telling her how he thought it should be done. It was all very heart warming, a blossoming foodie.

Anyways, that’s enough Baby Genius boasting for me. I had a good trip and I’m very, very, very pleased with my new Kitchenaid, (three exclamation points, three verys… it’s a big deal). All that’s left is to give my new guy a name and to put him to work. There will surely be more to follow soon.


Technorati Tags:
+ + +

September 25, 2006

Sugar and Spice and Waffles Are Nice

Photobucket - Video and Image Hosting

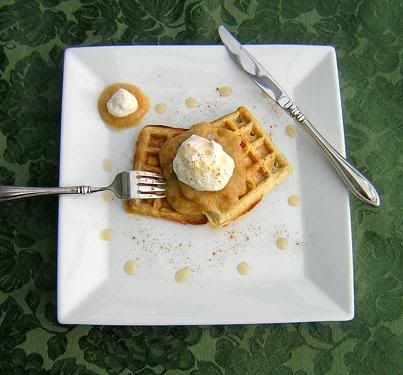
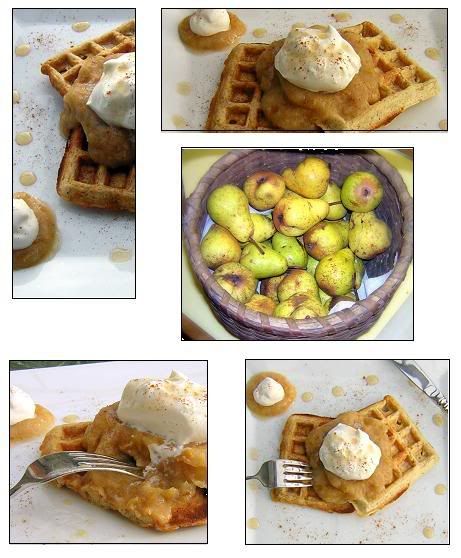
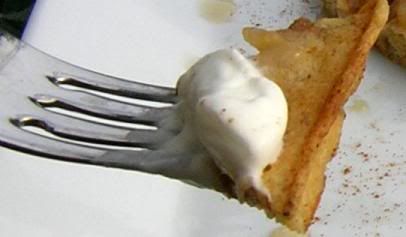
Some mornings cereal is just not going to cut it, toast is boring and you're tired of eggs. What to do, what to do? Well, if a nice friend had brought you over a basket of pears earlier in the week and you had made spiced pear sauce the night before then the correct thing to do would be to make waffles. But not just any old waffles, buttermilk waffles smothered in pear sauce, with a dollop of maple whipped cream, a sprinkle of cinnamon and drizzle of Canadian maple syrup. Or at least that's what I would do.
It just so happens that earlier this week a friend did bring me over a basket of pears, an actual wicker basket, only in the country. The pears had also been picked, fresh from their tree. The basket sat on the counter for a few days and I picked away at it everyday, but the thing was huge and I wouldn't be able to finish them all especially since I'm going away for a few days. There was no way I would ever waste pears though, so I turned the rest of the basket of pears into spiced pear sauce, with cinnamon, nutmeg and allspice. The sauce is going to be great on ice cream, in baked goods and would probably be pretty good with a roast of pork too, but for today it was waffles all the way.

Photobucket - Video and Image Hosting

The waffle maker is a new thing for me, I just got it a couple weeks ago. Now I'm sure there are plenty of fancy schmancy waffle makers out there with all sorts of different plate attachments and stuff like that, but my waffle maker was $7, it works just fine and I like it. But back to my breakfast... Most mornings I just want to eat without any fuss and since I'm usually making something just for me I don't really have the need to make it look pretty. This morning, however, since I was making waffles and I knew everything was going to taste sooo good, I wanted my plate to look just as good to my eyes as it did to my stomach. After creating my plate art I almost didn't want to ruin it by eating it. Who am I kidding? I couldn't wait to dig in, and I assure you it was every bit as good as I made it out to be, and more. If that was the last meal I ever ate, I think I would die happy.

Photobucket - Video and Image Hosting


Technorati Tags
+ + + +

September 22, 2006

One Last Taste of Summer, Surrounded by Fall

Photobucket - Video and Image Hosting

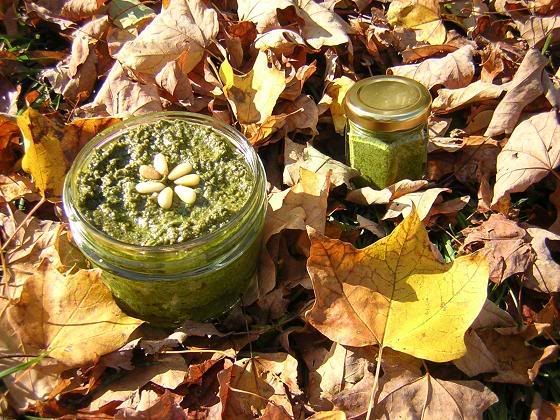
All summer I’ve had a great supply of basil from my garden. Now that Fall has announced its arrival I decided it was time to pick the last of the basil before the first frost, (yes, frost is soon a possibility, it was only 6°C this morning). With a food processor pesto takes only a couple minutes to make so if you’ve got any extra basil there’s no reason not to. I put the little jar in the fridge to use immediately and the bigger one will go into the freezer to be pulled out when it’s cold and snowy outside and I need a taste of summer. Pesto is obviously very tasty with pasta, but it’s also good on garlic bread and in spanakopitas. It can also be endlessly varied by adding a combination of herbs and nuts like parsley, mint, almonds and walnuts, whatever floats your boat.


Pesto

4 cups packed fresh basil leaves, washed well
1/2 cup pine nuts, toasted until golden, cooled, and chopped fine
1/2 cup freshly grated Parmesan
2 large garlic cloves, minced
1/4 cup plus 3 tablespoons extra-virgin olive oil
Salt and pepper to taste.
Put everything in the food processor and blend to the desired consistency. If you’re really particular about having bright green pesto then you can blanch the basil first to maintain its colour. If you blanch though only do it for a second or two and then submerge the basil in a bowl of ice water or else it will turn mushy.


Technorati Tags:
+ + +

September 20, 2006

Think Outside the Box


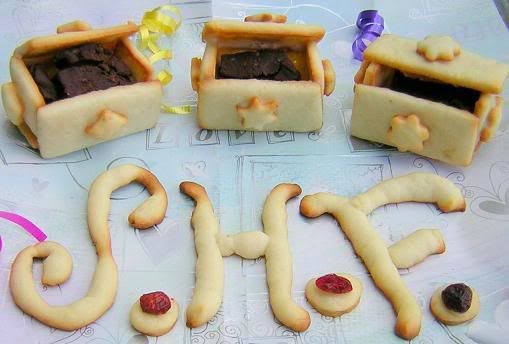
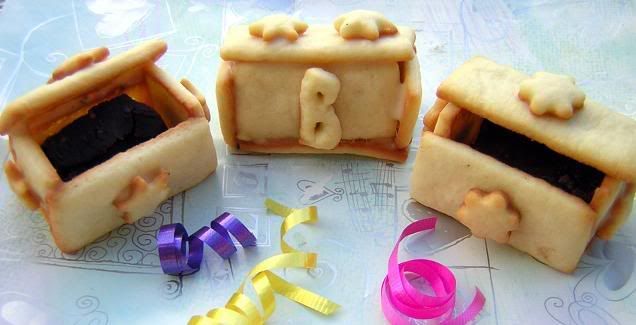
And try to guess what’s inside! It’s Sugar High Friday #23, hosted by Veggie Venture and the theme is “surprise inside”. The rules are pretty simple; make anything you want so long as it’s full of sugar and has a surprise on the inside. This was definitely a challenge that I was up for. Like the Kids Party challenge, I came up with lots and lots of potential ideas, but it took me a long time to settle on which one to make. I considered making a muffin or cupcake and filling the centre with some of my fresh homemade jam, but it didn’t seem special enough. I’ll make jam filled muffins pretty soon anyways, (I’m thinking making chocolate with white cherry inside) it’s a good idea, just not today. I thought about making cookies with caramel, nutella or fruit in the middle, (or all three together) but they weren’t exciting enough. With iced cakes the possibilities were endless. Virtually anything could be put in the middle and it would be a surprise until the cake was sliced open. Maybe a red velvet cake? Or a mint centered bundt cake surrounded by chocolate? Too many choices, forget cake. I contemplated making something that looks like one thing but tastes like another, like a pale green macaroon or meringue that appears to be mint but is actually pistachio. But the pain of ruining two whole trays of chocolate macaroons is still too fresh, another day. Each of these sugar filled items had potential, but none of them were quite what I felt like making.

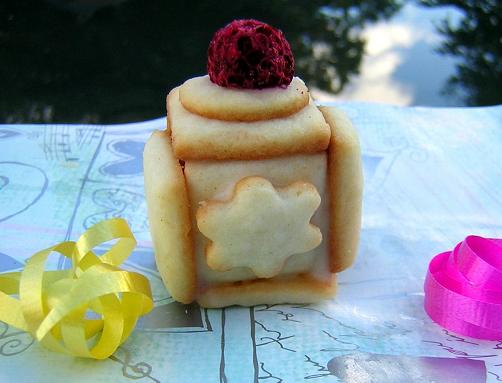
I think I was still thinking about kids’ parties when I made my final decision about what my contribution to Sugar High Friday would be. I had kids parties on the brain and what are kids’ parties full of (besides sugar)? Presents! They’re the epitome of SHF23’s theme, always a surprise on the inside. Decision made; I would make little presents. I think I was overambitious. I let my imagination get ahead of my ability. The end result was cute… in a homemade, unprofessional sort of way. But that’s ok, my presents are full of sugar and fulfill the SHF23 requirements. I guess at this point you’re wondering what is inside the box? The answer is fudge! Rich, decadent chocolate fudge. And the boxes are made of sugar cookies. I left some of the boxes open to prove that there really was a fudgy surprise inside. Or maybe I left some of them open because I didn’t measure any of the sides and so none of the boxes actually fit together properly, you decide.

Photobucket - Video and Image Hosting

I had a whole lot of fun making these. I got to roll out dough, use my cookies cutters, eat a lot of fudge. It was a good time all around. I highly recommend making this fudge, it’s really easy and quick and very, very tasty. Cookie boxes are optional and only recommended when you have nothing else to do and a fair amount of patience, the recipe can be found here. The only change I made was using kirsch instead of vanilla, and seriously reducing the baking time because I was using such small cutouts.

Chocolate Fudge

1/4 cup butter
2 tablespoons and 2 teaspoons unsweetened cocoa powder
2 tablespoons packed brown sugar
2 tablespoons milk
A handful of dark chocolate chips
1-3/4 cups confectioners' sugar
1 teaspoon kirsch (you could alternatively use vanilla extract)

In a microwave-safe bowl, combine butter, cocoa powder, chocolate, brown sugar and milk. Microwave until mixture boils. Stir in confectioners' sugar and kirsch. Pour into a pan lined with wax paper. Chill. Try not to eat it all in one sitting.

Photobucket - Video and Image Hosting


Technorati Tags
+ + + + +

September 18, 2006

Cookie Kebobs and Monkey Milk

Photobucket - Video and Image Hosting

Stephanie of Dispensing Happiness, (something she has been doing a lot of lately by organizing the Blogging By Mail package swap and now this) is hosting Blog Party #14 and has chosen a kids party as the theme. In order to participate you had to come up with an appetizer and a drink suitable for children, (alcohol was therefore frowned upon). I had lots of ideas for appetizers. The thing with kids is that they’re picky about real foods but will eat most junk that’s put in front of them. They’re extra excited if it looks like something they might find on the bottom of their shoe, or up their nose. Equally gross names for these concoctions are also appreciated by the little ones.

I thought of making ‘dirt’ (chocolate) cake with worms (of the gummy persuasion) but that didn’t really satisfy the rule that the appetizer had to be able to be eaten with one hand, (so that they could be sipping a drink from the other). I thought of different things with pudding and jello (both can be turned into slime or snot or sludge) and different creepy crawlers creations, but the problem with all of these ideas is that although they might be appealing to kids, there are no kids in my house right now and so I’m not certain that something labeled ‘spider snot balls’ would get eaten… I thought of making a party mix type of snack like ‘puppy chow’ (something I was introduced to in Australia by an American, it’s got chocolate chips, peanut butter, Chex cereal, butter and icing sugar, very sweet and sugar laden) but it seems like every other kid is allergic to nuts these days, so that wouldn’t work. Then I contemplated going the cute route, making animal cookies or crackers, but I see that Culinary Concoctions By Peabody is already all over that idea, and she did quite a nice job of making farm animals. I thought of making gingerbread people but decided that it was too Christmas-y and I’m not ready for that yet. I considered a more savoury appetizer like cheese bread or mini pizzas, which I’m sure my imaginary children would adore, but ultimately decided that I wanted something sweet. Isn’t the whole point of children’s parties to get them hyped up on sugar and then send them home to their parents’ house where they’ll be bouncing off the walls for days? That’s the impression I always got anyways, fill them with sweets and hope they don’t explode until they’re safely out of your supervision…

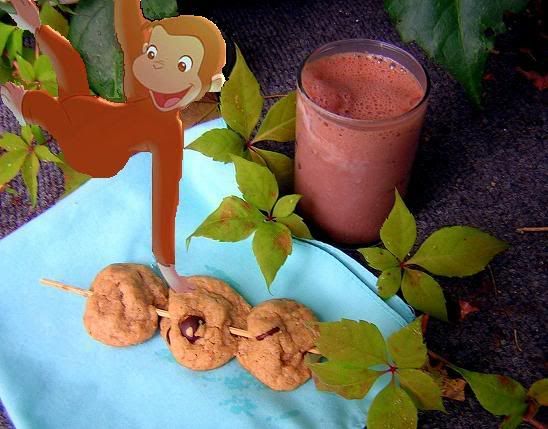
Now then, if my sweet appetizer wasn’t going to be cute like bunnies, what would it be? A-ha! What’s better than snack food you eat with your hands? Snack food you eat off a stick! What kind of sweet snack could I put on a stick that would be worthy of a children’s party, but would also get eaten by the adults that will actually have to consume them? Chocolate chip cookies! And so the Chocolate-Chip-Cookie-Kebob was born. I followed a recipe for chocolate chip cookies from bakingsheet, the only change that I made was to add dark chocolate chips instead of regular as they’re preferred at my house, I suppose for the kiddies mini M&M’s would have been more appropriate but I didn’t have any of those. Then all that I did was make mini cookie balls and slide them onto wooden skewers which I had soaked in water ahead of time.

Appetizer done, onto the kid friendly party drink. What goes better with chocolate than a nice cold glass of milk? A nice cold glass of Monkey Milk, (like I said, the silly names are a must). Monkey Milk takes seconds to make and about the same time to devour. Just combine banana ice cream (mine happened to be homemade, I’m still on my ice cream making kick), milk, some ice and a few scoops of chocolate powder and blend away. Let the sugar high begin with Cookie Kebobs and Monkey Milk!
*Sugar apparently induces random creative streaks in me, hence the Curious George picture. He also fulfills the “cute” aspect, done and done.


Technorati Tags:
+ + + + +

September 15, 2006

I Jam Cause I Can

Photobucket - Video and Image Hosting

There are some things that I’ve never really considered making. Up until a little while ago, jam was one of those things. I don’t know why I’ve never made it, I’ve had all of the components in place; I’ve got fruit and I like to eat jam. That’s really all you need. Jars help too. I guess jam making somehow seems old fashioned, like something that’s only done by grandmothers… and Mennonites. Somehow people have been led to believe that in the 21st century you buy your jam at the grocery store. Now that I know how easy it is to make my own jam, I will no longer be one of the poor schmucks buying Smuckers.

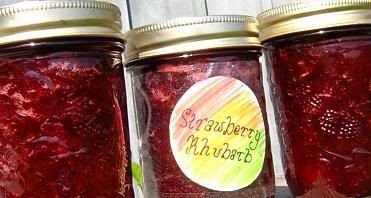
This whole jam thing got started when I cleaned out the freezer and realized that about half of it was fruit, and it would have taken a whole lot of pies to use up all that fruit, (not that I’m opposed to pies, I love pie, but I’ve got lots of love to give and it’s about time jam got some of that love). Anyways, I vaguely remember, sometime in the distant past, before Mom started working, that she used to make jam. Of course, she used to make a lot of things for my brother and sister, then I came along and she started working. Suddenly she made less and less, and special things like bread and jam where only made when my brother came home from university, (I still hold a grudge over that). Nevertheless, she did at one time make jam and so I decided to use her old recipe, which comes from the Canadian Living Cookbook, to make some of my own. For my first jam making session I chose strawberry-rhubarb, a lovely combination:

1 ½ lbs strawberries
¾ lb rhubarb
3 cups sugar
¼ cup lemon juice

Boil it up, test consistency, put it in sterilized jars, and there you have it, jam! I was so pleased with how easy this was that I went ahead and made white cherry jam too. Now I want to turn everything into jam and eat it on ice cream and in muffins and on waffles, (and tomorrow- I’m makin’ waffles!) and in cakes and on toast, (maybe with peanut butter) and with eggs (yes it’s true, jam with eggs, try it, you’ll be converted like I was) and pudding and let’s bring jam into dinner too- throw some on chicken and meat, (cherry goes well with duck) and, and, and…. And everyone’s getting jam for Christmas.


Technorati Tags:
+ + + +

September 14, 2006

Hay Hay It’s Donna Day#5… Or At Least It Was Supposed To Be

Photobucket - Video and Image Hosting

I made this recipe up all on my own with the intention of participating in a blogging event called ‘Hay Hay It’s Donna Day’ which is being hosted by Running With Tweezers. As I sat down to type up my post, (on the eve of the deadline no less) I took another look at the original challenge and realized that in my haste and ignorance I had misinterpreted it. Perhaps part of this misinterpretation is due to the fact that up until about a week ago I didn’t even know who Donna Hay was. For anyone else who has been living under a rock, Donna is a famous cook and food stylist from Australia. Donna’s recipes are known for being simple and generally unfussy but which look good enough to be the star of a meal. She has her own magazine and wrote a bunch of cookbooks. Many people equate Donna with Martha Stewart. If you want to find out more you can check out her website. Anyways, I should have clued into the fact that the event is called Hay Hay It’s Donna Day and as such would probably have something to do with her. I have the attention span of a turnip lately and haven’t been to pay full attention to anything, this event being a case in point. Now that I’ve read up on the origins of the event (it was started by Winos and Foodies and the first recipe was Donna’s self frosting cupcakes) and understand how it works, my tart clearly has nothing to do with it and I should just hang my head in shame, but it’s a good tart, so I remain proud of that. The whole point of this event is to take the assigned Donna Hay recipe, (this month it’s an asparagus tart) and make it your own. I get it now, the recipes are easy and look pretty and everyone is supposed to come up with easy and pretty variations of their own. I’m a rebel without a cause, here’s my freshly invented recipe for Shrimp and Scallop Tart:

Ingredients:
1 pastry crust
1 onion, sliced
3 cloves garlic, minced
Handful of morels, soaked in boiling water, drained and chopped, ¼ cup of liquid retained
12 scallops, halved horizontally
12 shrimp, halve horizontally
¼ cup white wine
½ cup sour cream
1 egg, beaten
1 tablespoon fresh basil, chopped
1 tablespoon fresh chives, chopped
1 teaspoon fresh thyme, chopped
4 tomatoes, sliced
Parmesan cheese, freshly grated
Bread crumbs, (mine happened to be from a leftover baguette)
2 tablespoons butter
1 tablespoon + 1 ½ tablespoons oil

Directions:
1. Roll pastry into a 9” tart pan. Any kind you have will do, you could even use phyllo dough or puff pastry but you would have to adjust cooking times appropriately. I used a ball of pie dough (no sugar) that I had in the freezer.
2. Blind bake at 350F for 20 minutes. Remove the weights and bake another 5-10 minutes until slightly brown. Remove from oven and cool.
3. Heat butter and 1 tablespoon of oil in a skillet and add sliced onions. Stir occasionally and remove from heat when they have become slightly brown and caramelized.
4. Heat another skillet and add the remaining oil. Add garlic, cook for 2 minutes and then add morels, cooking another few minutes. (I happen to be fortunate enough to have morels that grow in my backyard which I dry and then use all year long, if you are not so fortunate you could use any type of wild mushroom).
5. Add in sliced shrimp and scallops and sear briefly, just a minute or two on each side.
6. Add white wine and let it cook off. Add the reserved morel water and simmer until it has reduced slightly.
7. In a bowl, mix the egg and sour cream together. Remove your skillet from the heat and stir in the egg and sour cream.
8. If there is still a lot of liquid in your pan drain some off so that it won’t be too runny when you pour it into the crust, you need some liquid however so that it doesn’t dry out in the oven.
9. When your crust has cooled, layer in the caramelized onions, then the shrimp and scallop mixture. Sprinkle the chopped herbs overtop. Cover with slices of tomato. Top the tomato with bread crumbs and parmesan cheese.
10. Cover with tin foil and bake in the oven at 350F for 25 minutes. Remove the tin foil and bake another 5-10 minutes until the cheese has become crisp. Remove from oven and let cool slightly. Serve and enjoy.

My recipe is not by Donna Hay, it’s not all that simple and the end result is by no means beautiful, therefore completely disqualifying it from Hay Hay It’s Donna Day#5, but I assure you, it DOES taste good.


Technorati Tags:
+ + + +

September 13, 2006

Soup Season

Photobucket - Video and Image Hosting

Soup Season seems to have come early this year. Hot summer days have been replaced with cool rainy ones. Leaves are turning colour and falling from the big maple trees in front of my house, clogging the eaves trough. The kitchen stove which has been dormant through the heat, has now reawakened and is eager to be put to use. The garden, perhaps in cohorts with the stove, is producing mass quantities of assorted squash just begging to be turned into a warming soup. Ah, Soup Season. I thought I’d kick it off with a roasted butternut squash soup, my own creation, (although I’m sure there are tons out there just like it, this soup is as easy as you get)

Bri’s Roasted Butternut Squash Soup

1. Go out to your garden and find yourself a nice butternut squash. If you do not personally have such a garden, a local farmer’s market is acceptable and so are kids at the end of their laneways with a wheelbarrow full of squash just trying to make a buck- that used to be me.
2. Peel and cube your squash and throw it on a baking sheet with a head or two of garlic (no need to peel, just slice off the top so you can squeeze it out later) and a couple small onions which have been quartered and drizzle the whole thing in olive oil. Bake in the oven at 350F until the squash has begun to caramelize, stirring occasionally.
3. In the mean time, heat some chicken stock (how much you use will depend on how thick or thin you like your soup) on the stove, get out your blender or food processor, and look in the fridge for a block of parmesan and some sour cream.
4. When the squash is done and the stock is warm, combine the two in the blender, (you may have to do this is batches, let it cool a bit if too hot) add in ½ cup grated parmesan, 1 cup of sour cream, a pinch or two or cayenne pepper and a tsp of habanero sauce, salt to taste.
5. Place a strainer over the pot that you used for chicken stock and pour the contents of the blender through the strainer, back into the pot to keep it warm until serving. Some toasted pine nuts or fresh chives make a nice garnish.

I wouldn’t skip the straining step, it gives the soup a really nice smooth texture. And don’t be afraid of the habanero sauce, it balances out the sweetness of the squash. There you have it, the first soup of the season. More will undoubtedly follow.


Technorati Tags:
+ + + + +

September 12, 2006

And It's Off!

Photobucket - Video and Image Hosting

A few weeks ago I found out about the Blogging By Mail project, this round organised by Stephanie from The Happy Sorceress. The rules are simple:

Photobucket - Video and Image Hosting

Food bloggers from all over the world swap treats, baked good, recipes and more, sending a care package to a new friend. Cookies, cakes, jellies, breads, candies, teas and coffees, music, cookbooks, photos... Everyone who joins in will be given a swap partner to whom they'll send a package and you can fill your package with whatever you want to share.

I wanted the package that I sent to represent some things that are typically Canadian, some things that are local and some things that are just my personal favourites. Here’s a little sneak preview into some of the things in the package that I’ve sent off:

Photobucket - Video and Image Hosting

On the left is Smoked Paprika. I love this stuff, you can use it on everything from meat rubs to deviled eggs. On the right is a salt bowl that I made on the lathe out of a piece of mahogany and then inscribed with the blogger’s initials. I had initially wanted to make a lot of my own food items but was worried about how they would ship. I still wanted my blogger to get something homemade so I made the salt bowl, (I use it for coarse salt, but really you could use it for whatever you want). Anyways, there are a bunch of other little goodies in the package but I don’t want to spoil the surprise for anyone. Now I just have to sit back and wait anxiously for my package to arrive from some unknown location. I currently have the patience of a two year old.


Technorati Tags:
+ + +

September 11, 2006

A Tray Full of Sweets

Photobucket - Video and Image Hosting

Perhaps this entry should have been more accurately titled “How To Be A Domestic Disaster”. But that’s a little harsh. My tray of sweets looks pretty, and it’s fairly edible too, it’s just not exactly what I had originally planned. Mom had asked for some goodies to bring to work, nothing specific so I thought I’d make an assortment. I began with a chocolate chip cookie. I’m eternally in search of the perfect chocolate chip cookie so I attempted another new recipe, hoping it would be better than the last. It wasn’t perfection. The cookies were by no means bad, but my search continues. I want a chewy chocolate chip cookie that is just as good the following day as it is fresh out of the oven. I want a fat cookie with edges that are barely crisp and a middle that is soft and chewy. If anyone has a cookie that fits this description, I would be very happy to hear from you.

After the random chocolate cookie recipe I decided to go with something from Nigella Lawson. I was planning on making her chocolate macaroons, but I wanted a warm up recipe before I delved into something more complicated. I settled for blueberry muffins. I’ve made tons of muffins, no problems here. I even dared to put them in mini muffin pans and they came out just fine.

Then came the macaroons, a.k.a. the downfall of the day. I thought it started out pretty well, I was whipping egg whites, sifting cocoa, things seemed alright. I then had to pipe my batter into little circles on baking trays. This was supposed to be done with a pastry bag and tip. I used a milk bag with a hole cut out of the bottom. Things were still alright. I ended up with three trays full of nice little chocolate meringues to go into the oven. Little did I know, there was trouble ahead. This being my first attempt at making macaroons I was unsure as to how they should look when done and when to take them out of the oven. Nigella told me 12-15 minutes and that when they were done they should be dry on top and chewy on the inside. Twelve minute passed and then fifteen. I left them in for longer and longer because the tops didn’t seem to be dry, and how was I supposed to know if they were chewy on the inside? I think what deceived me the most was that they were chocolate and therefore didn’t show any indication of how very burnt they were on the bottom. I finally took them out of the oven only to discover that the bottoms were as black as hockey pucks. I think I was so preoccupied with trying to determine an appropriate state of dryness that I failed to notice the smoke that was now billowing out of the oven and must have been accumulating for some time. You would think that smoke would have been pretty obvious…

Not one of the macaroons was salvageable; I had to throw all of them out. I hated having to throw out two full trays of macaroons. It physically pained me. It brought tears to my eyes, or maybe that was the smoke? In any case, I faired slightly better with the third tray, except I was so paranoid that I would burn them again that I took them out too early. This meant they were extra chewy. Chewy is better than tasting like charcoal. Having thrown out two of my three trays of cookies, I had way more chocolate filling than was necessary, (this had been prepared while the macaroons were on fire). My one good tray contained 18 meringues, only enough to make 9 finished macaroons. So not only did I have extra ganache but I was also short on cookies, (Mom had requested enough for 60 people). Off I went, in search of a recipe that wasn’t Nigella’s macaroons to use up the rest of the ganache. I will attempt the macaroons another time, but at that point I was in no mood to risk failure again.* My final cookie was a simple vanilla cookie, quick and easy, which I combined with the ganache to make chocolate filled vanilla sandwiches, a sort of soft reverse Oreo. They were ok, but just left me with regret; the sadness of what could have been.

*After having a few hours to reflect on the whole macaroon situation I’m pretty sure it was actually educational and will lead to high quality, Nigella Lawson worthy macaroons in the future, but at the time I was not happy.


Technorati Tags:
+ + +

September 10, 2006

Domestic Goddess In Training

Photobucket - Video and Image Hosting

After spending the last few days drooling over my new cookbooks, I decided to try out a recipe. There are still some key lime cookies left and tomorrow I have to bake up a whole bunch of sweets for Mom to bring to work with her, so I restrained myself from making a dessert item. This was hard to do as the majority of Nigella Lawson’s How To Be A Domestic Goddess’ is one mouthwatering goodie after another. Instead I ended up making what Nigella calls “Irish Blue Crackers”. In my North American mind, when I hear the word cracker I think of something crisp, thin and savoury. I guess 2 out of 3 ain’t bad. Thin? Yes. Savoury? Yes. Crisp? No. The results were good, but only after I got over the fact that these were definitely not the crackers I had in mind. I was initially quite disappointed, but then I realized that had this recipe been titled “Flat Little Flakey Irish Blue Biscuits” I would have been quite satisfied with the outcome. I suppose that’s not a very whimsical title. But that’s what they were! They were very very flakey and delicate and almost crumbled when you picked them up. This delicateness was probably due to my rolling them out too thin. I ended up with many more “crackers” than was predicted. Despite these minor glitches, the blue cheese flavour was prominent and went very well with the fresh pear that I sliced up to accompany my Flat Little Flakey Quebec Blue Biscuits, (because if you really want to get specific I used blue cheese from Quebec, not the suggested Ireland, but Nigella said I could!). I think grapes would have been nice as well. And maybe a glass of wine too. Ah well, these are all thoughts to file away for next time.

So my first attempt at becoming a Domestic Goddess was less than a resounding success, but really, that was all in the semantics. I say potato, Nigella says potahto, we’ll work this through.


Technorati Tags:
+ + +